n8n
1-Click Cài đặt N8N
Bước 1: Tạo một Website Mới
Bước 2: Sau khi website được tạo thành công, nhấp vào Manage để mở giao diện quản lý.
Bước 3: Cài đặt N8N
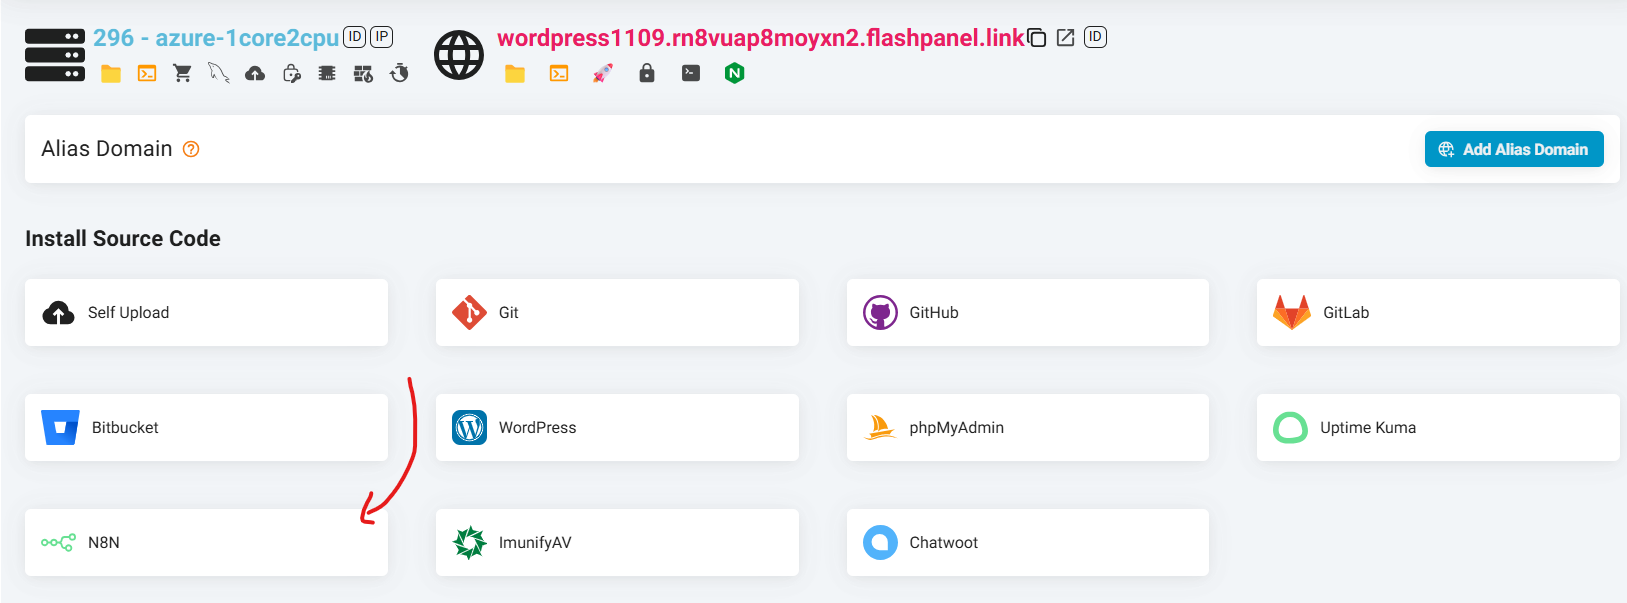
- Trong giao diện quản lý website, tìm mục Install Source Code.
- Tại đây, bạn sẽ thấy tùy chọn N8N trong danh sách.
- Nhấp vào biểu tượng N8N, sau đó bấm nút Install.
Bước 4: Hoàn tất
- FlashPanel sẽ tự động tải và cài đặt mã nguồn N8N.
- Sau khi hoàn tất, bạn có thể truy cập vào website vừa cài đặt để bắt đầu sử dụng N8N ngay lập tức.
Với tính năng One-Click Install, FlashPanel giúp bạn triển khai N8N nhanh chóng mà không cần tốn nhiều thời gian và công sức. Hãy trải nghiệm ngay để tận dụng tối đa tiềm năng của công cụ giám sát mạnh mẽ này!
Cài đặt thủ công
Cài đặt ứng dụng
nodejsCài đặt ứng dụng
pm2Mở terminal lên và gõ lệnh cài
n8n bash
bashnpm -g install n8n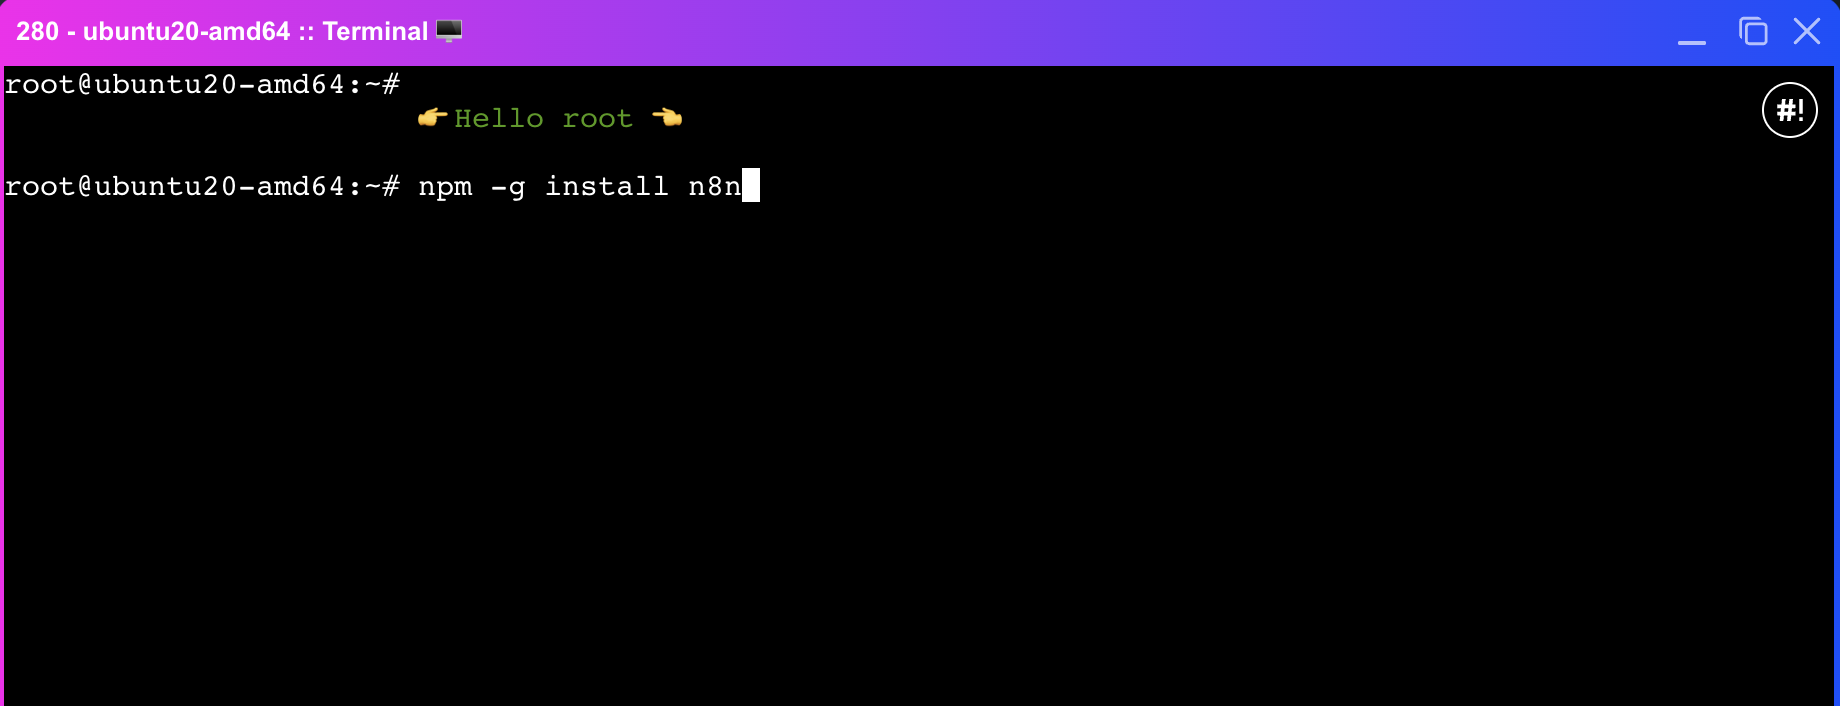
Vẫn tại terminal bước 3, start
n8nbằng lệnhbashN8N_SECURE_COOKIE=false pm2 start n8n pm2 savebash# thay domain.com thành địa chỉ website của bạn N8N_SECURE_COOKIE=false WEBHOOK_URL=http://domain.com pm2 start n8n pm2 savebash# thay domain.com thành địa chỉ website của bạn WEBHOOK_URL=https://domain.com pm2 start n8n pm2 save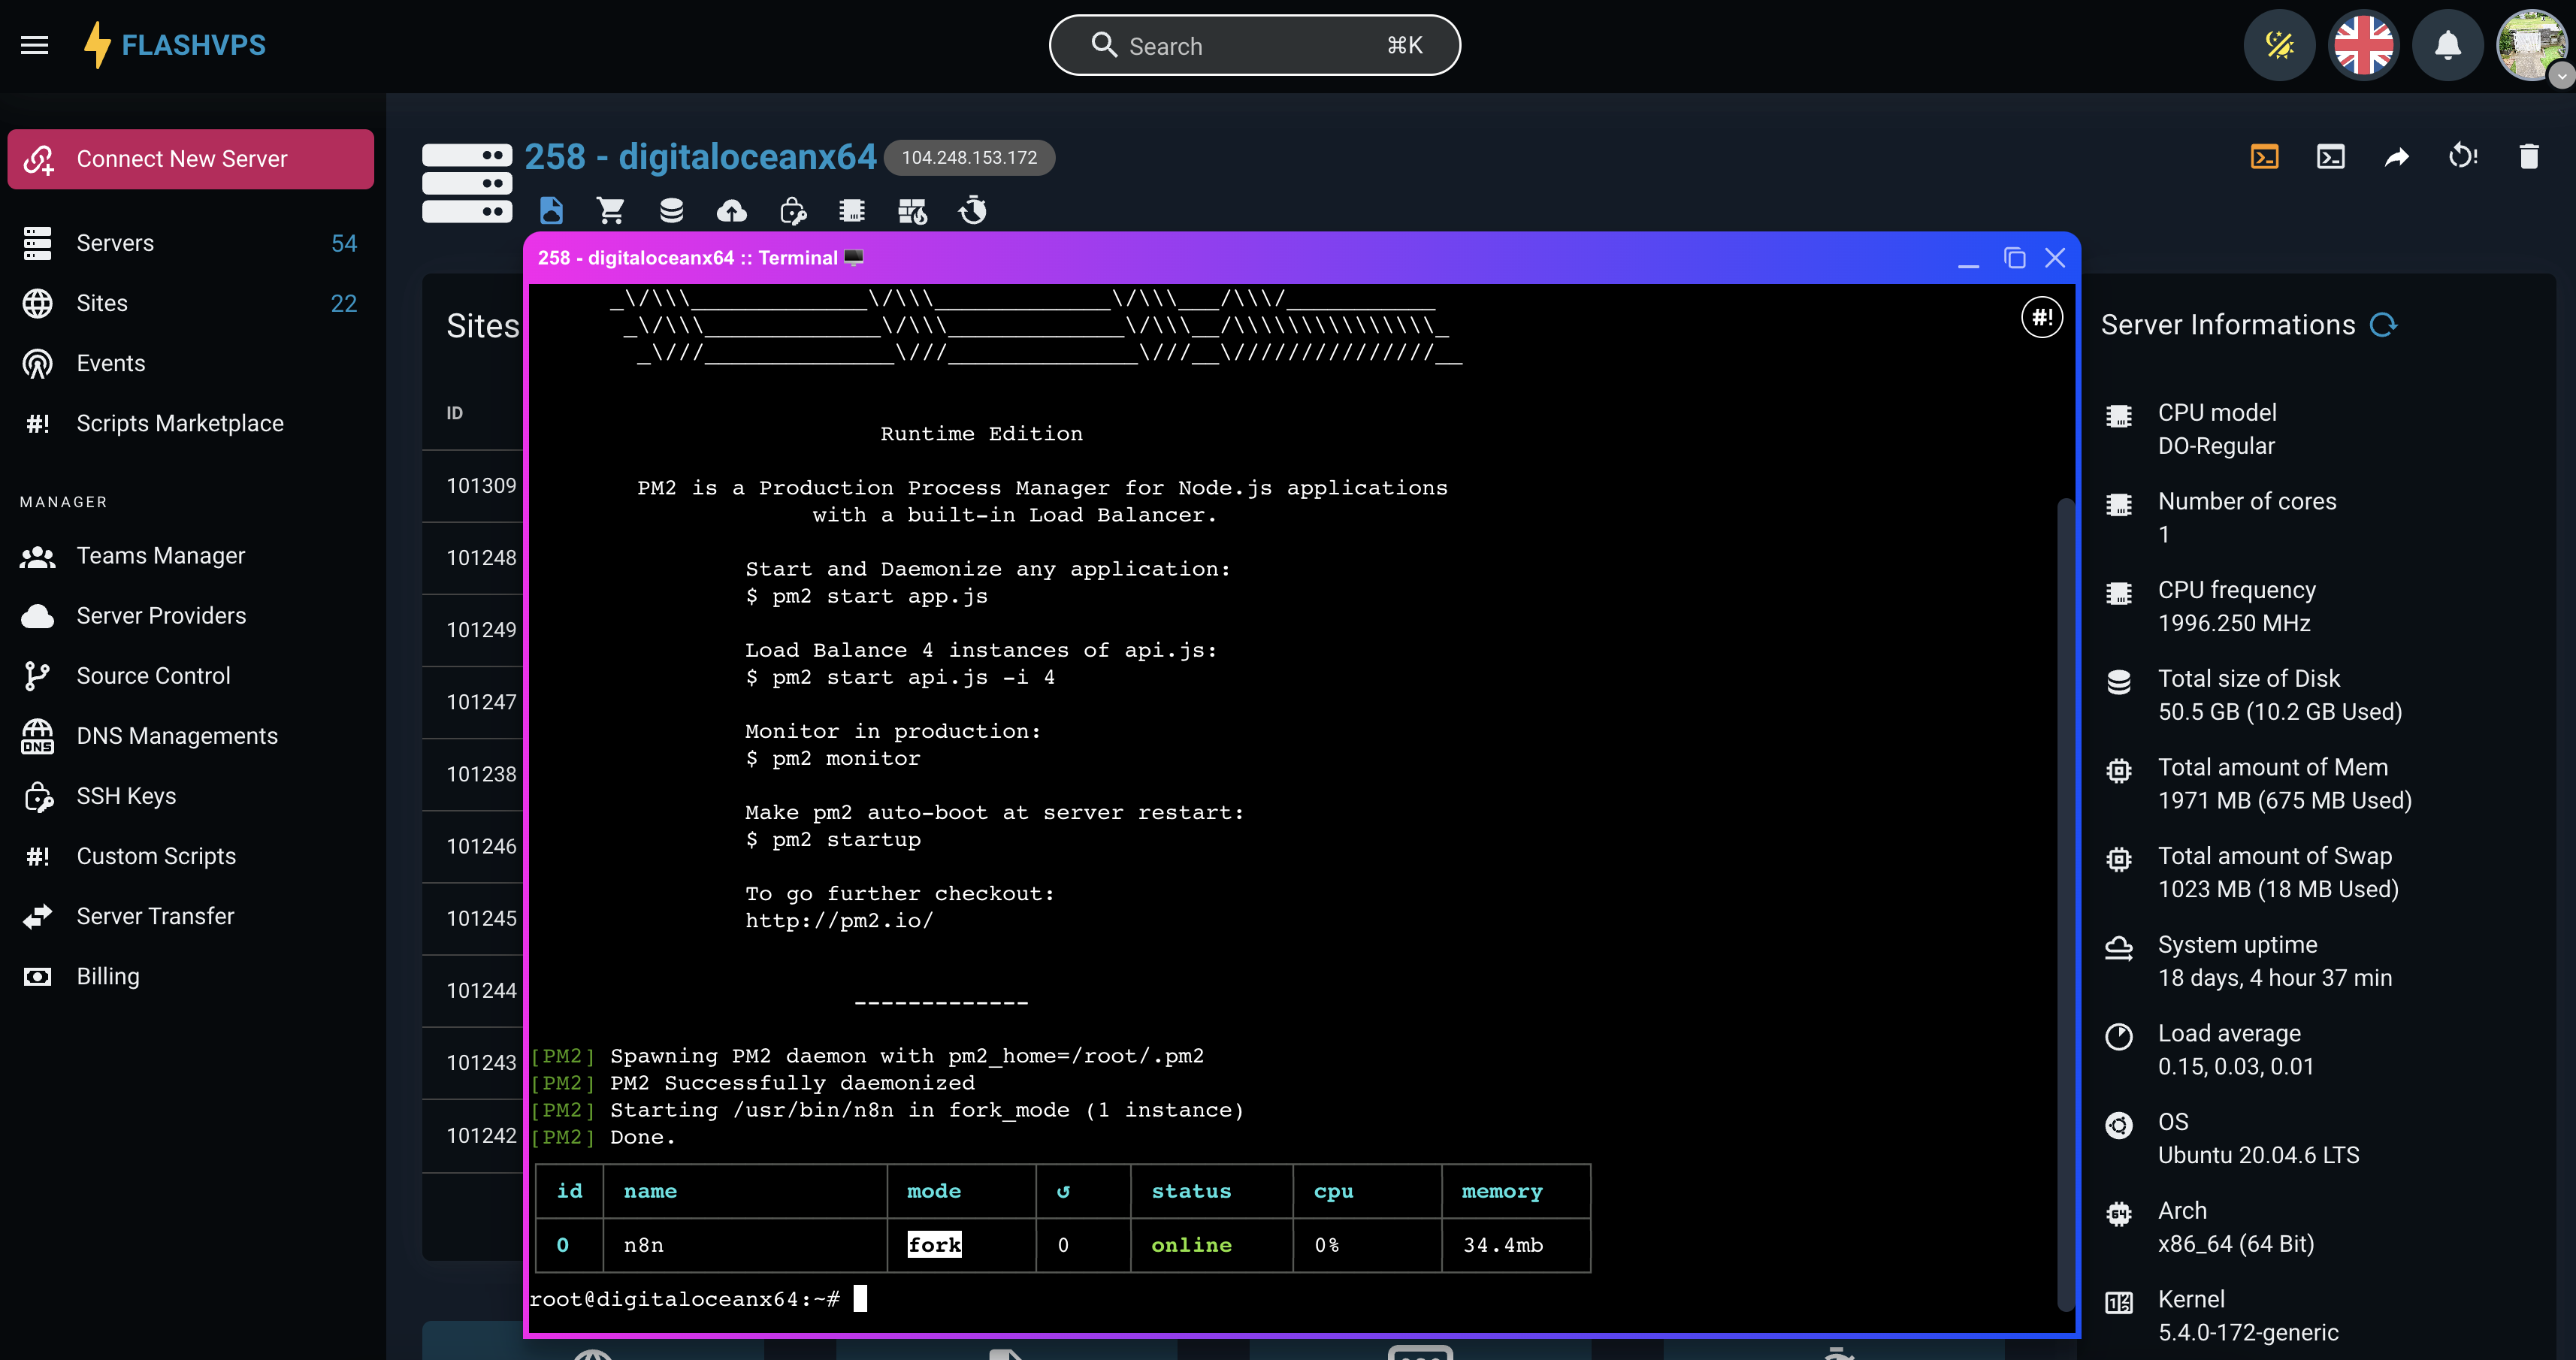
Truy cập
Để truy cập UI n8n bạn có 2 lựa chọn, dùng với dạng http://ip:port hoặc domain
Dùng với dạng ip:port
Sử dụng tính năng Firewall Rule
Thêm firewall rule như sau:
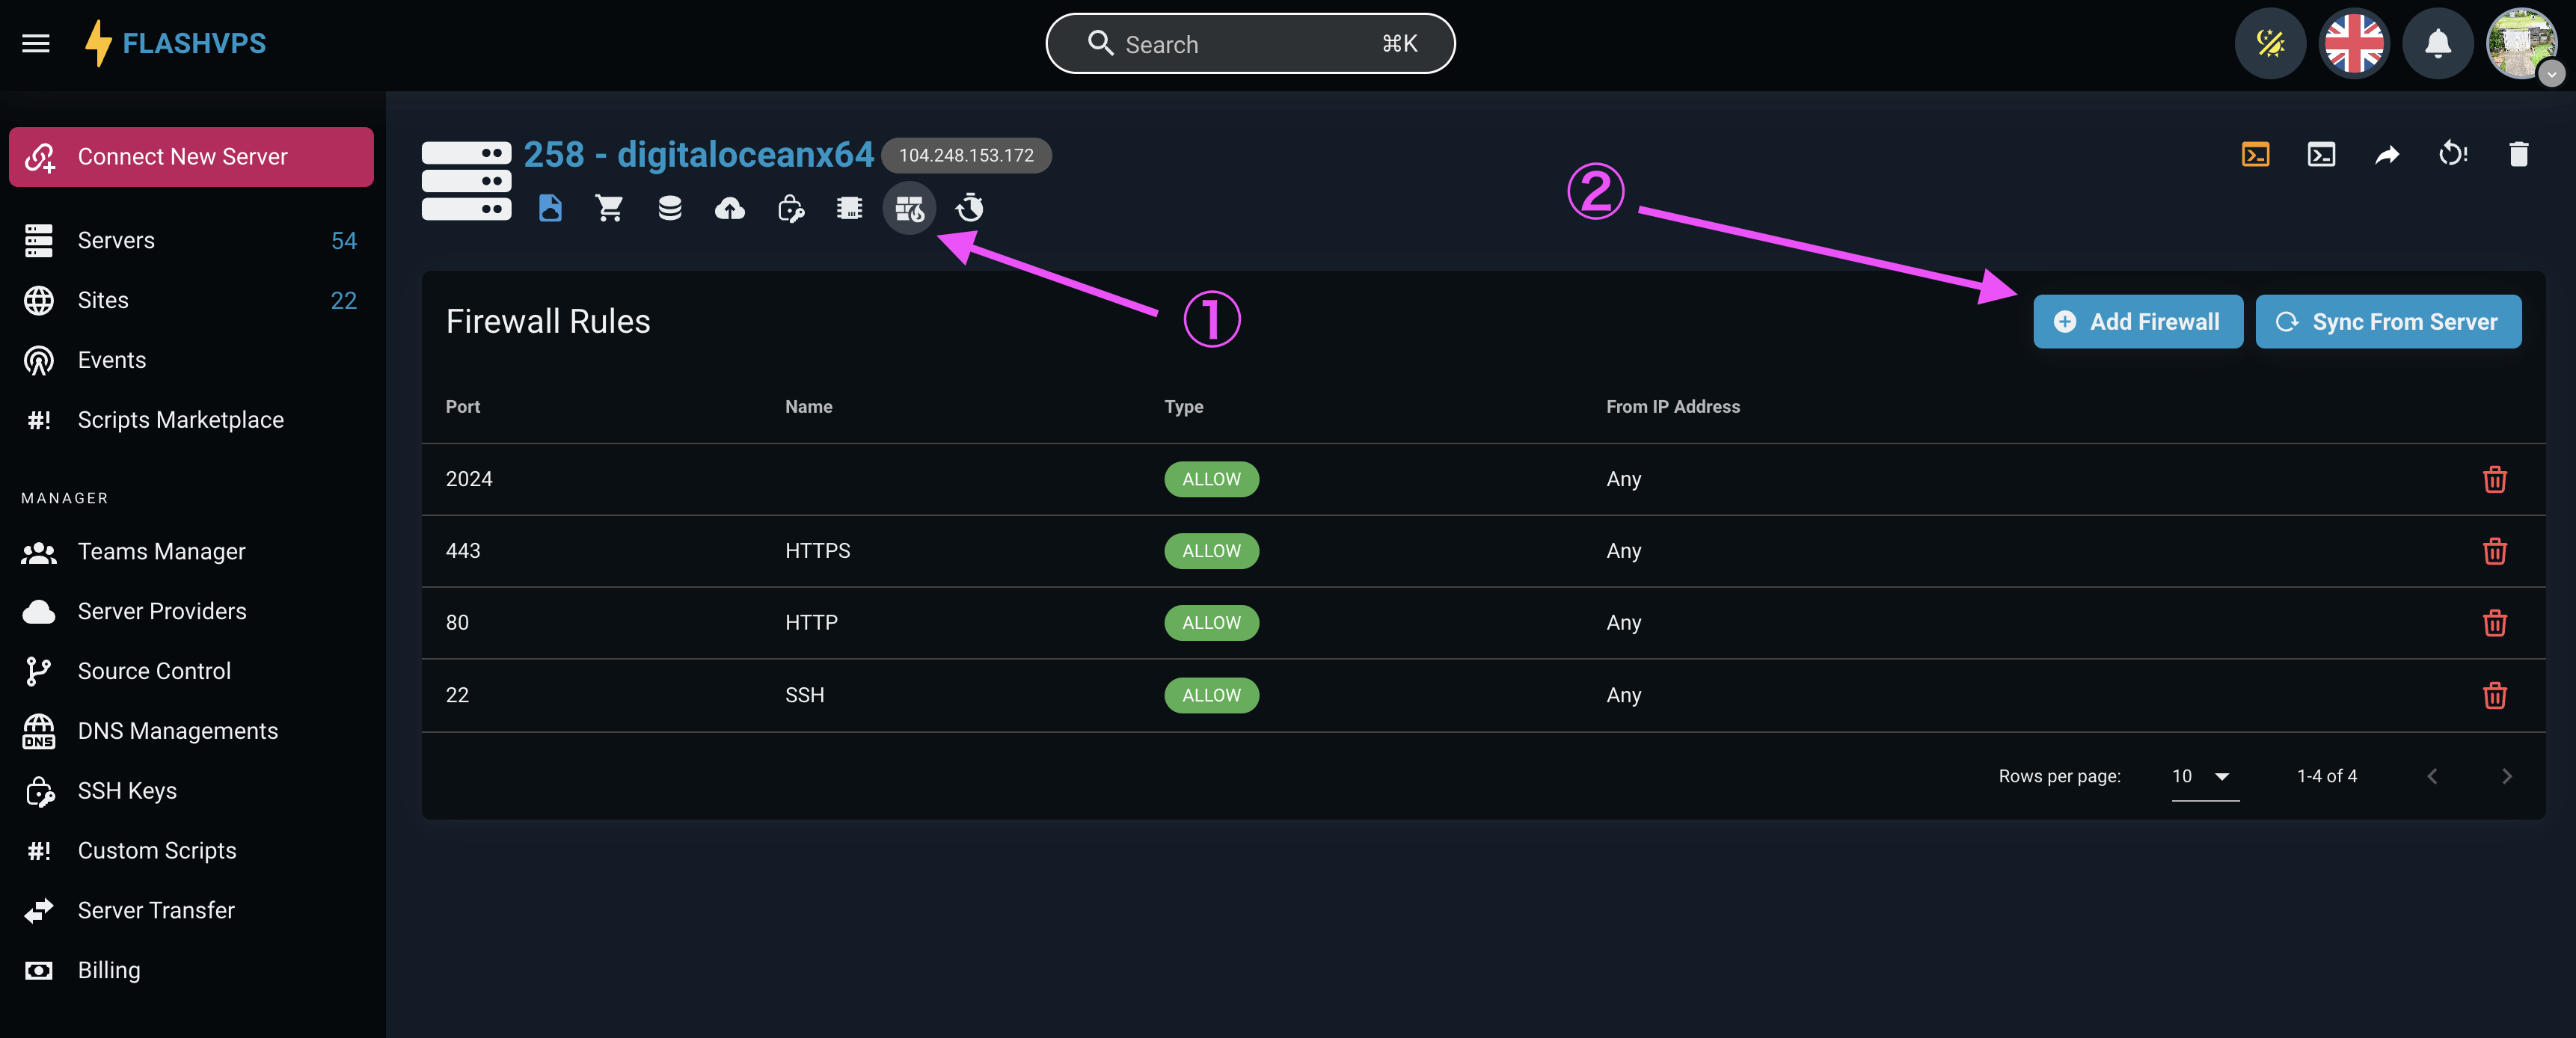
Name: nhập
n8nPort: nhập5678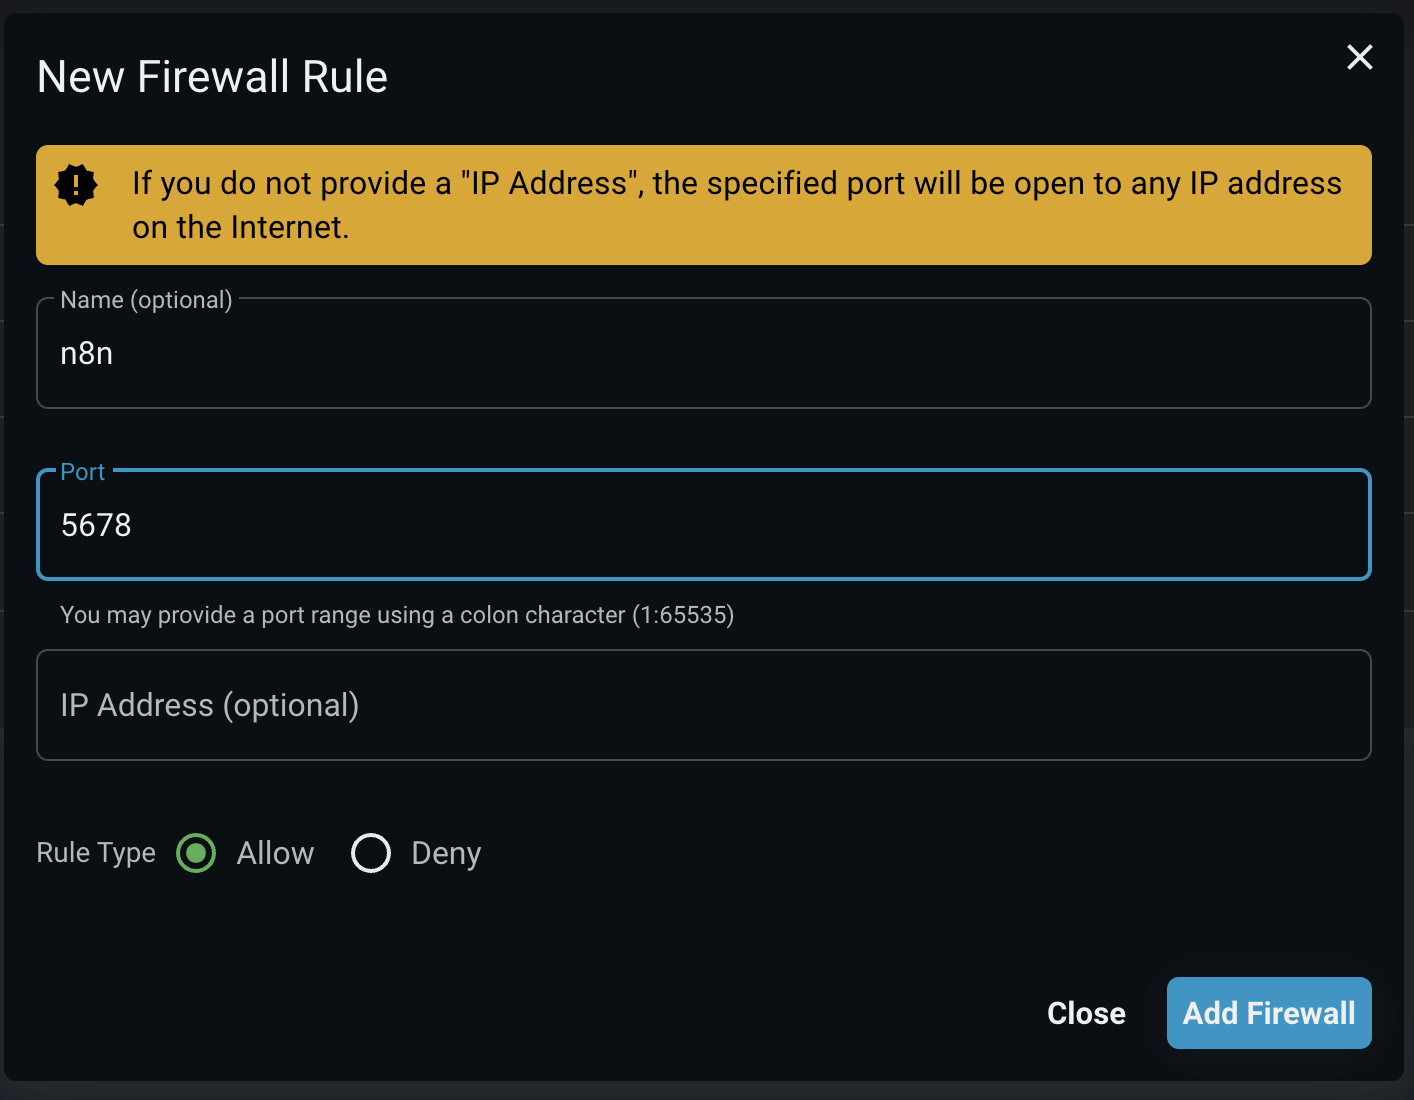 Ấn nút
 Add FirewallMở trình duyệt nhập với
http://ip:5678thayipthành ip máy chủ của bạn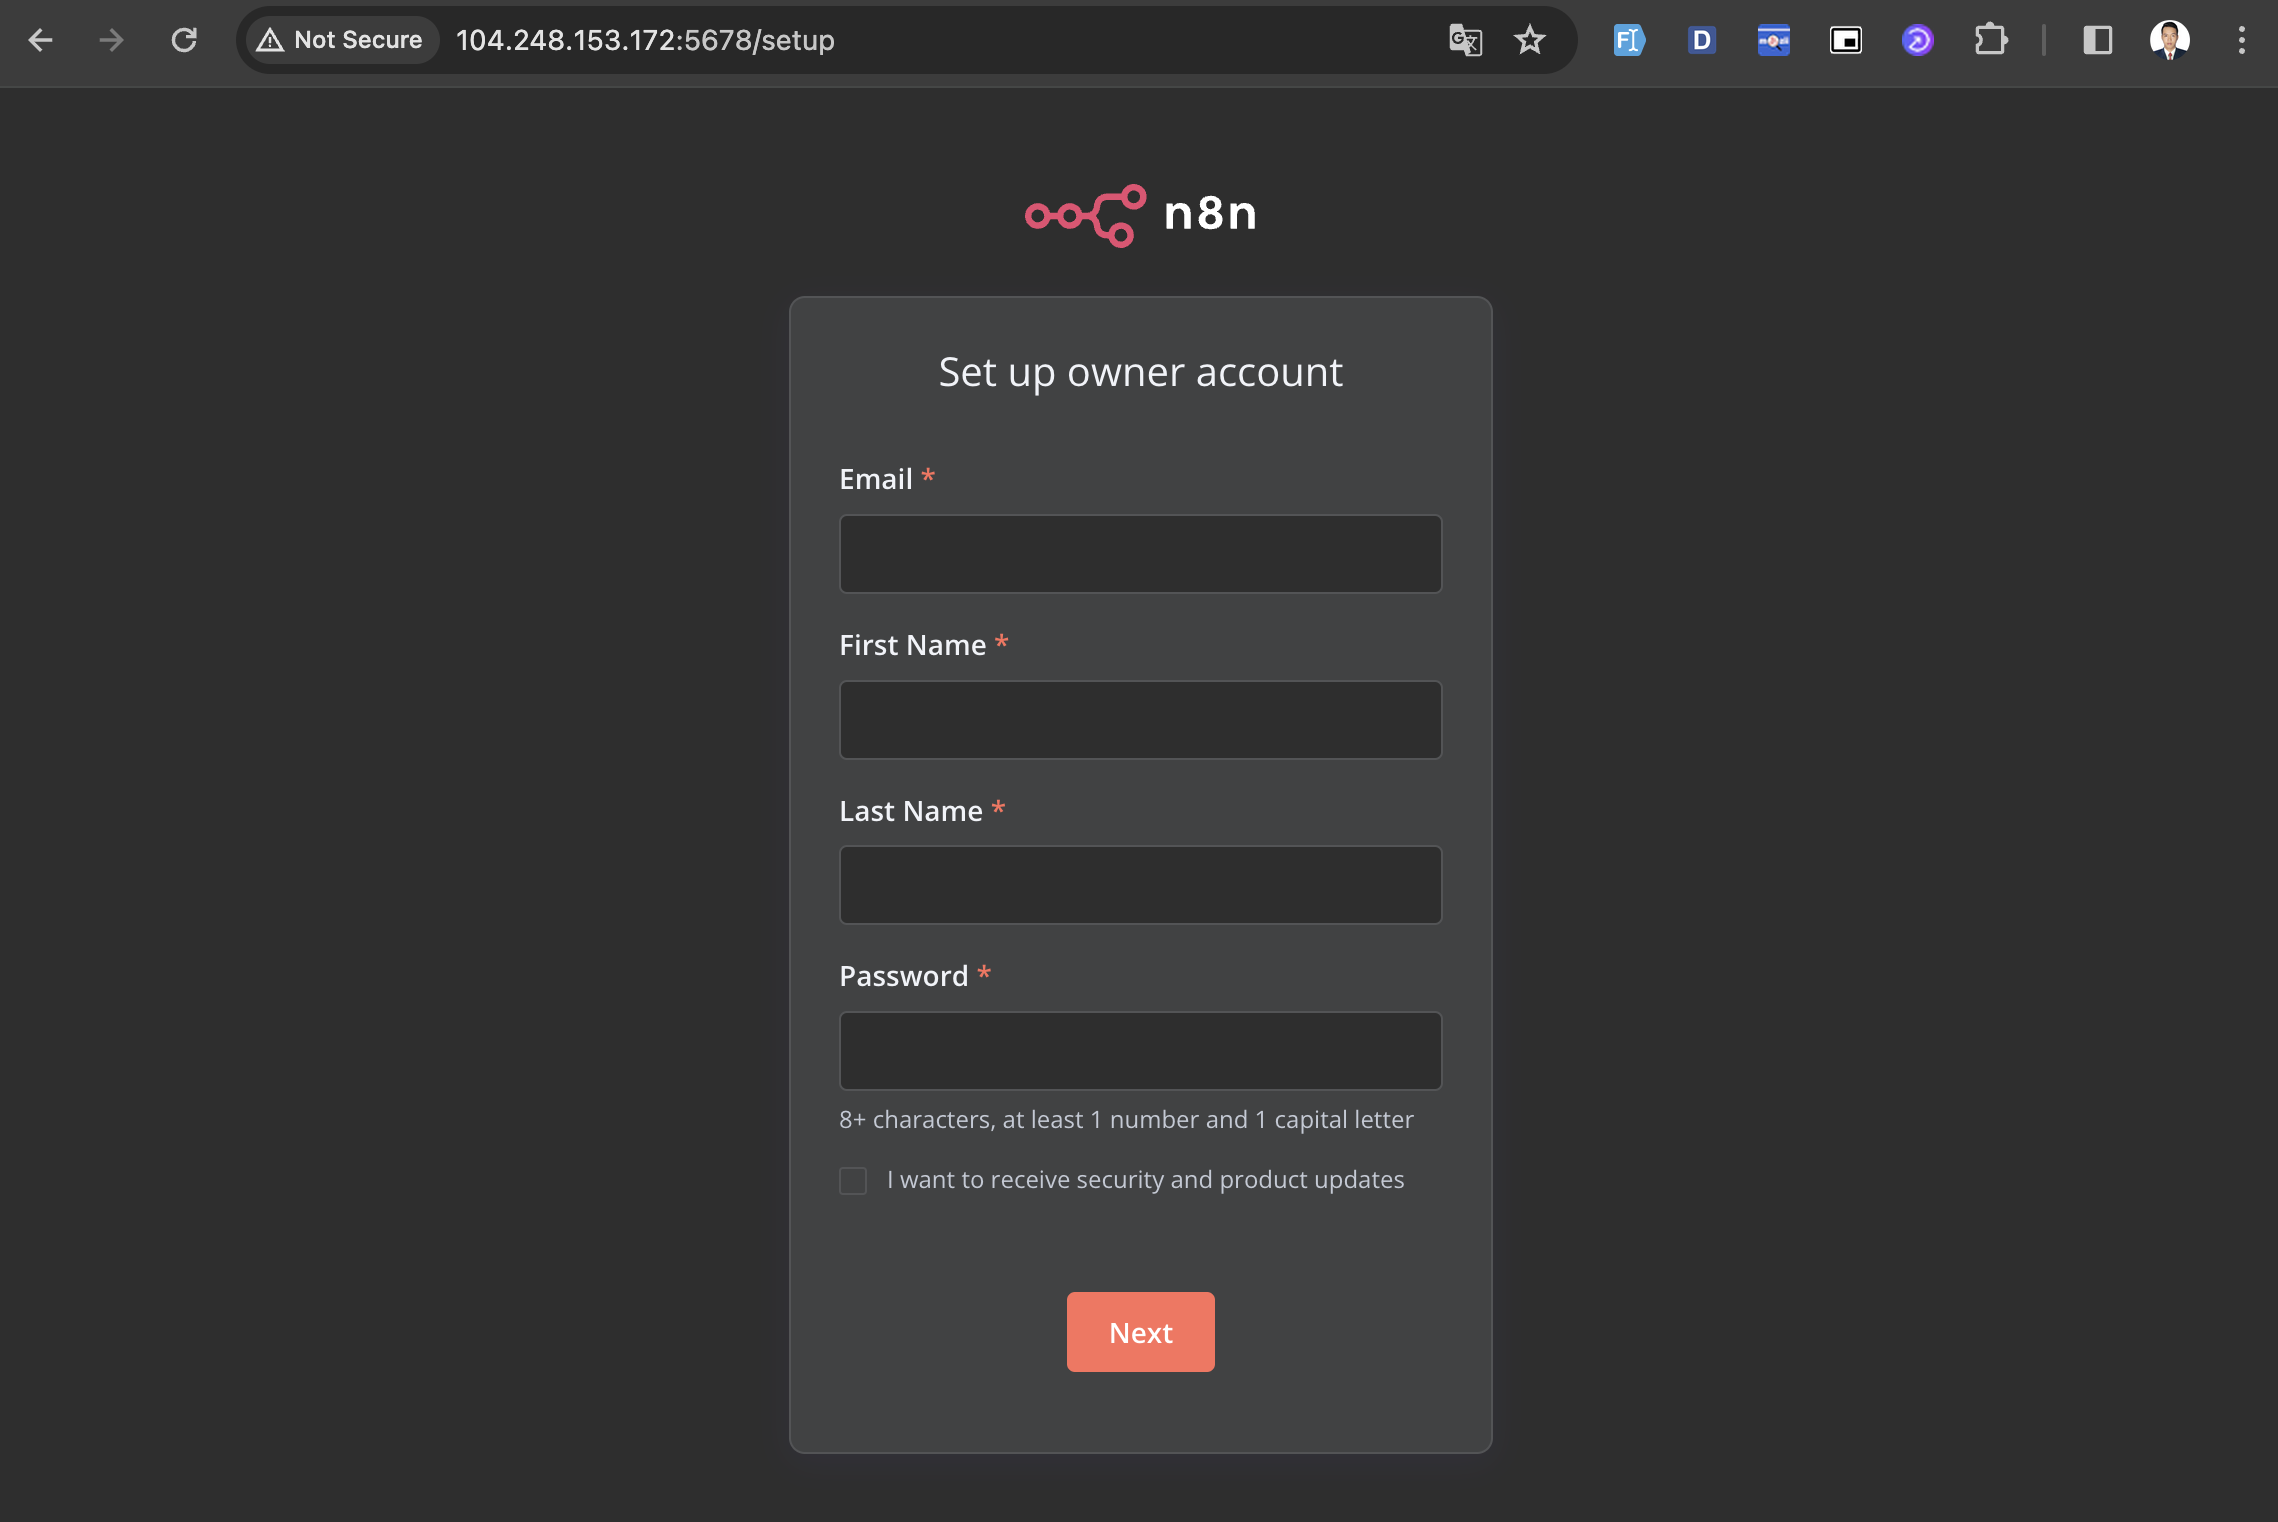
Dùng với dạng domain
Giả sử bạn có tên miền là domain.com và bạn muốn sử dụng n8n.domain.com để truy cập UI n8n:
Tạo 1 trang web có tên là
n8n.domain.com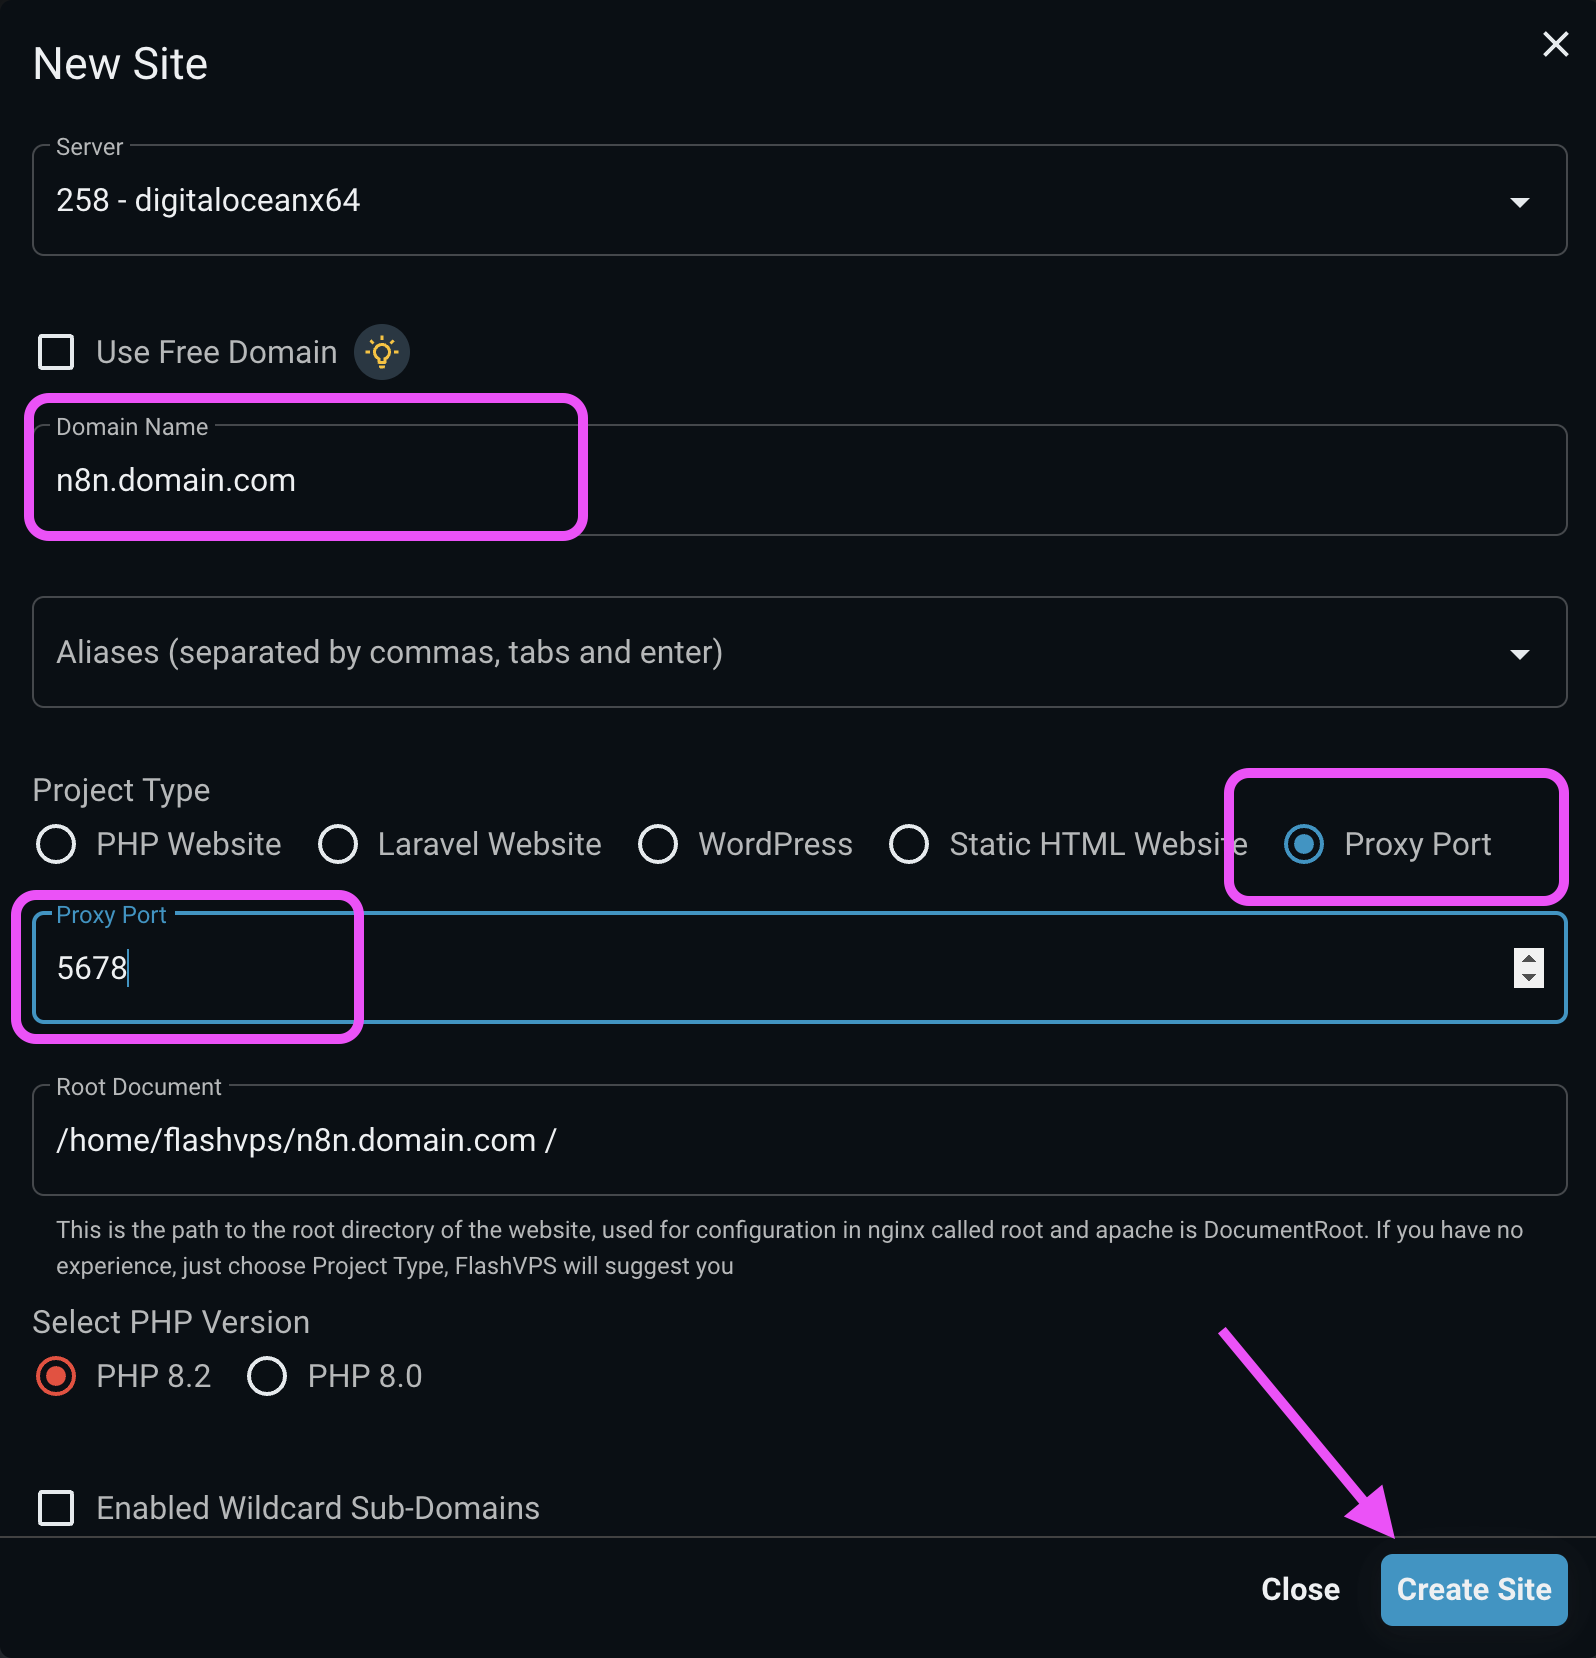
Vào phần
nginxcủa website để chỉnh sửa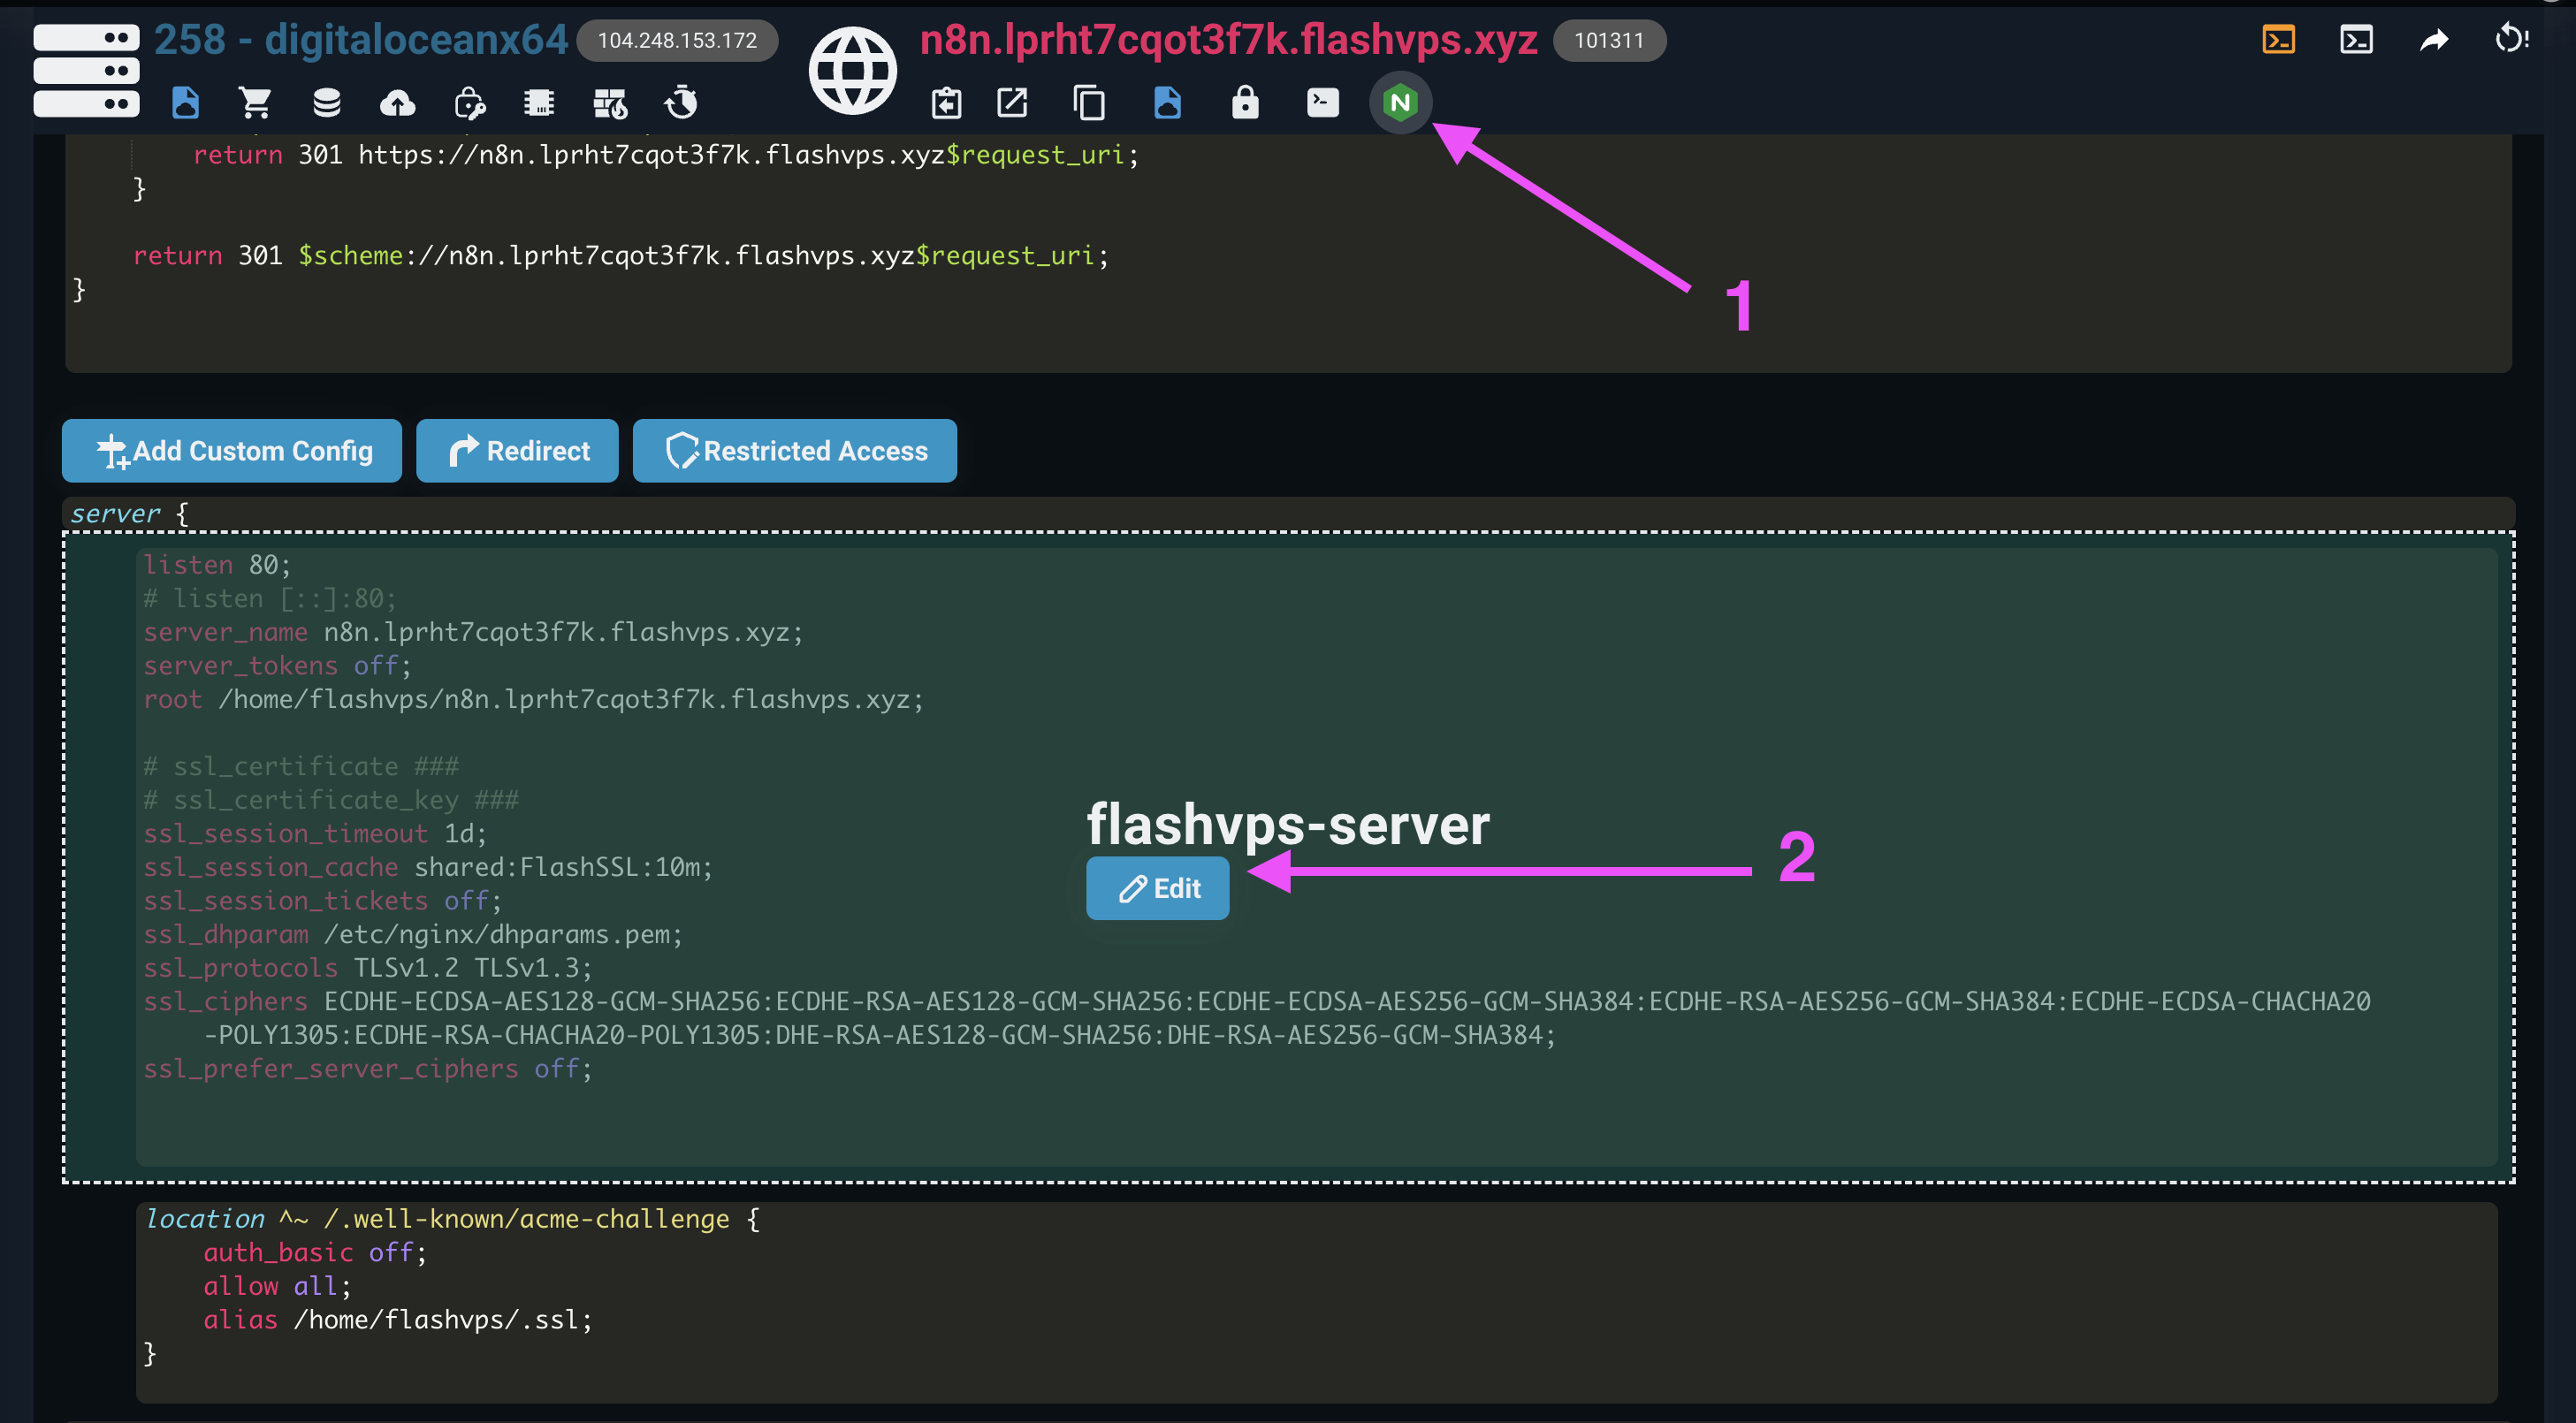
Kéo xuống dưới, thêm dòng có dấu + (cộng) và xóa đi những dòng có dấu - (trừ)
nginxlisten 80; listen [::]:80; server_name n8n.lprht7cqot3f7k.flashvps.xyz; server_tokens off; root /home/flashvps/n8n.lprht7cqot3f7k.flashvps.xyz; # ssl_certificate ### # ssl_certificate_key ### ssl_session_timeout 1d; ssl_session_cache shared:FlashSSL:10m; ssl_session_tickets off; ssl_dhparam /etc/nginx/dhparams.pem; ssl_protocols TLSv1.2 TLSv1.3; ssl_ciphers ECDHE-ECDSA-AES128-GCM-SHA256:ECDHE-RSA-AES128-GCM-SHA256:ECDHE-ECDSA-AES256-GCM-SHA384:ECDHE-RSA-AES256-GCM-SHA384:ECDHE-ECDSA-CHACHA20-POLY1305:ECDHE-RSA-CHACHA20-POLY1305:DHE-RSA-AES128-GCM-SHA256:DHE-RSA-AES256-GCM-SHA384; ssl_prefer_server_ciphers off; add_header Strict-Transport-Security "max-age=63072000" always; add_header X-Frame-Options "SAMEORIGIN"; add_header X-XSS-Protection "1; mode=block"; add_header X-Content-Type-Options "nosniff"; index index.html index.php; charset utf-8; # USER CUSTOM CONFIG (CAN MOVE, DO NOT REMOVE!) location / { proxy_pass http://localhost:5678; proxy_http_version 1.1; proxy_set_header Upgrade $http_upgrade; proxy_set_header Connection 'upgrade'; proxy_set_header Host $host; proxy_cache_bypass $http_upgrade; #proxy_read_timeout 86400s; #proxy_send_timeout 86400s; chunked_transfer_encoding off; proxy_buffering off; proxy_cache off; } # Deny files starting with a . (dot) except .well-known location ~ /\.(?!well-known).* { deny all; } location ~* \.(3gp|gif|jpg|jpeg|png|ico|wmv|avi|asf|asx|mpg|mpeg|mp4|pls|mp3|mid|wav|swf|flv|exe|zip|tar|rar|gz|tgz|bz2|uha|7z|doc|docx|xls|xlsx|pdf|iso|eot|svg|ttf|woff|woff2)$ { gzip_static off; add_header Pragma public; add_header Cache-Control "public, must-revalidate, proxy-revalidate"; access_log off; expires 30d; break; }location ~* \.(txt|js|css)$ { add_header Pragma public; add_header Cache-Control "public, must-revalidate, proxy-revalidate"; access_log off; expires 30d; break; } Bấm nút
Edit Nginx Configurationđể thay đổiBấm nút
Syncđể áp dụng thay đổi.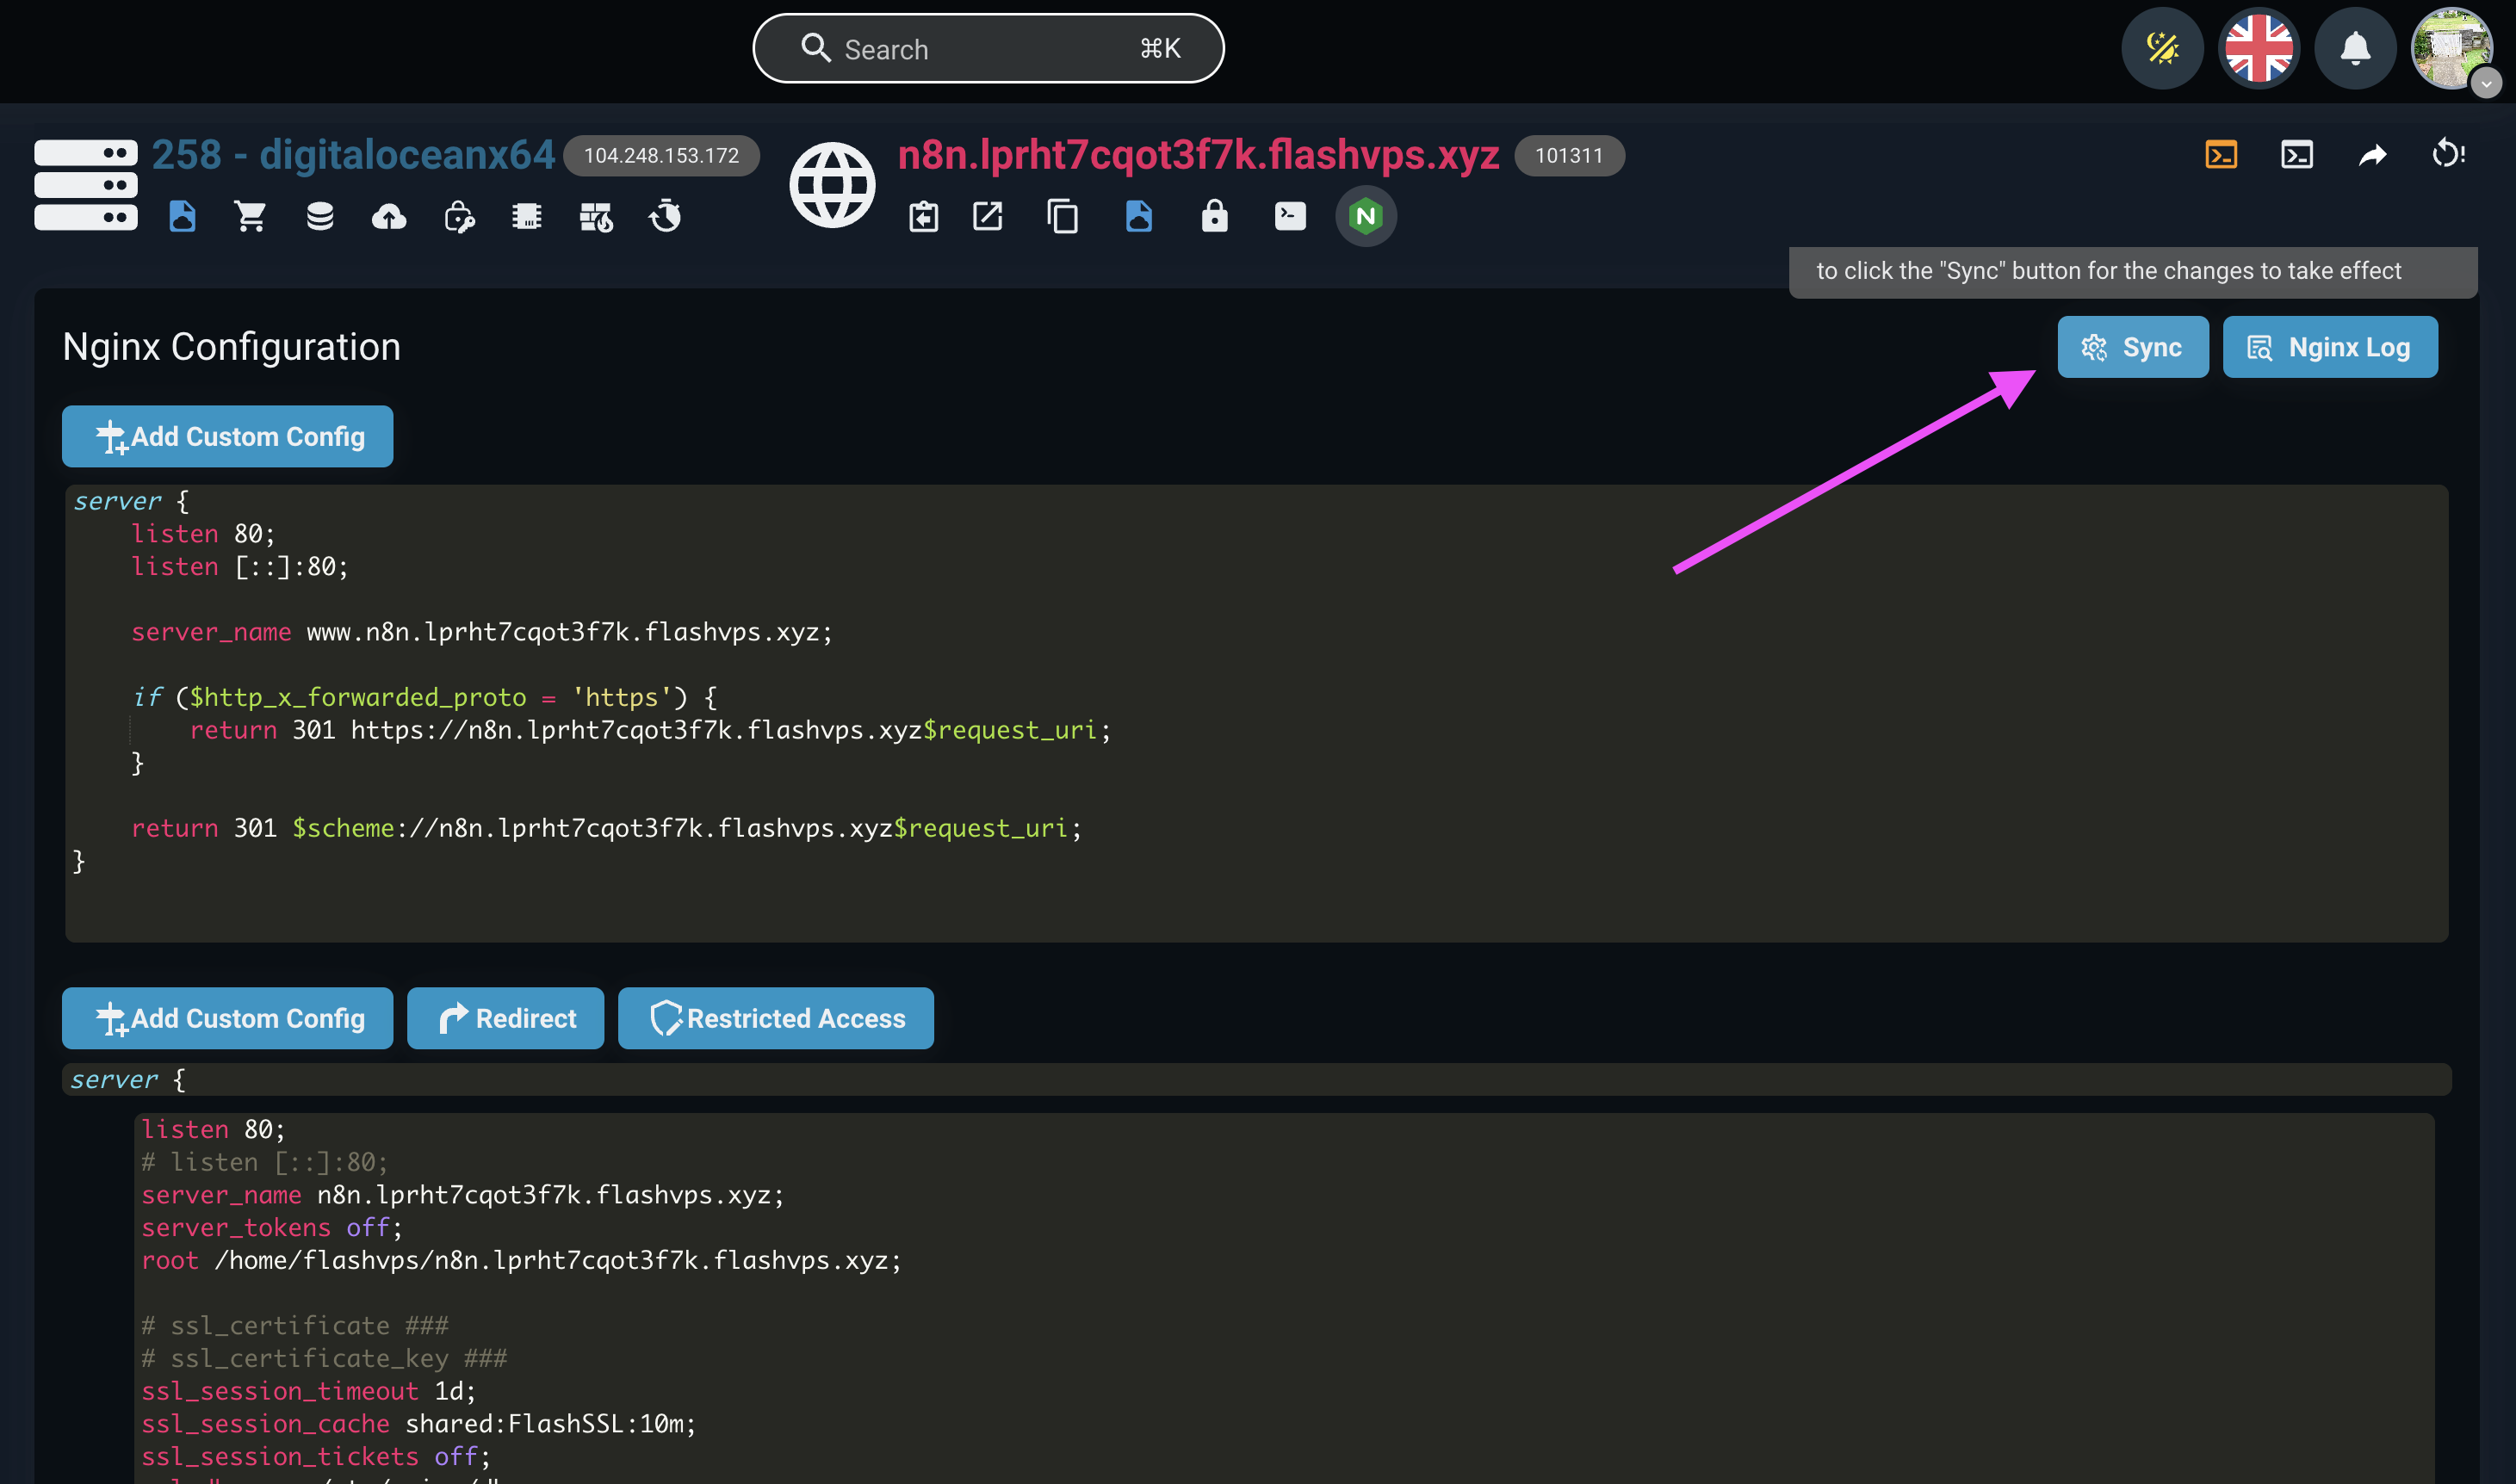
Mở trình duyệt và truy cập trang
n8n.domain.com(thay domain.com thành tên miền của bạn)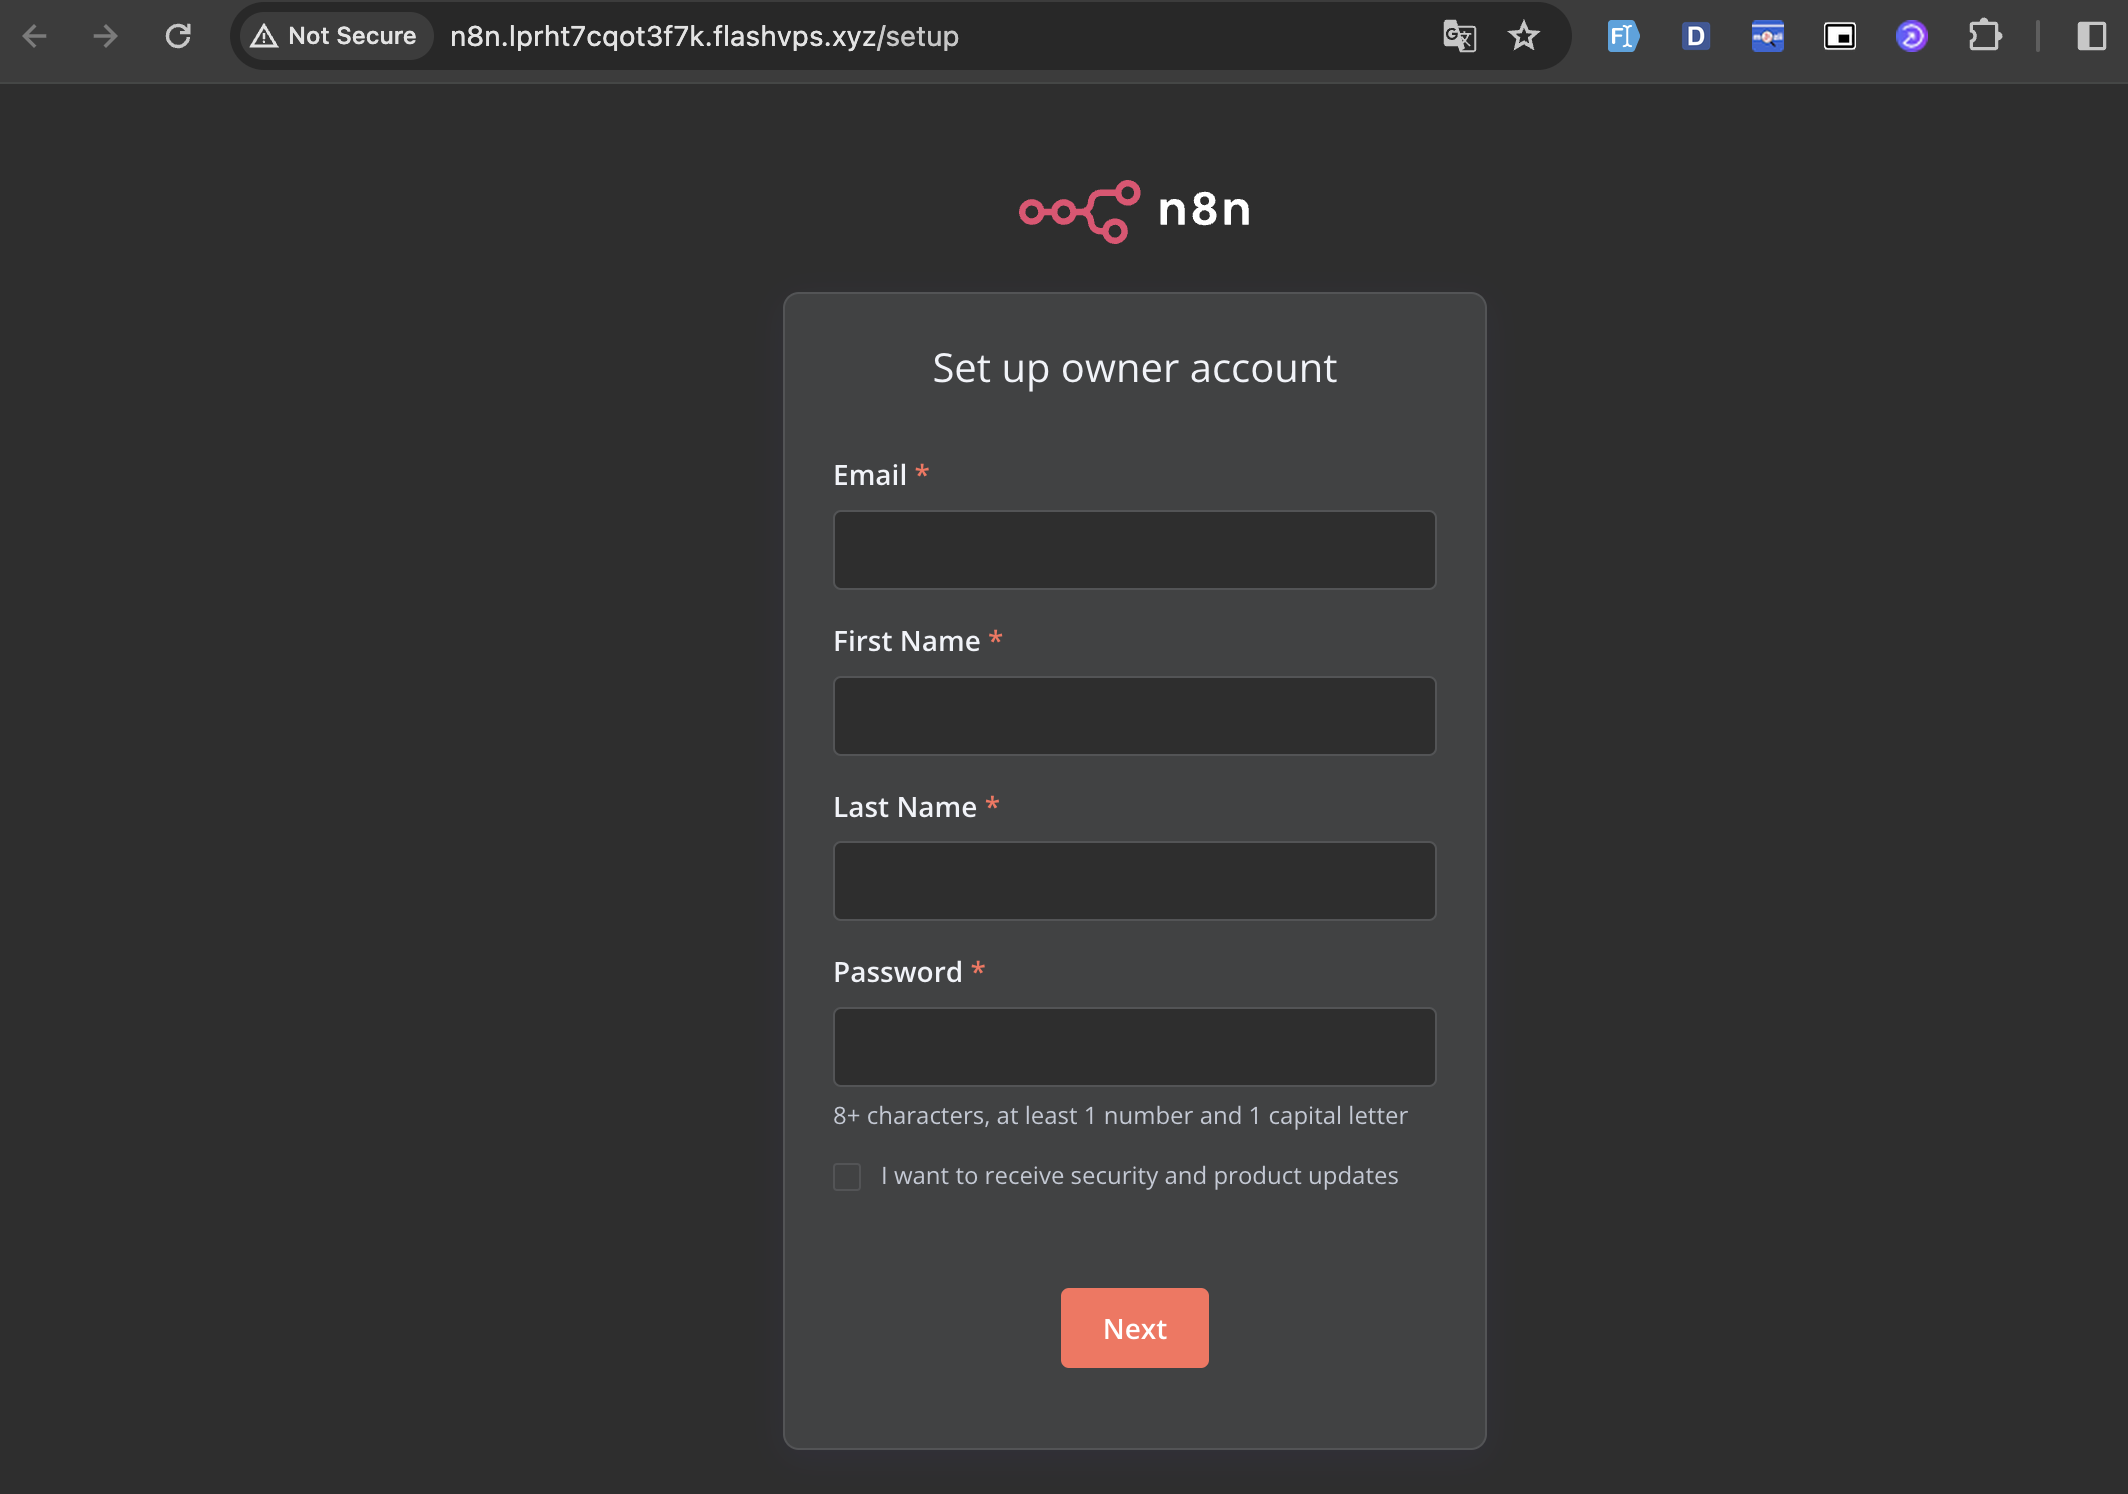
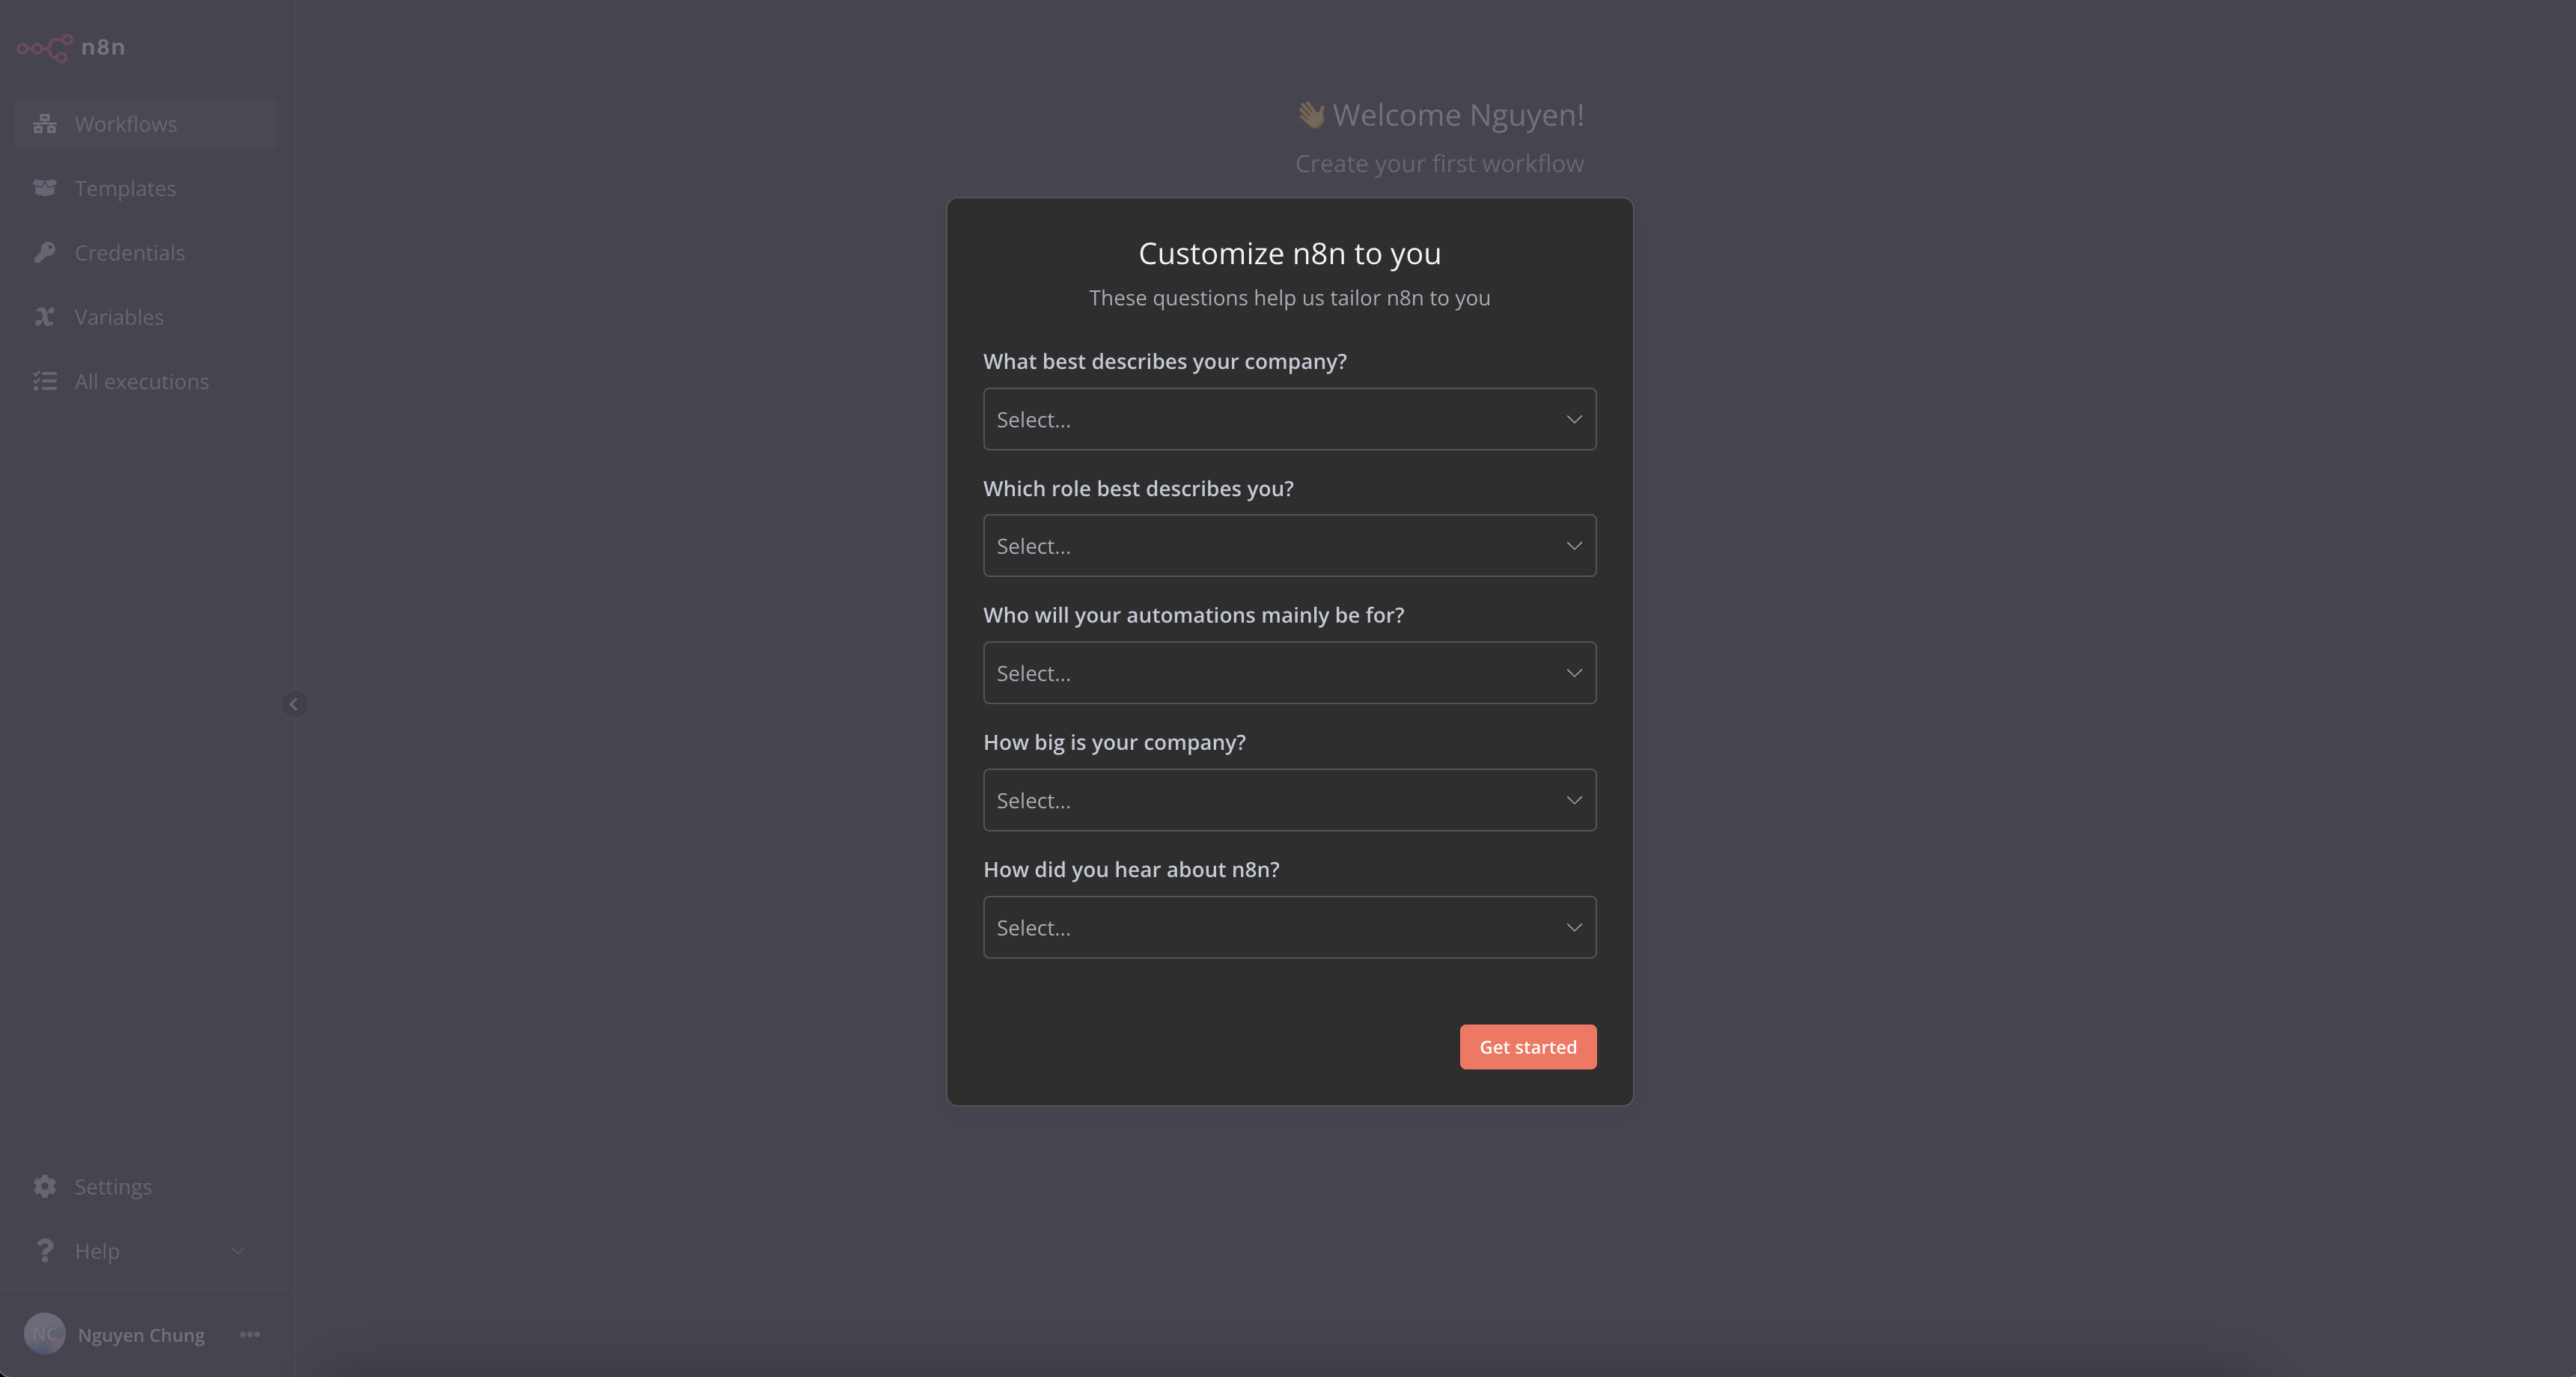
Hiển thị như thế này là thành công