phpMyAdmin
- 2023-01-22 11:56:00
Table of Contents
What is phpMyAdmin?
phpMyAdmin is a freeware tool written in PHP that handles the administration of MySQL over the Web. phpMyAdmin supports a wide range of operations on MySQL and MariaDB. Commonly used operations (managing databases, tables, columns, relations, indexes, users, permissions, etc.) can be performed through the user interface, while you still have the ability to execute any SQL statement directly.
FlashVPS also supports installing phpMyAdmin, so you can manage the database from anywhere.
If you have not done so, you should create a new database and database user. This is used by phpMyAdmin to store the configuration of your database and users.
Once FlashVPS has phpMyAdmin installed, you can then log into your installation using any combination of your database username and password.
Outstanding Features of phpMyAdmin
- Intuitive web interface
- Supports most MySQL features:
- browse and delete databases, tables, views, fields and indexes
- create, copy, delete, rename and change databases, tables, fields and indexes
- maintenance server, databases and tables, with recommendations for server configuration
- execute, edit and bookmark any SQL statement, even batch queries
- manage MySQL user accounts and privileges
- manage stored procedures and triggers
- Import data from CSV and SQL
- Export data to different formats: CSV, SQL, XML, PDF, ISO/IEC 26300 - OpenDocument Text and Spreadsheet, Word, LATEX and others
- Administering multiple servers
- Generate graphics of your database layout in different formats
- Creating complex queries using Query-by-example (QBE)
- Global search within a database or a subset of it
- Convert stored data to any format using a set of predefined functions, like displaying BLOB data as an image or download-link
- ...
Installing phpMyAdmin
Note: Currently php8.1 is new, so installing phpMyAdmin on this version still has some errors. Select version php8.0 or lower instead.
-
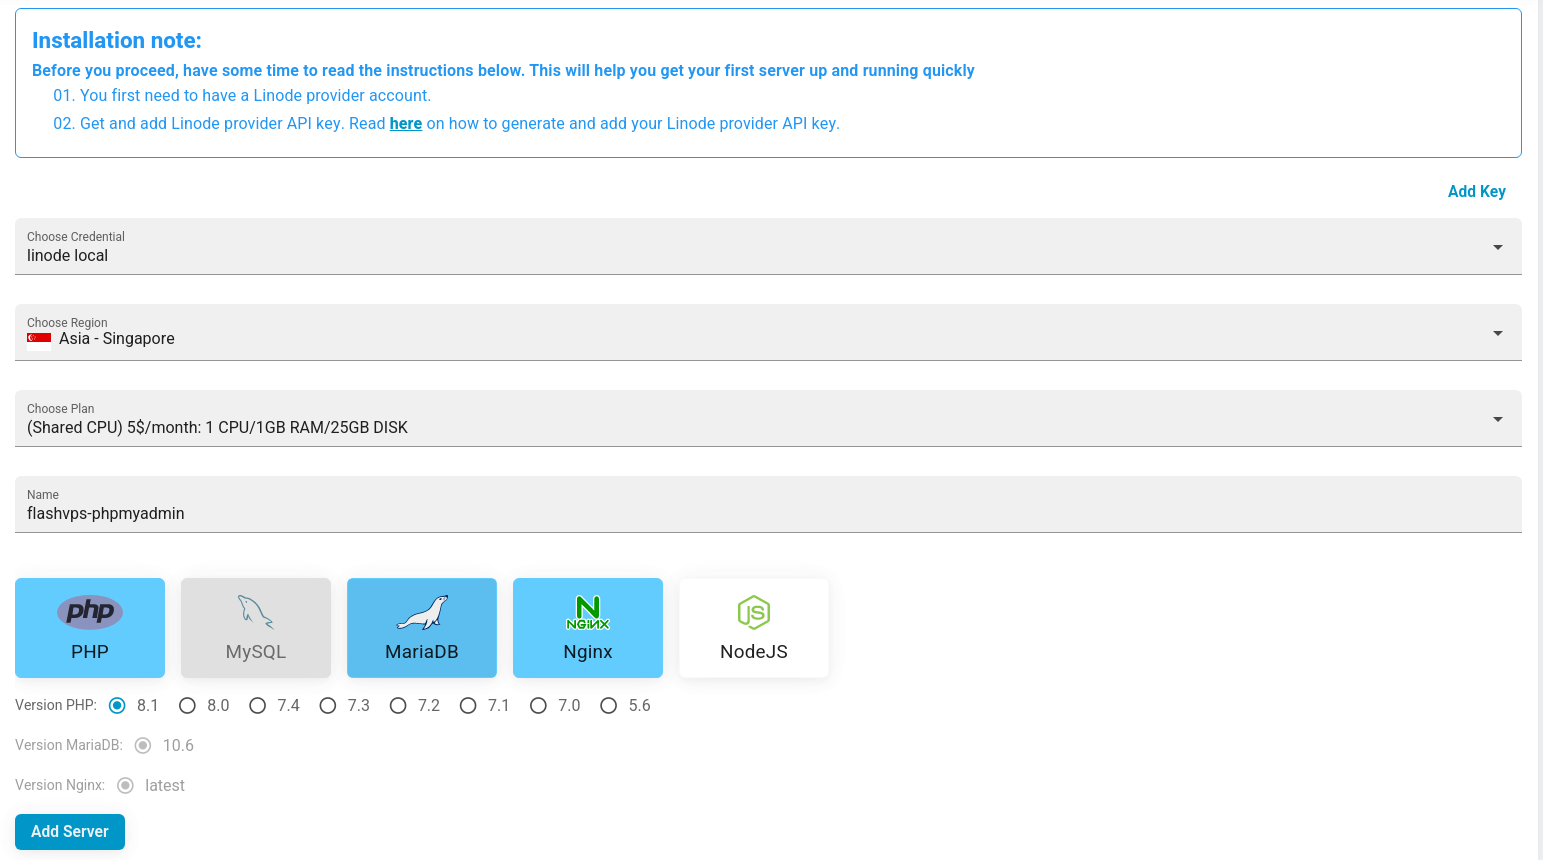
Server Settings : Available Server Connections . You can install MySQL or MariaDB
-
Create a website : At the server information interface, select
Tạo trang web mới Fill in website information and select
Tạo trang web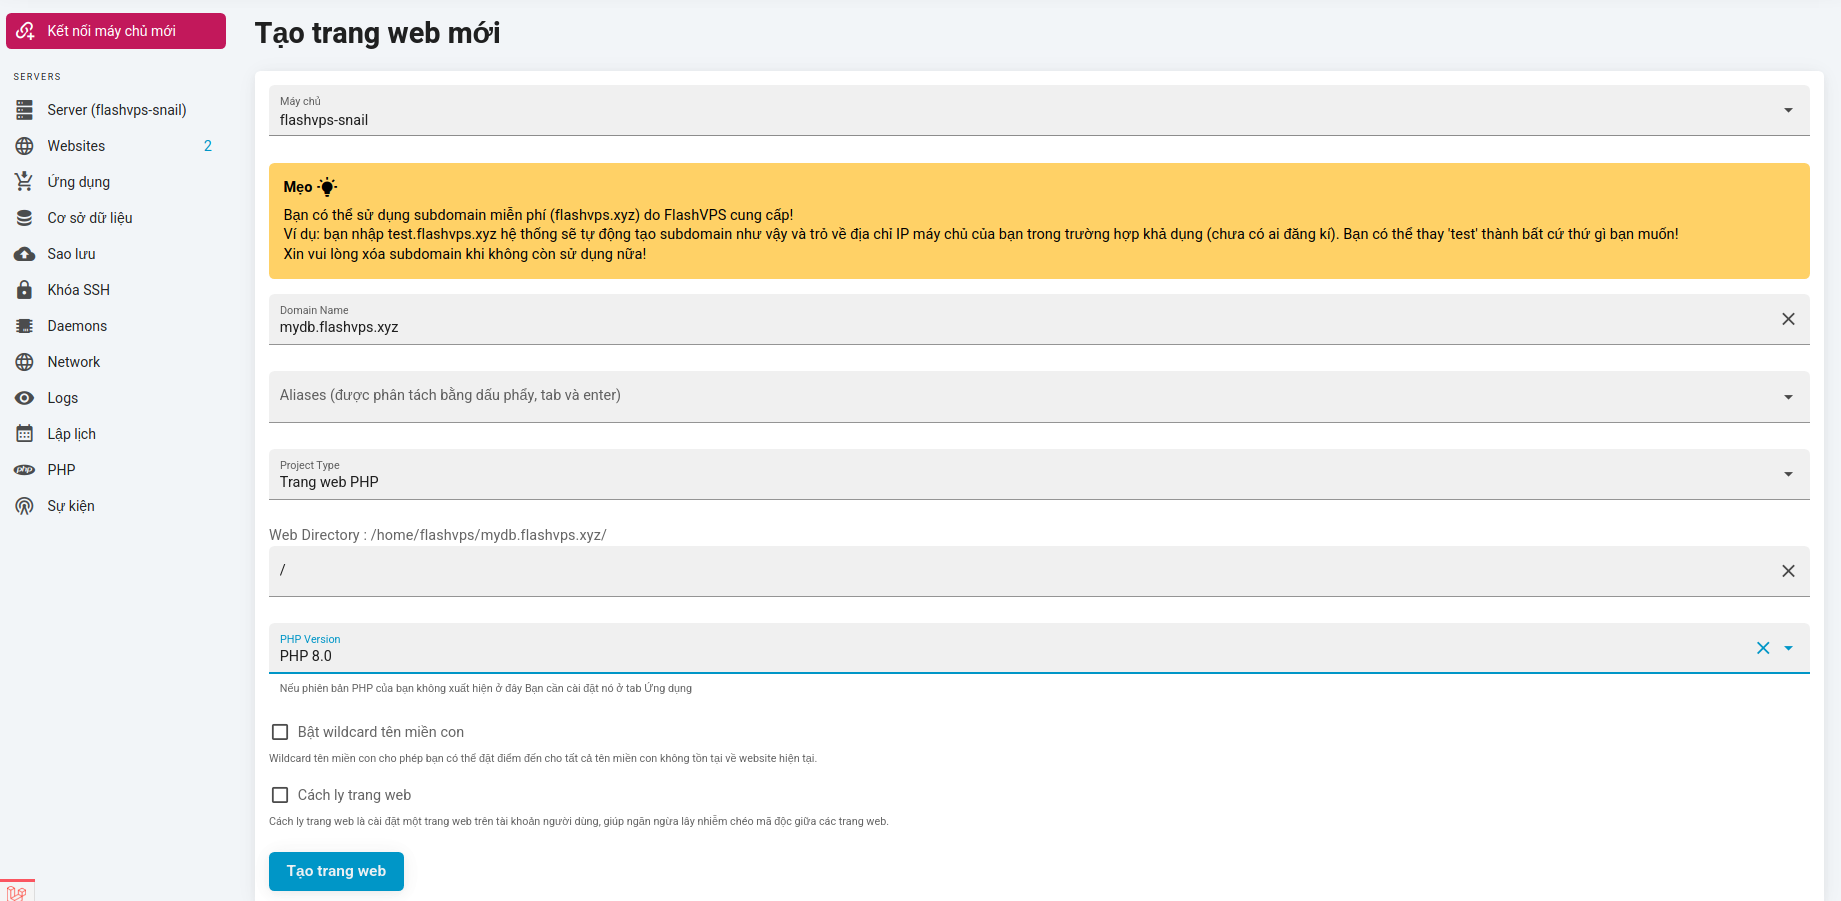
-
Install phpMyAdmin : You go to the site management panel.
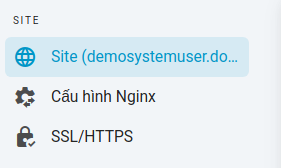
 Then select the option to install the phpMyAdmin source code
-
Select
Cài đặt phpMyAdminFlashVPS will install it for you, The installation process will take 1-2 minutes. Then you just need to access the website and if you see the interface as shown below, it is successful. You enter the username and password that FlashVPS sent you via email when you created the server. Or you can also go to the
Cơ sở dữ liệu> tab and create a new username and password.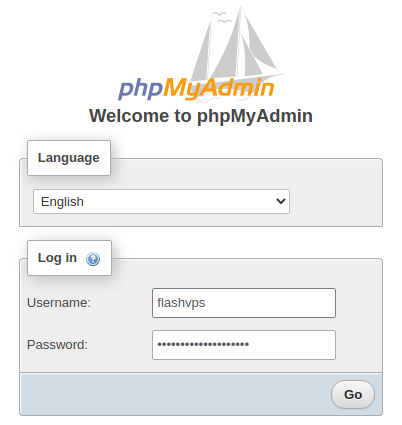
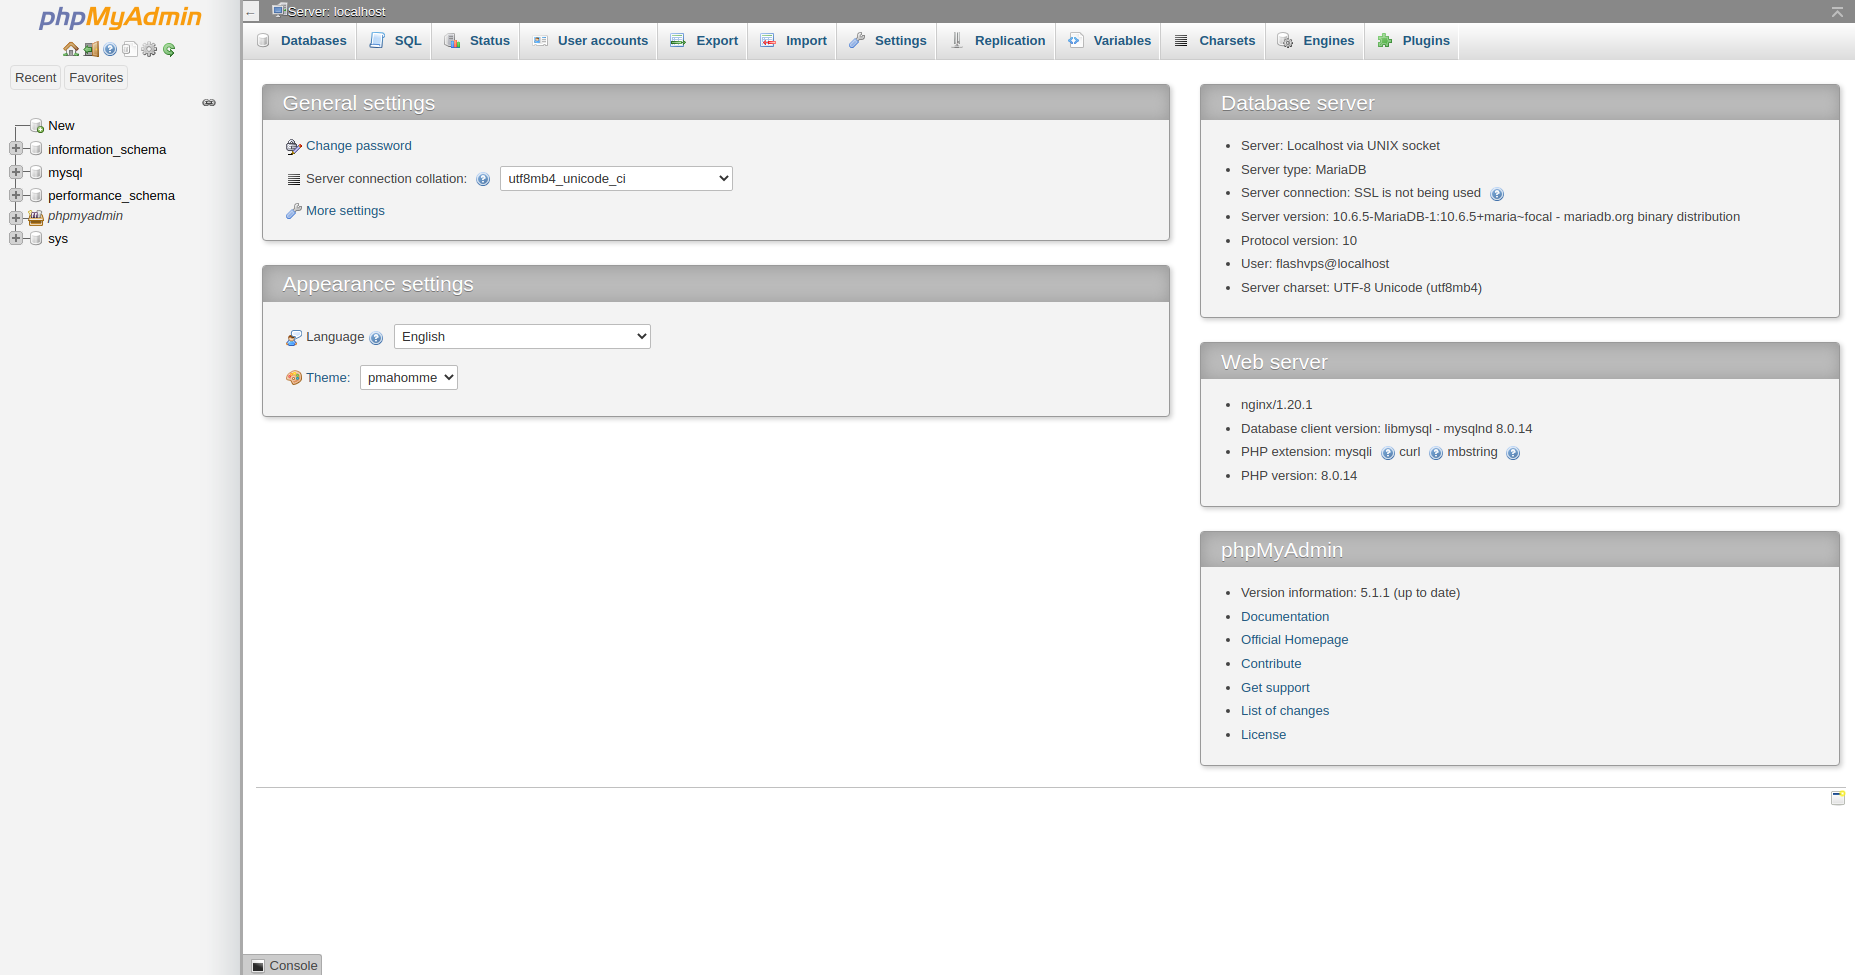
After successful login, the interface will look like this:
A few things to keep in mind
When importing large files
- When importing a large file, it will take a long time to process
- You go back to FlashVPS and set a few more parameters at the server management panel for the file import to be successful:
- Setup
Kích thước file tải lên tối đa(MB) - Establish
thời gian thực thi
- Setup
Some basic operations on phpMyAdmin
Create Database (Database)
At the main interface, you choose Database> nhập tên csdland collection>Create 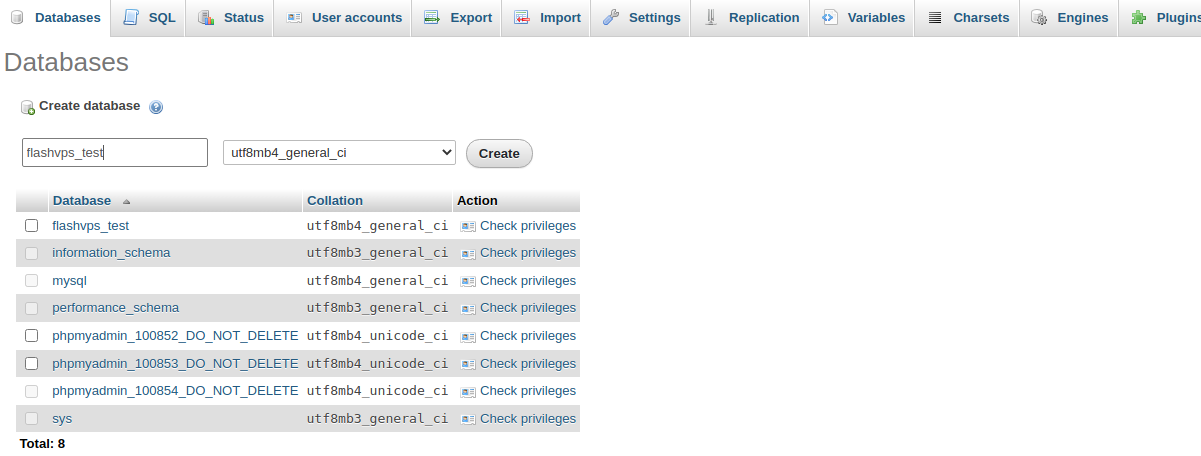
Create table for database
In the left sidebar you select the database name, then at the bottom Create Tableyou enter tên bảngand số cộtfor the table and select Go  You fill in the information for the table such as column name, data type, length/value, default value, nullable, ... then select
 Save 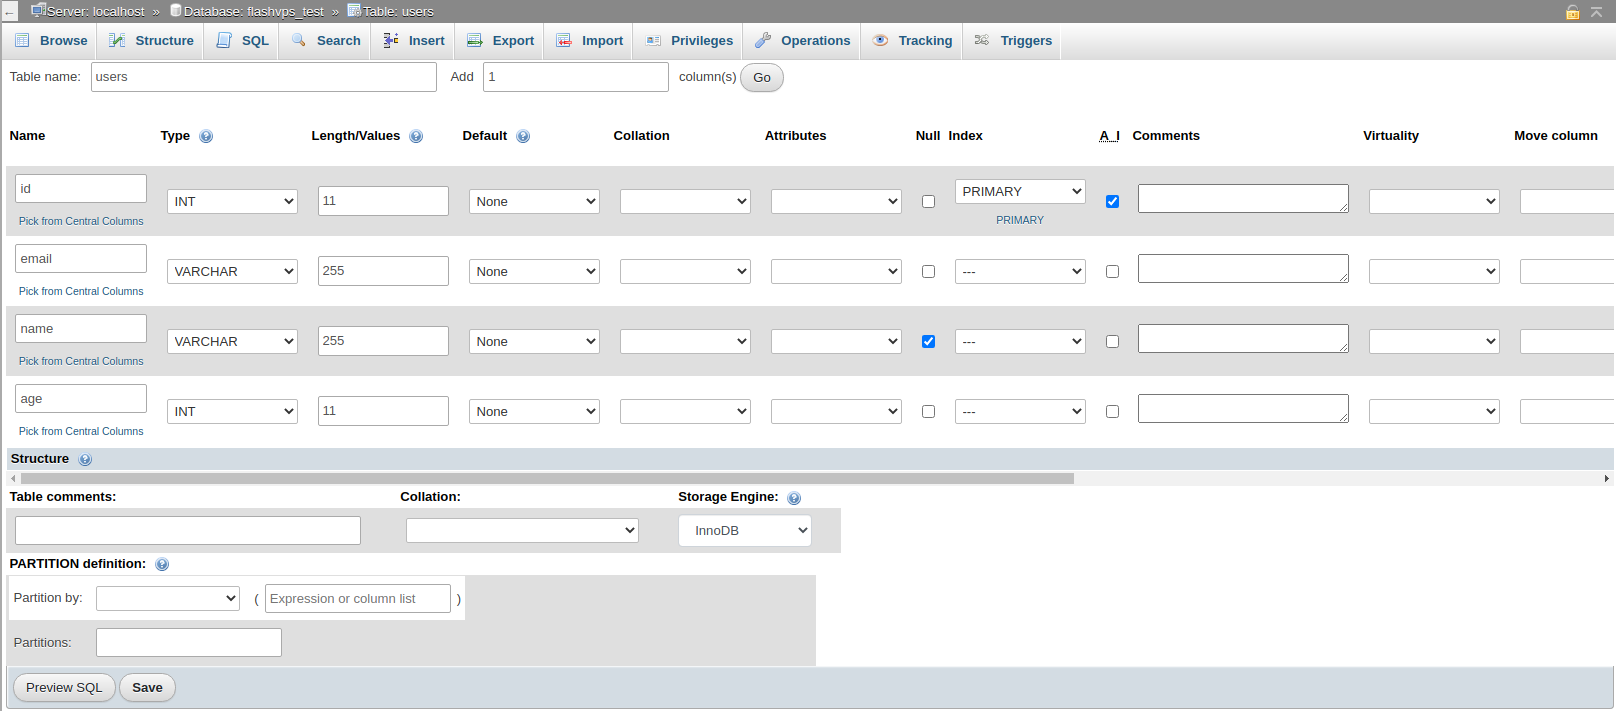 After Select
 Savewe have the following table structure.
Add records to the table
At the table to add, you select the tab Insertin the upper navigation bar > Điền thông tin> Go 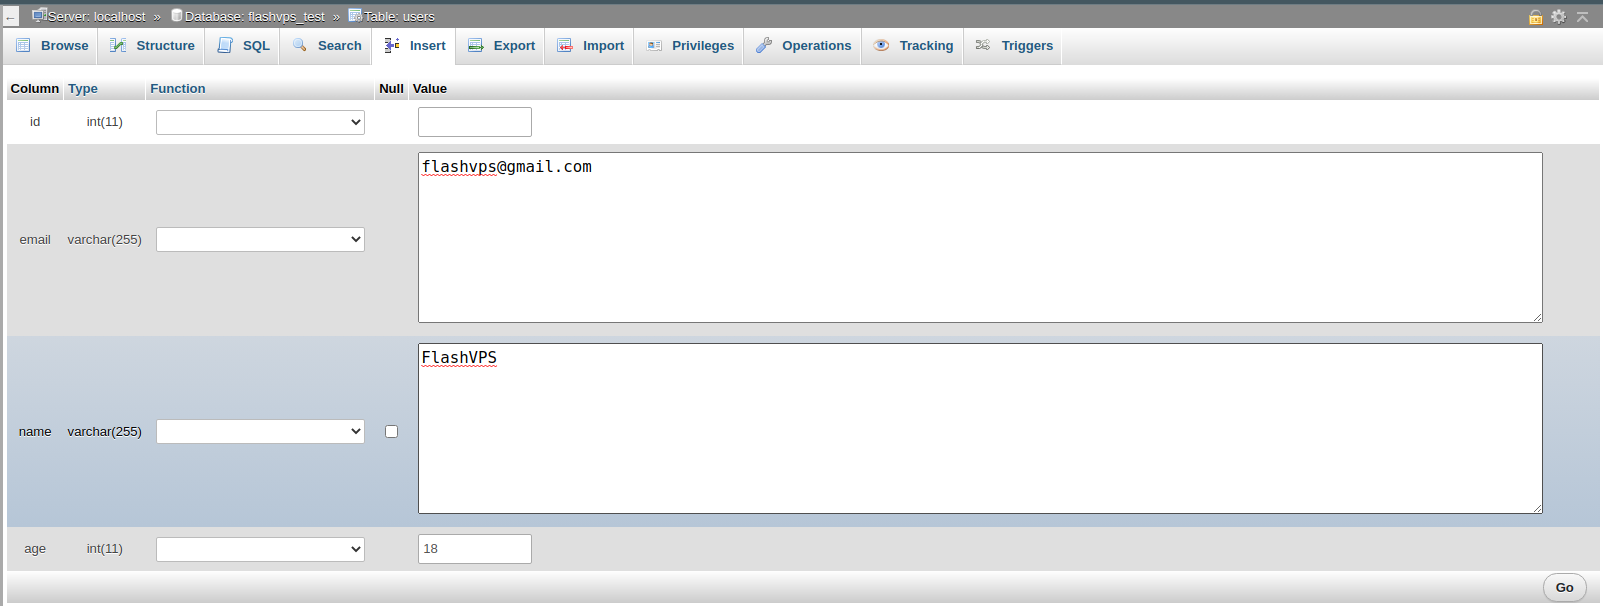 Success message
 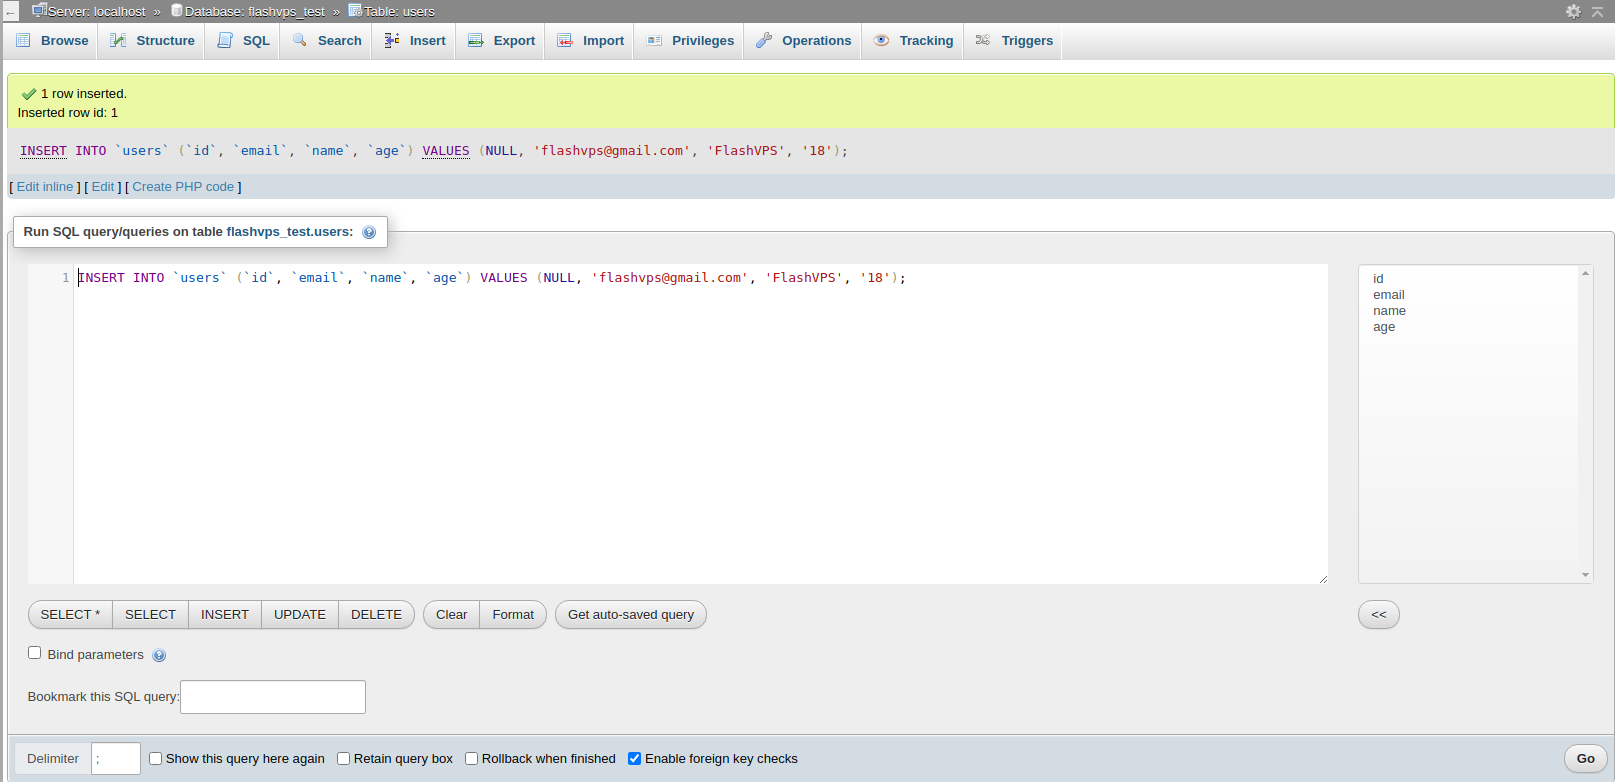 You select the tab
 Browseto see a list of existing records
Export File (Export File)
There are 2 types of output files:
-
Xuất CSDL: You select a database and select the tabExport>Chọn kiểu cần format: SQL, CSV, Excel,...>Go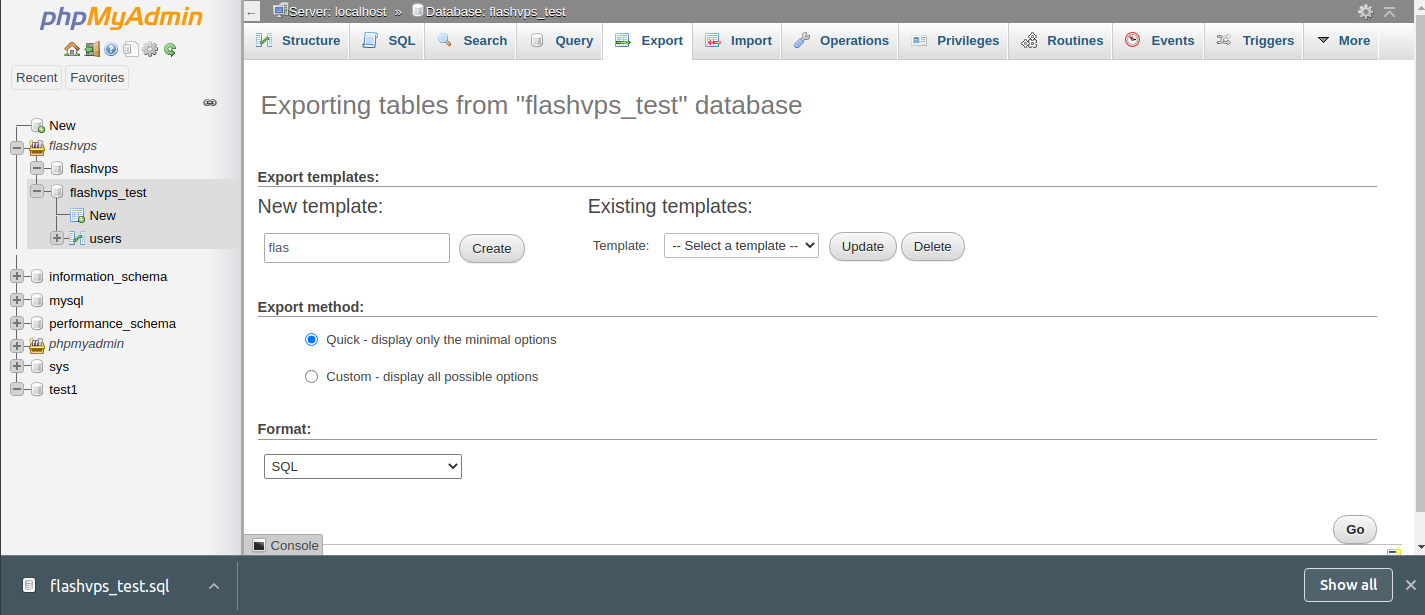
-
Xuất bảng: You select a table and select tabExport>Chọn kiểu cần format: SQL, CSV, Excel,...>Rows>Go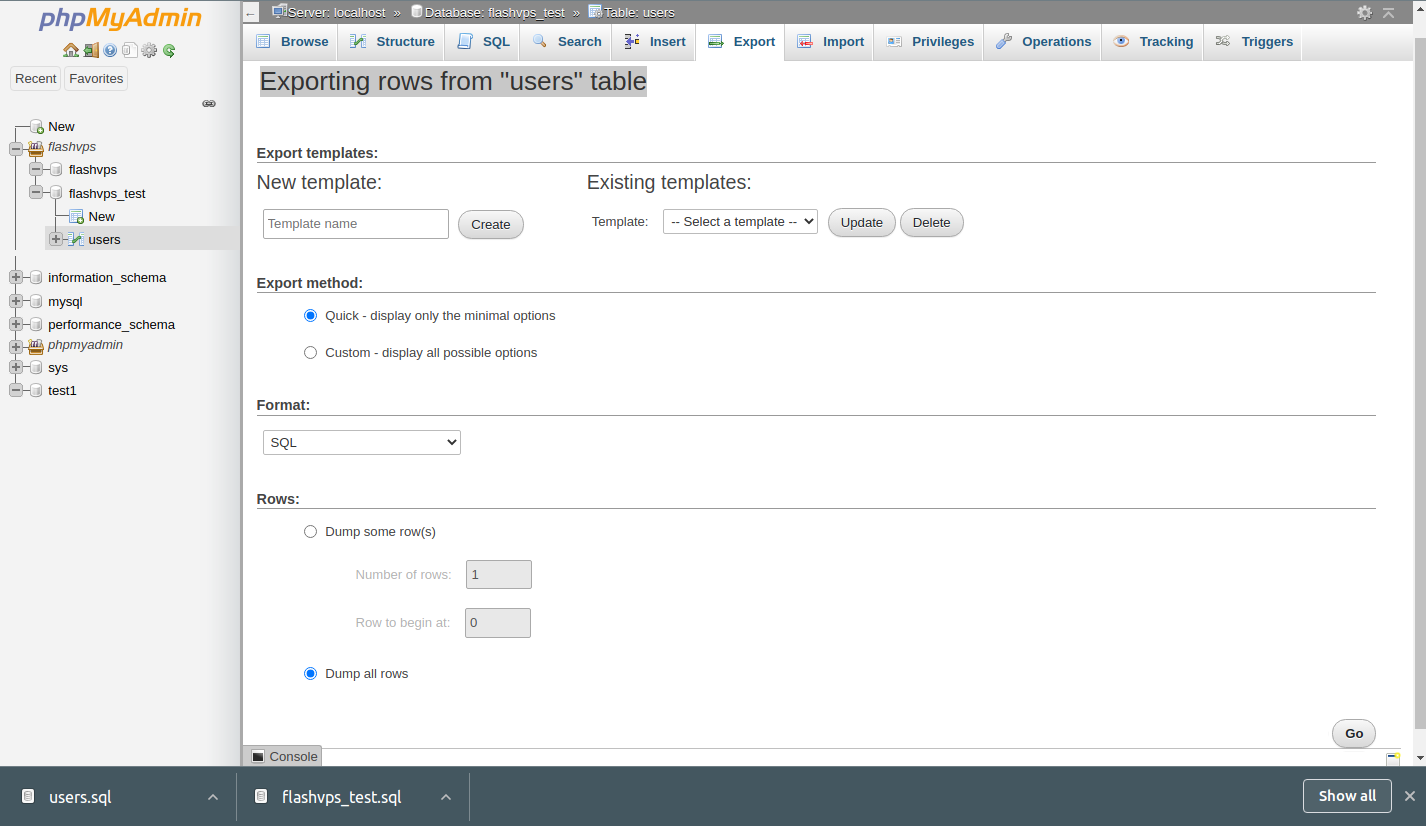
Import File (Import File)
There are 2 types of Import files:
Nhập CSDL: You select a database and select the tabImport>Chọn file cần import.>GoNhập bảng: You select a database and select the tabImport>Chọn file cần import.>Go
Note : Here you need to note the place (Max: 2,048KB) . This is the maximum file size that can be uploaded by default. If your file is larger in size, you need to update the size according to the instructions here . Then go back to phpMyAdmin and do File Import as usual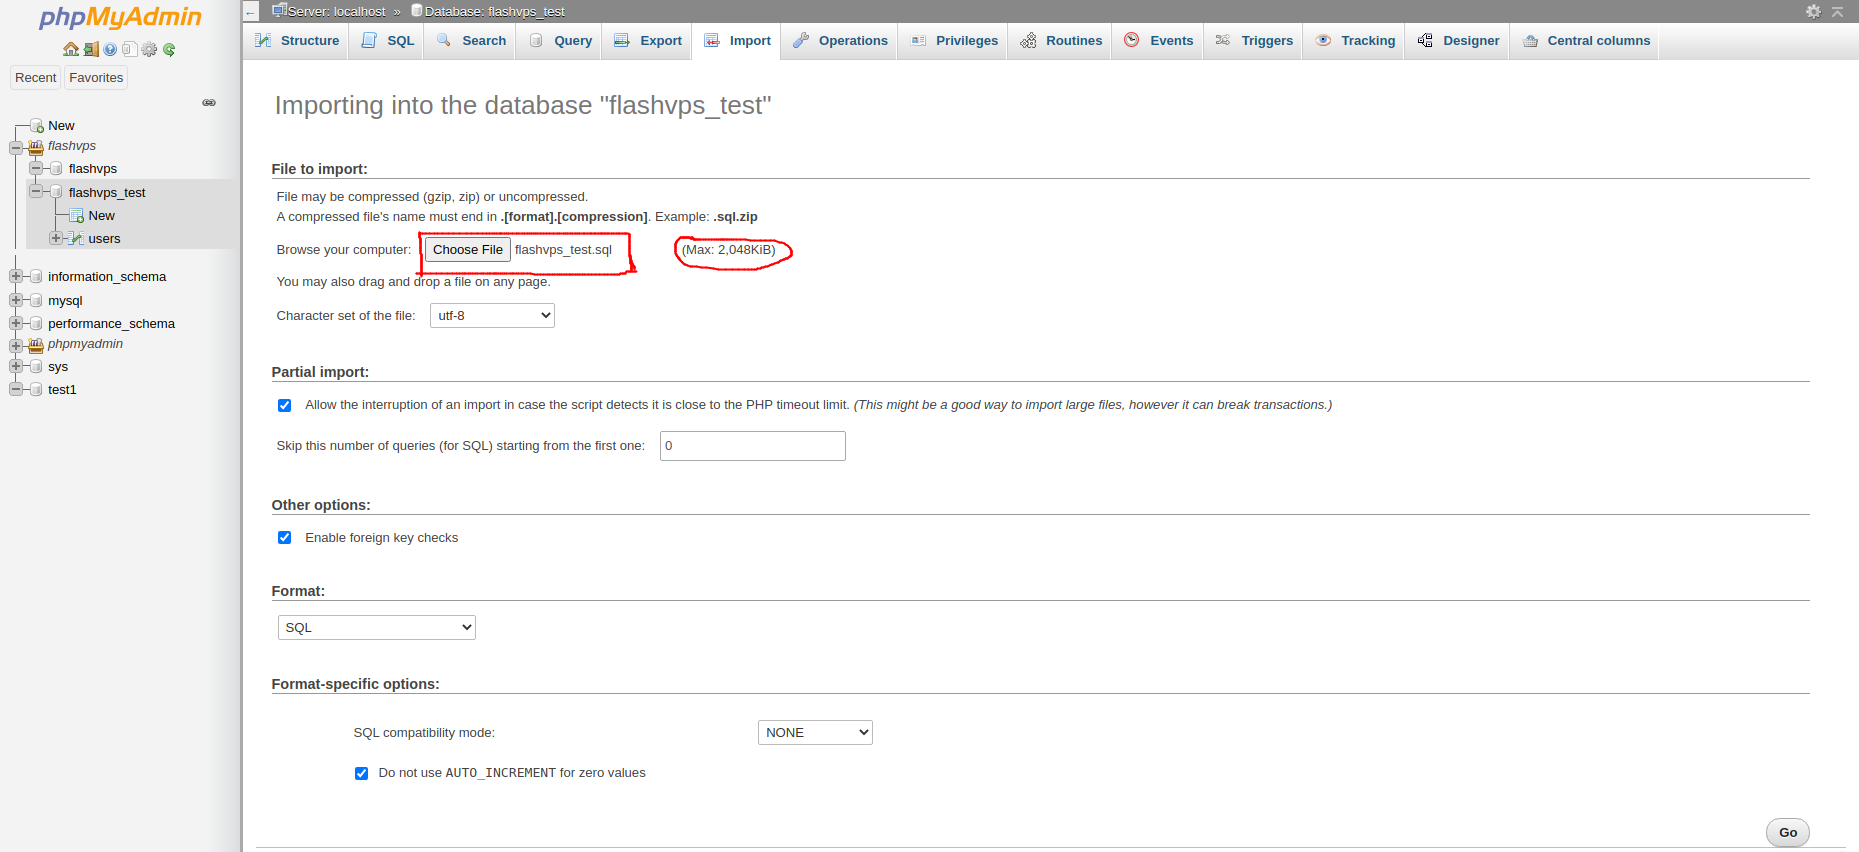
Decentralization
There are also two types of authorization:
Phân quyền cho CSDL: Select Database > select tabPrivileges>Add user accountPhân quyền cho bảng: Select the table > select the tabPrivileges>Add user account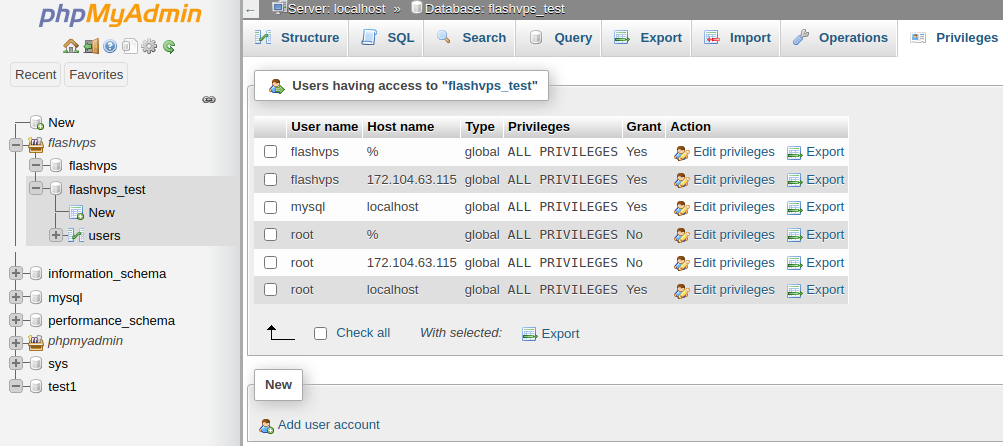 Fill in the login information
  Select the permissions for the account and select
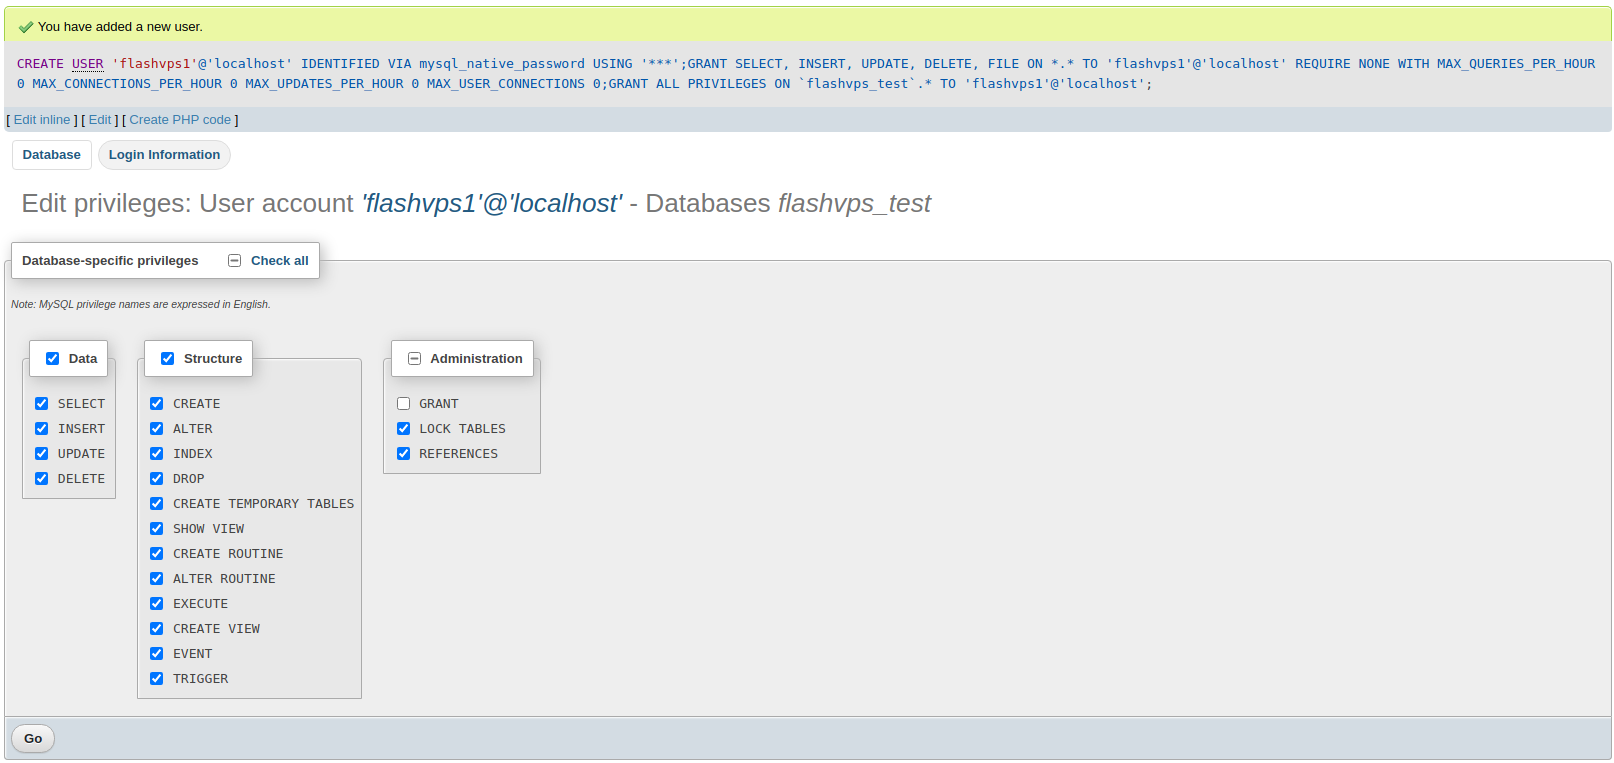
 Go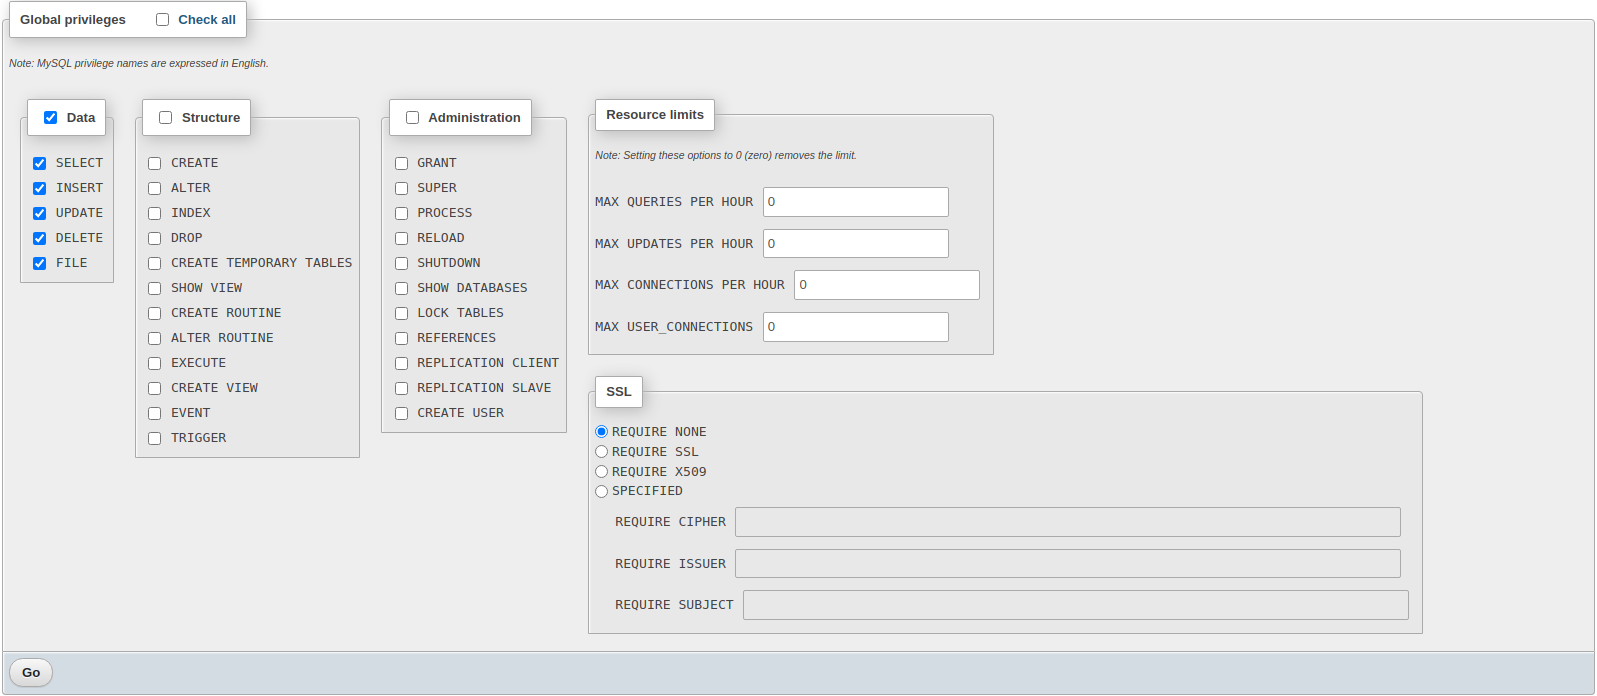 the interface successfully add and edit permissions

- Getting Started
- Servers
- Knowledge
- Sites