OpenLiteSpeed
INFO
OpenLiteSpeed is an open source web server developed and maintained by LiteSpeed Technologies. It is a "lightweight" version of LiteSpeed Web Server, a web server that offers high performance and powerful features.
OpenLiteSpeed is designed to provide a fast, lightweight and efficient web server solution for projects and development environments. It supports many features such as multithreading, caching, HTTP/2, SSL/TLS, rewrite rules, and many more that help optimize the performance and security of websites and web applications.
One of the strengths of OpenLiteSpeed is its high performance and good scalability, which helps it handle a large number of web requests efficiently, especially in high-load environments. In addition, with its open source version, OpenLiteSpeed is also suitable for projects and environments with limited budgets.
OpenLiteSpeed is an attractive web server choice for projects and development environments that want an open source, efficient, and easily configurable solution.
Install OpenLiteSpeed
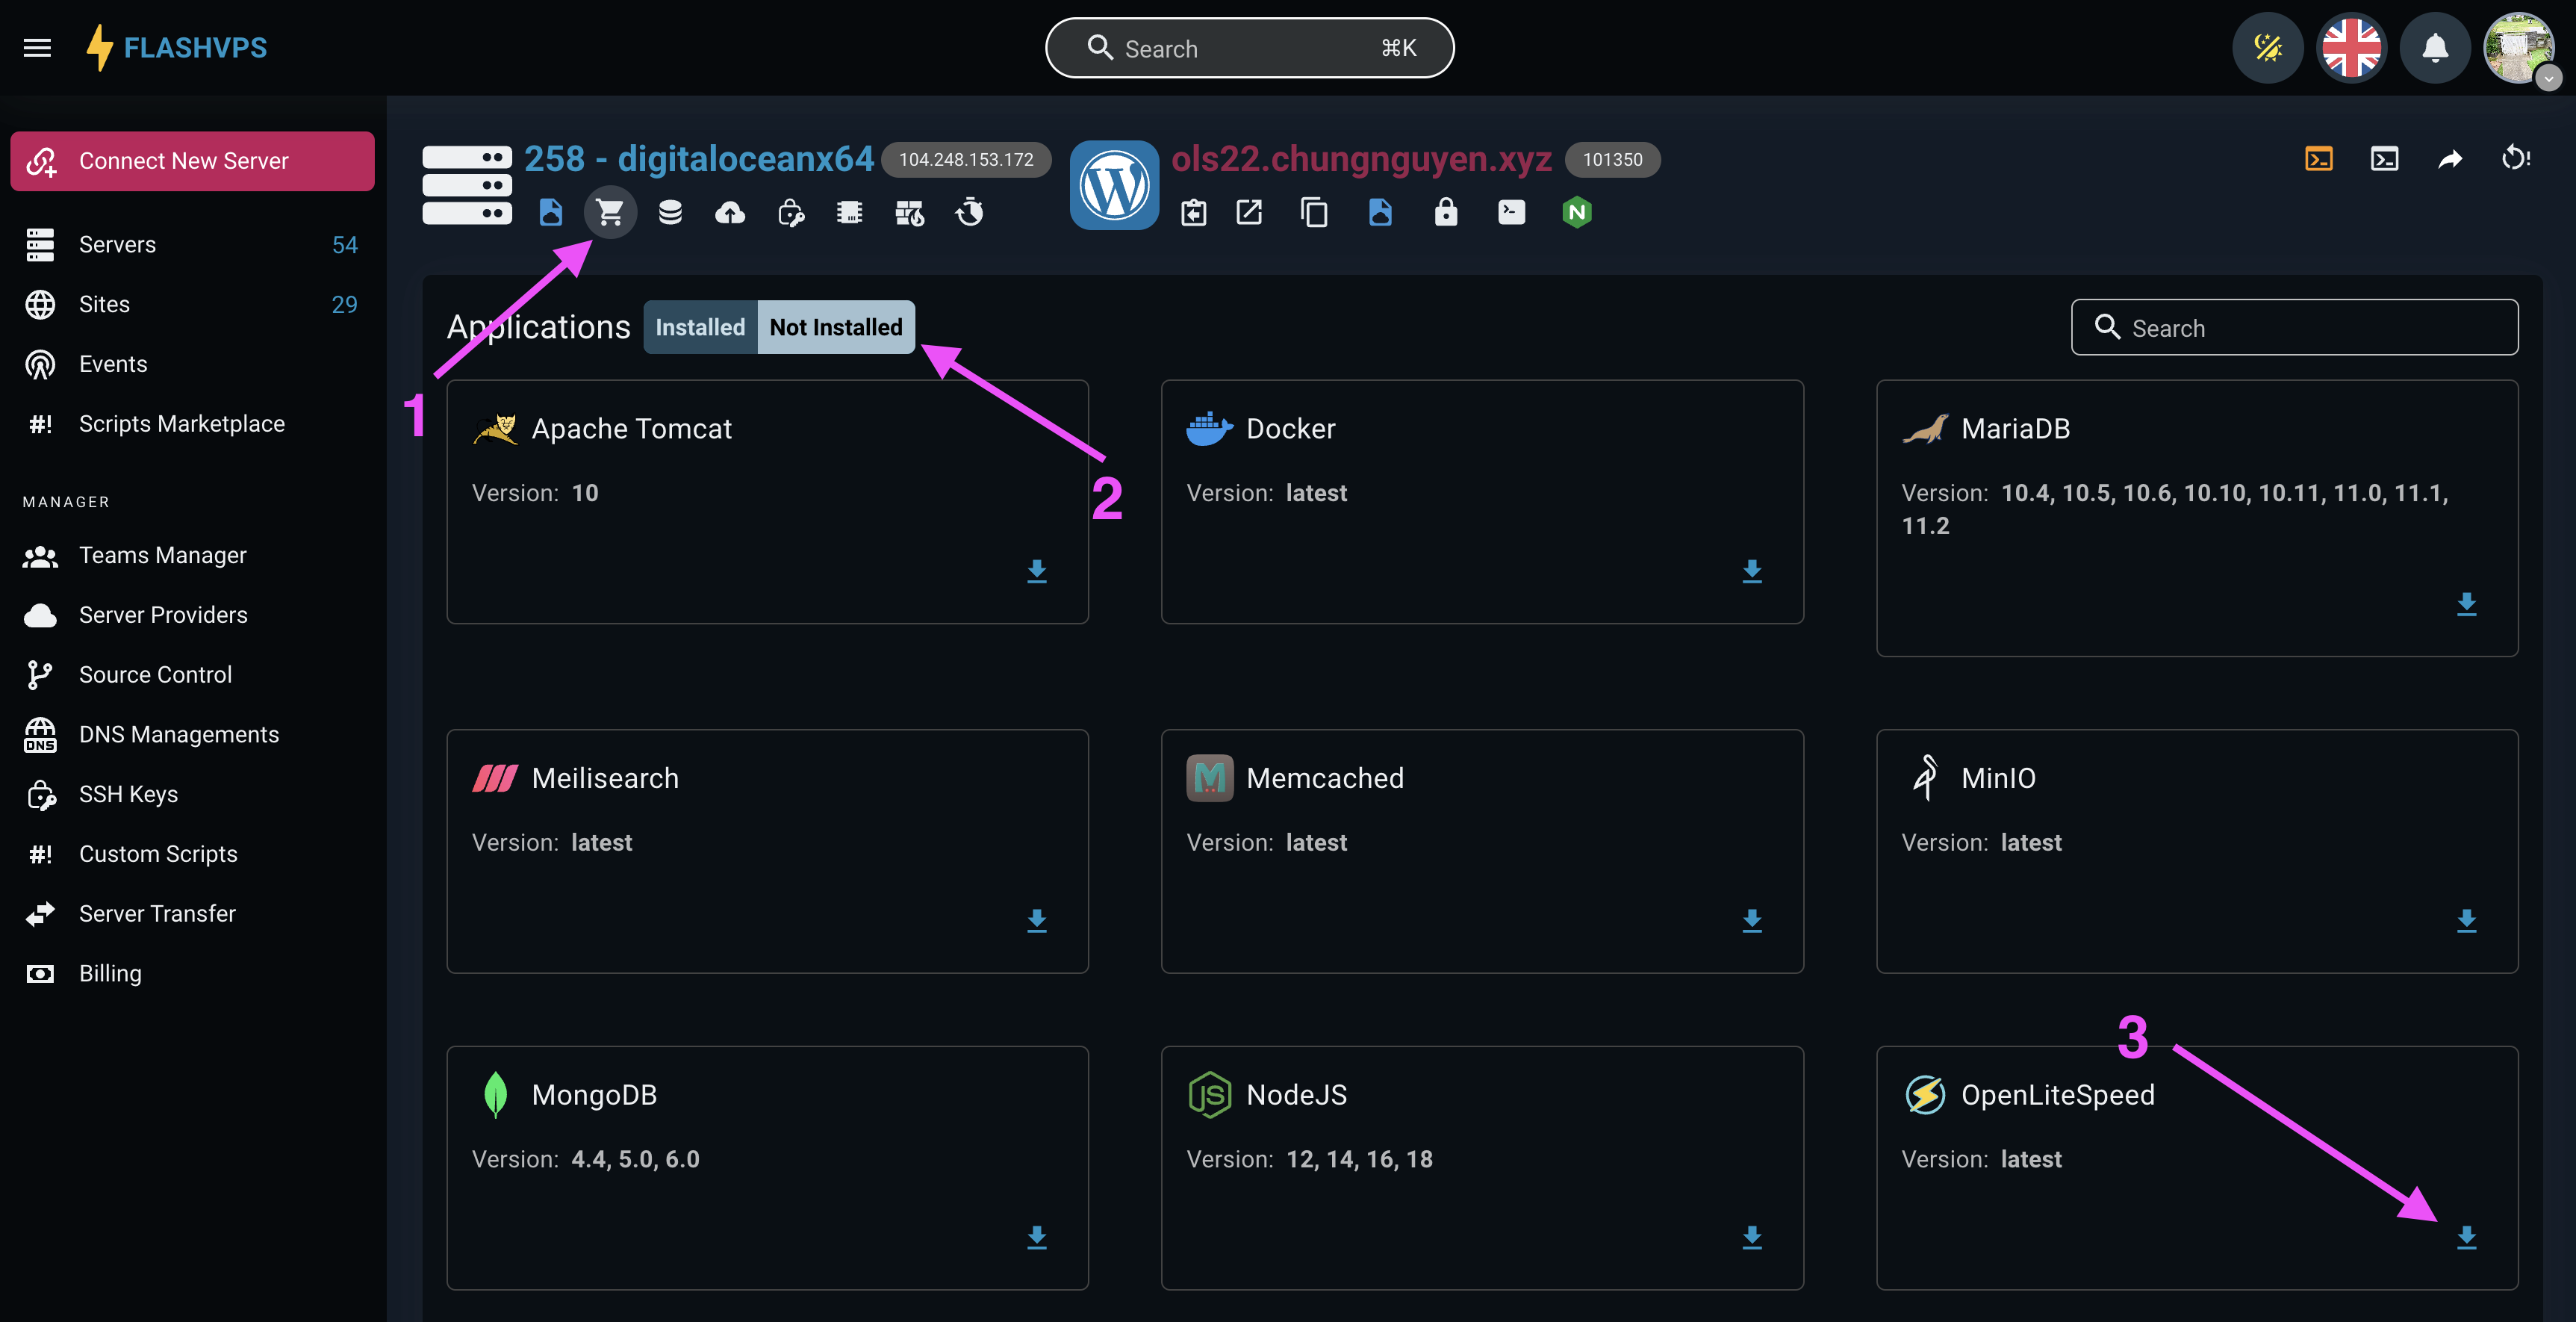
Access OpenLiteSpeed Web Admin
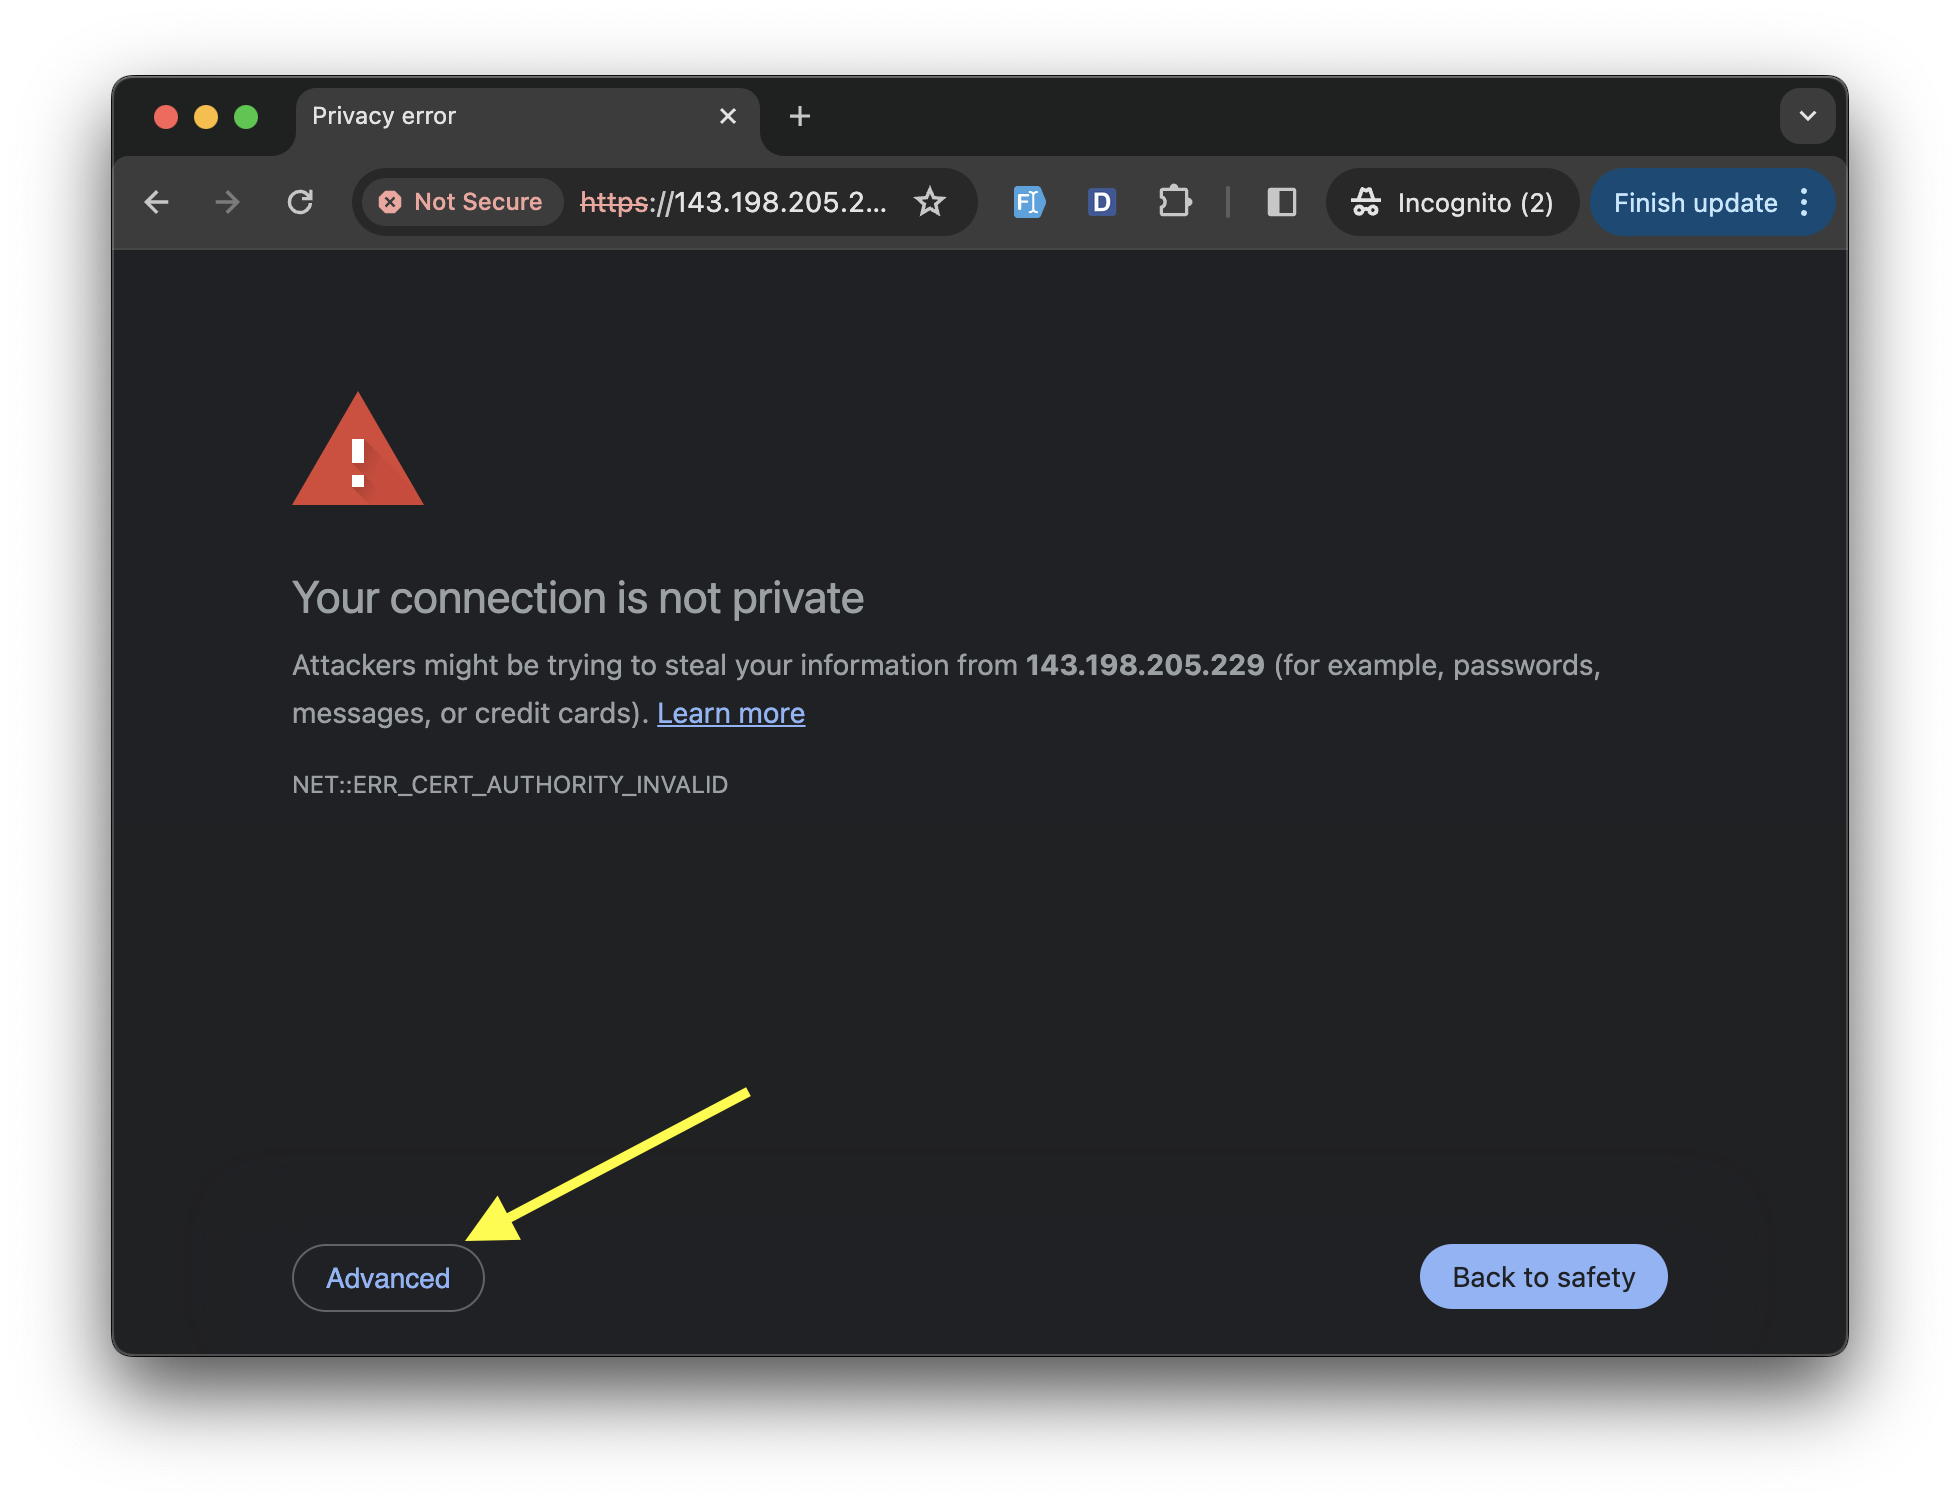
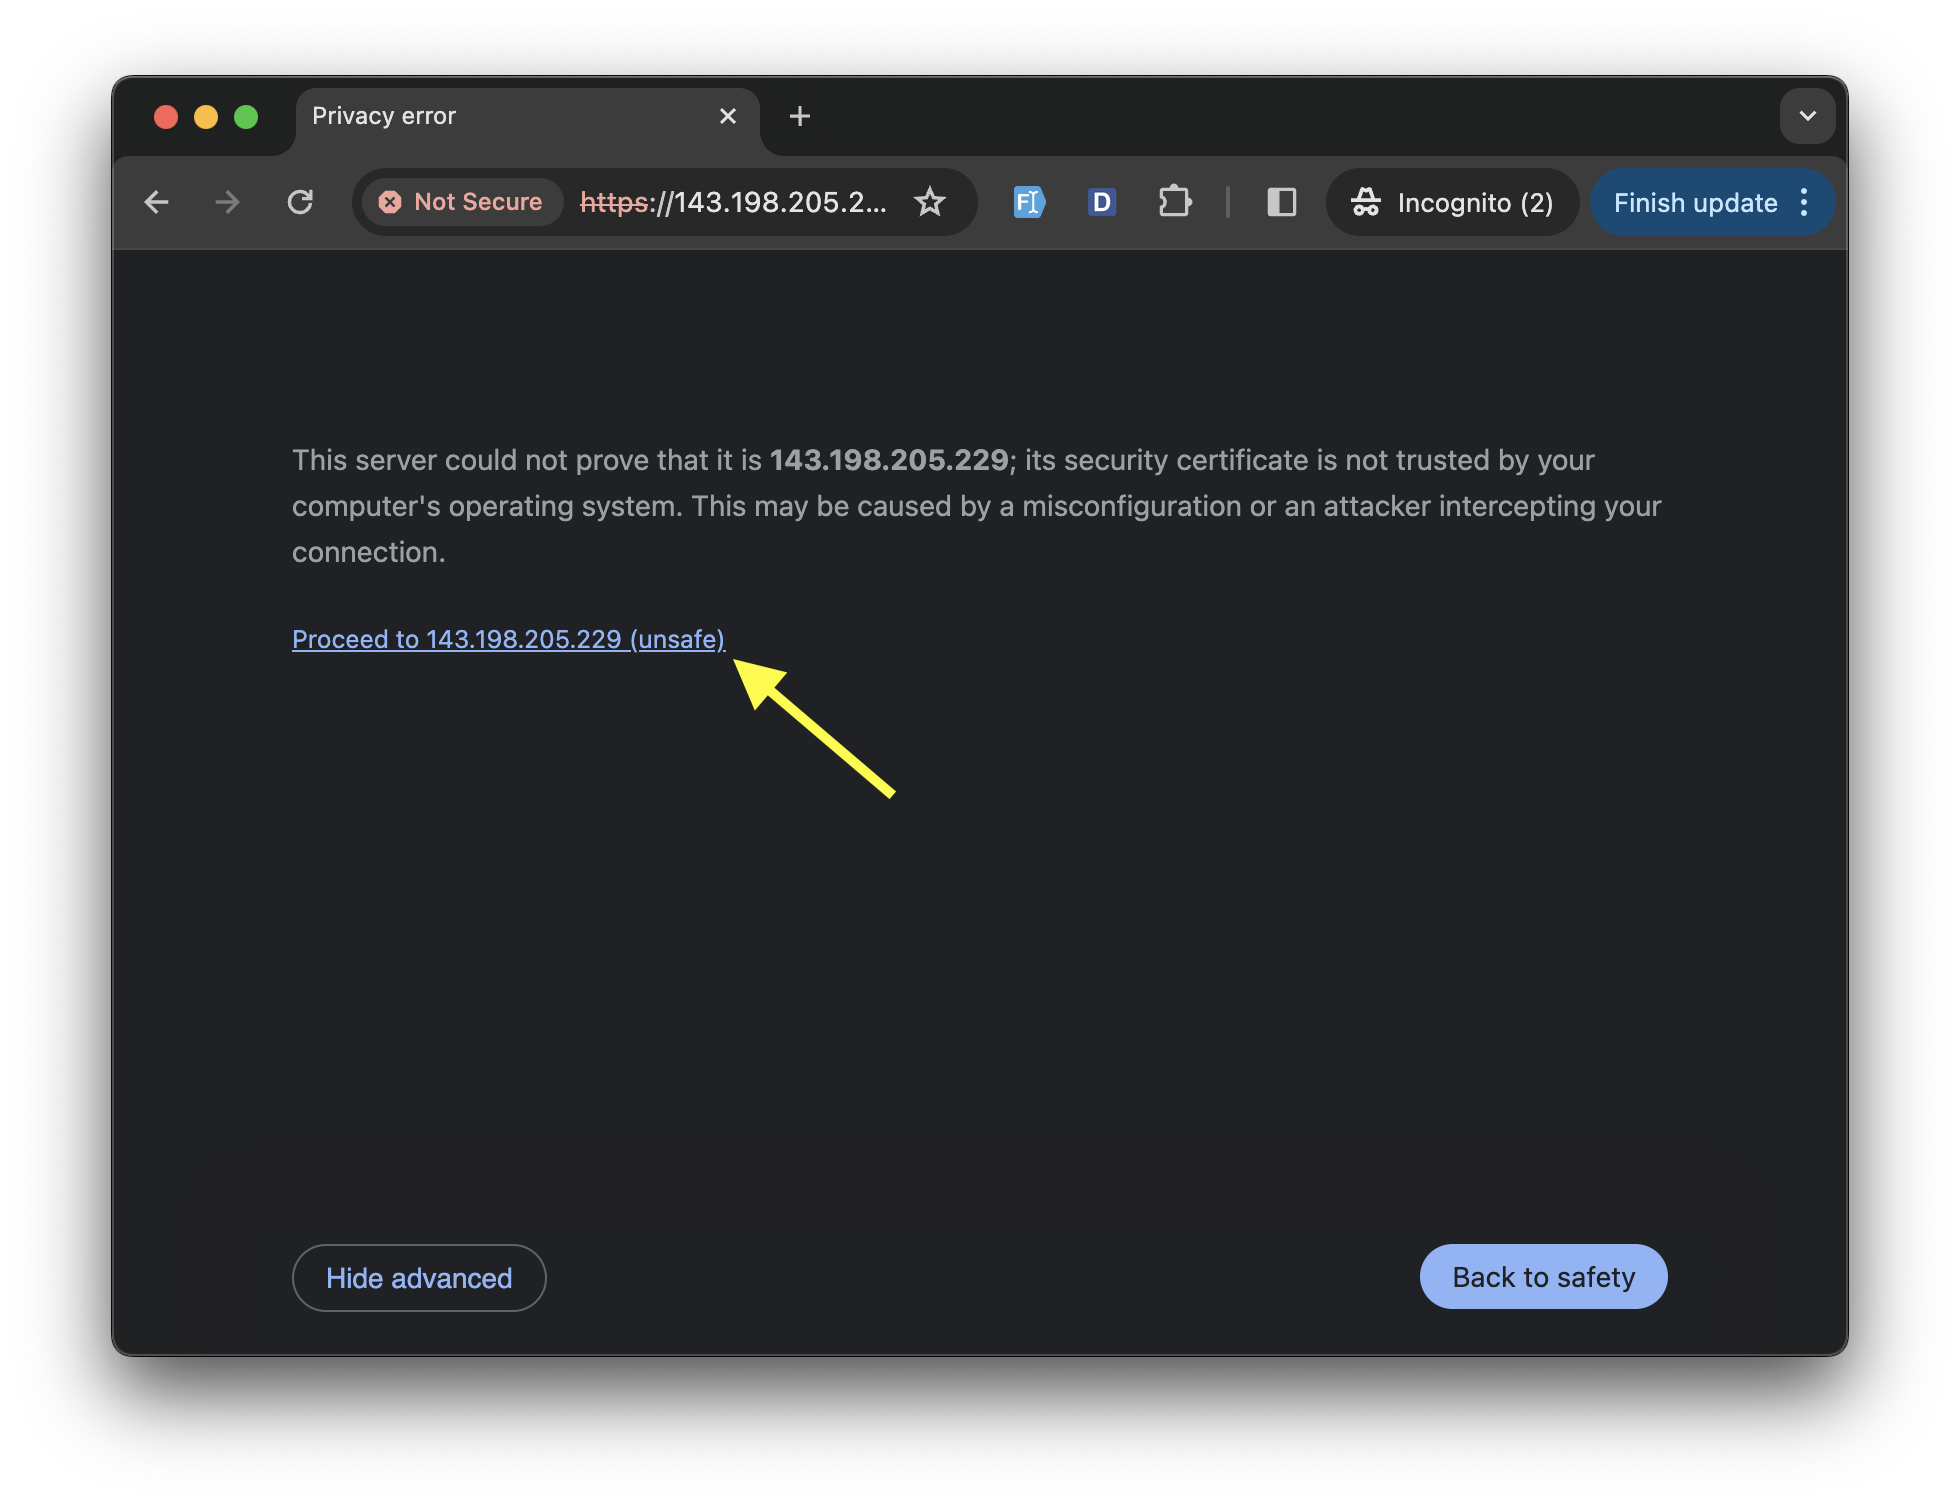
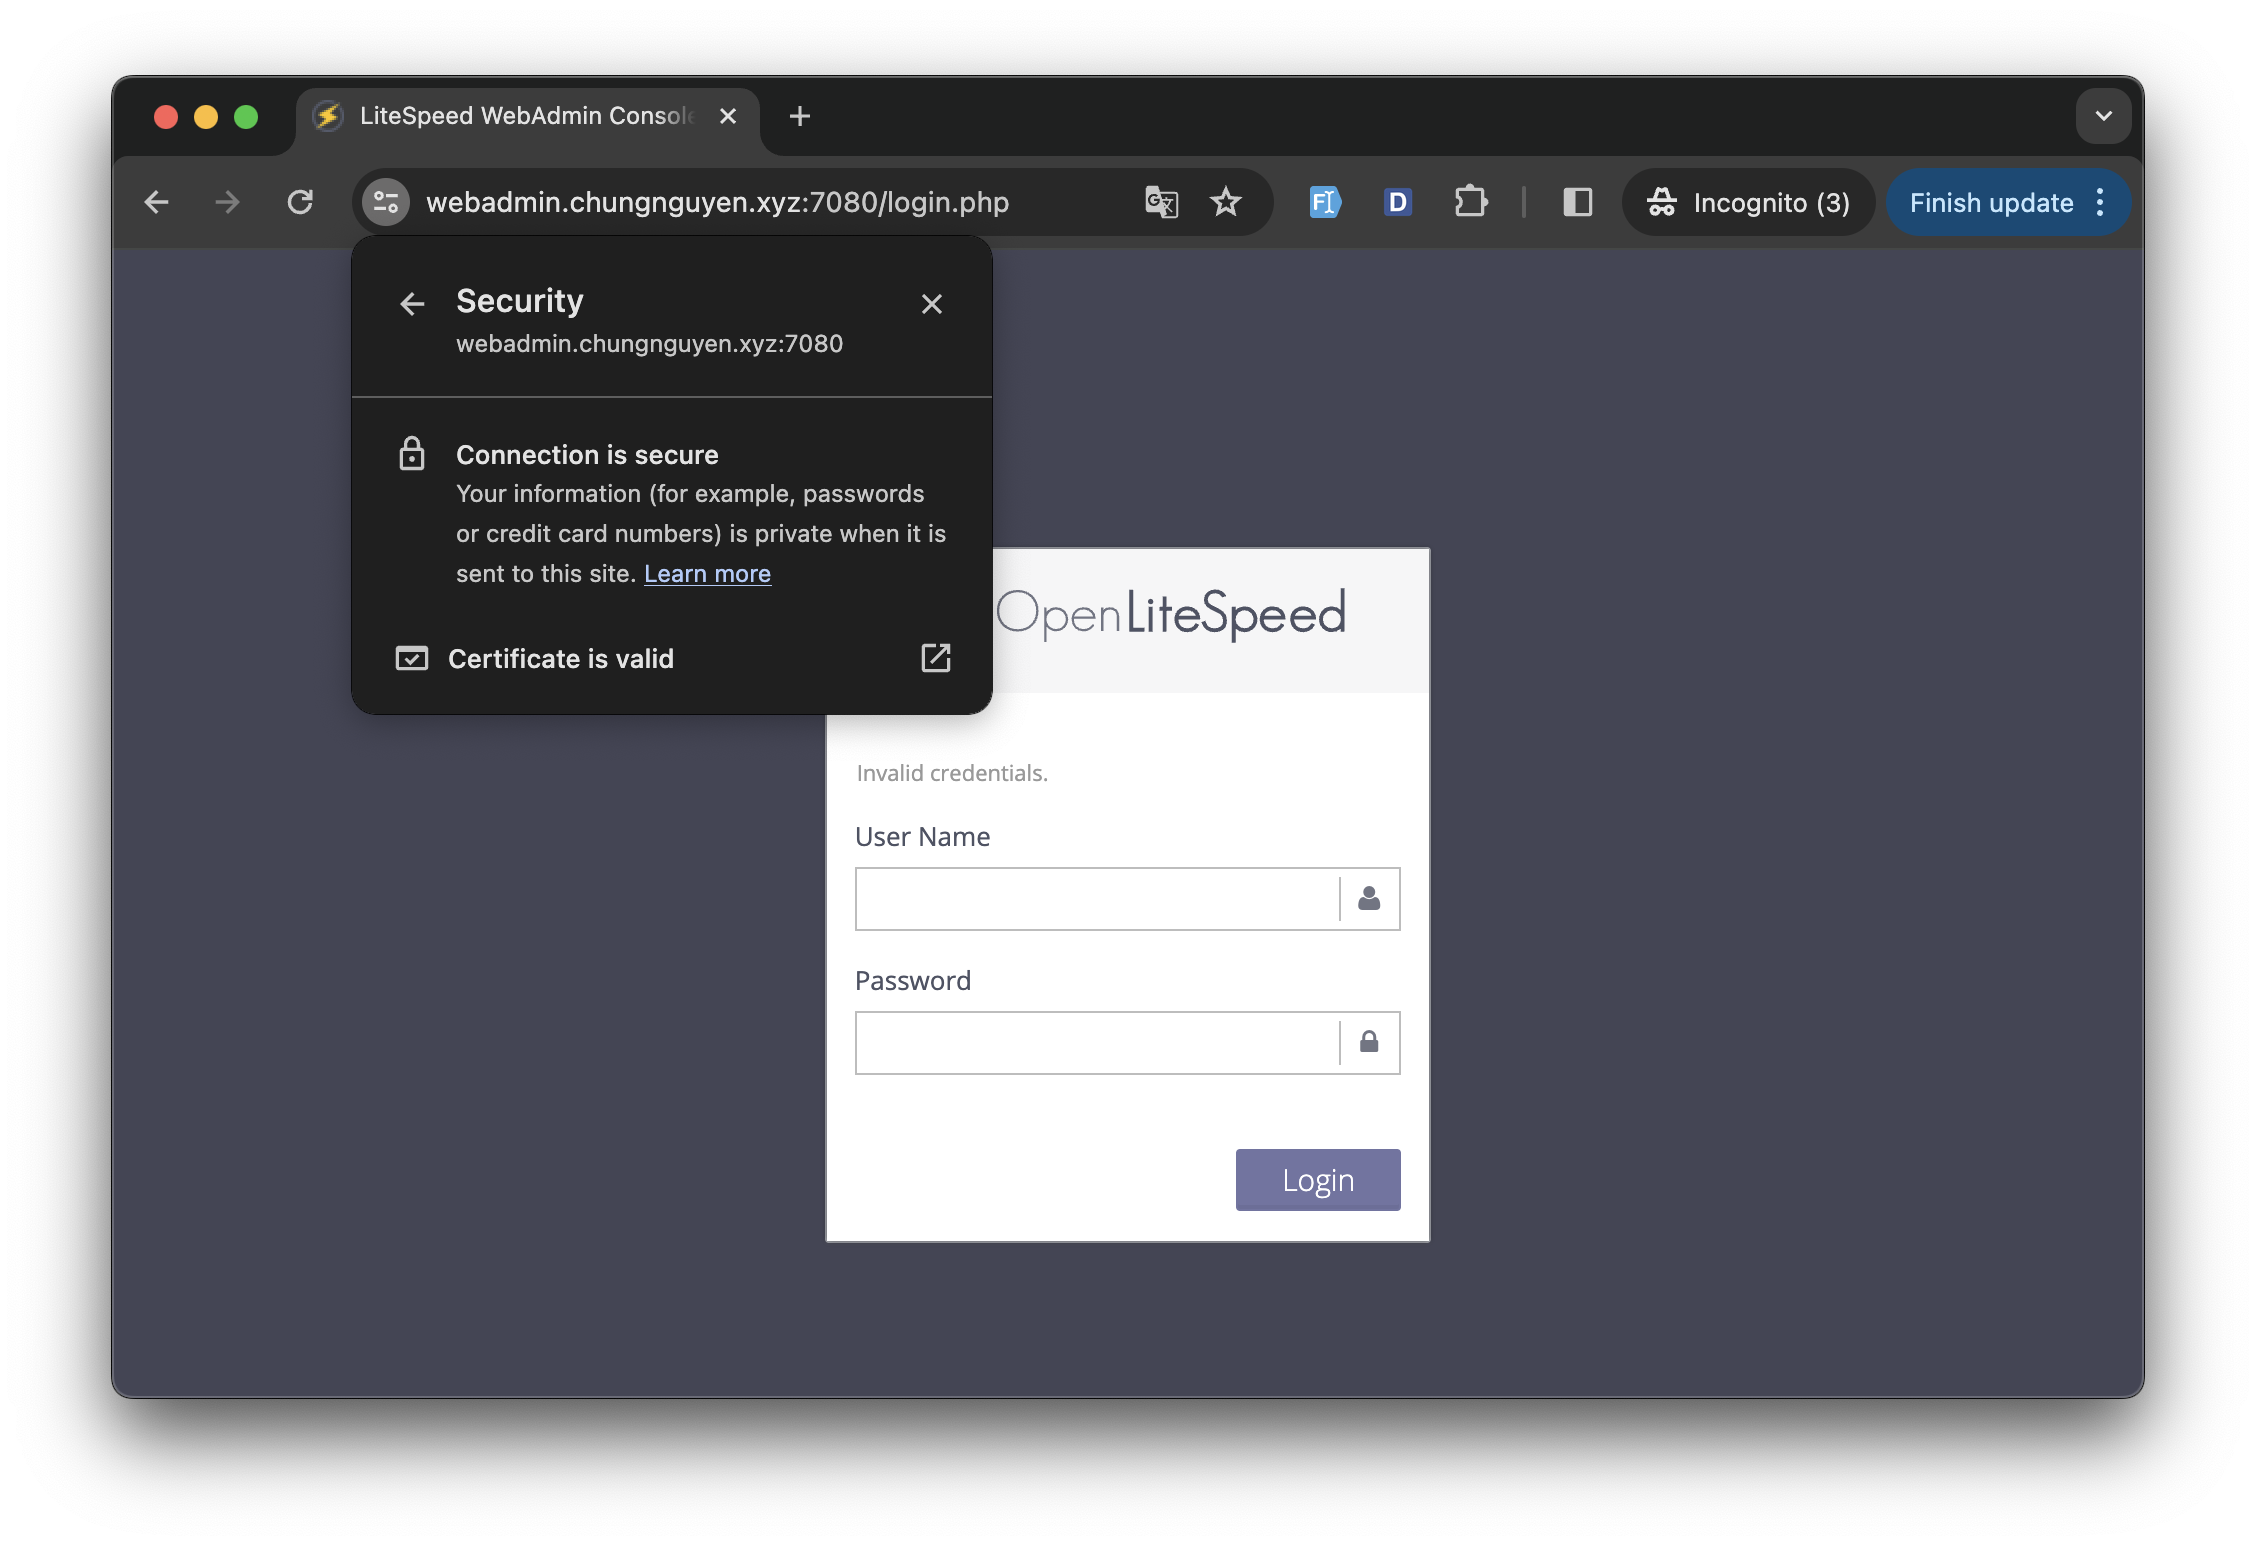
After installing OpenLiteSpeed, you can access OpenLiteSpeed Web Admin: https://ip:port. When accessing the admin website for the first time you will encounter the security warning Your connection is not private NET::ERR_CERT_AUTHORITY_INVALID. This warning is not serious, because by default the OpenLiteSpeed web admin uses a self-signed certificate on the server.
You can choose one of two ways: continue accessing or install an SSL certificate for the web admin
Method 1: Continue accessing on Chrome
Method 1: Continue accessing on Safari
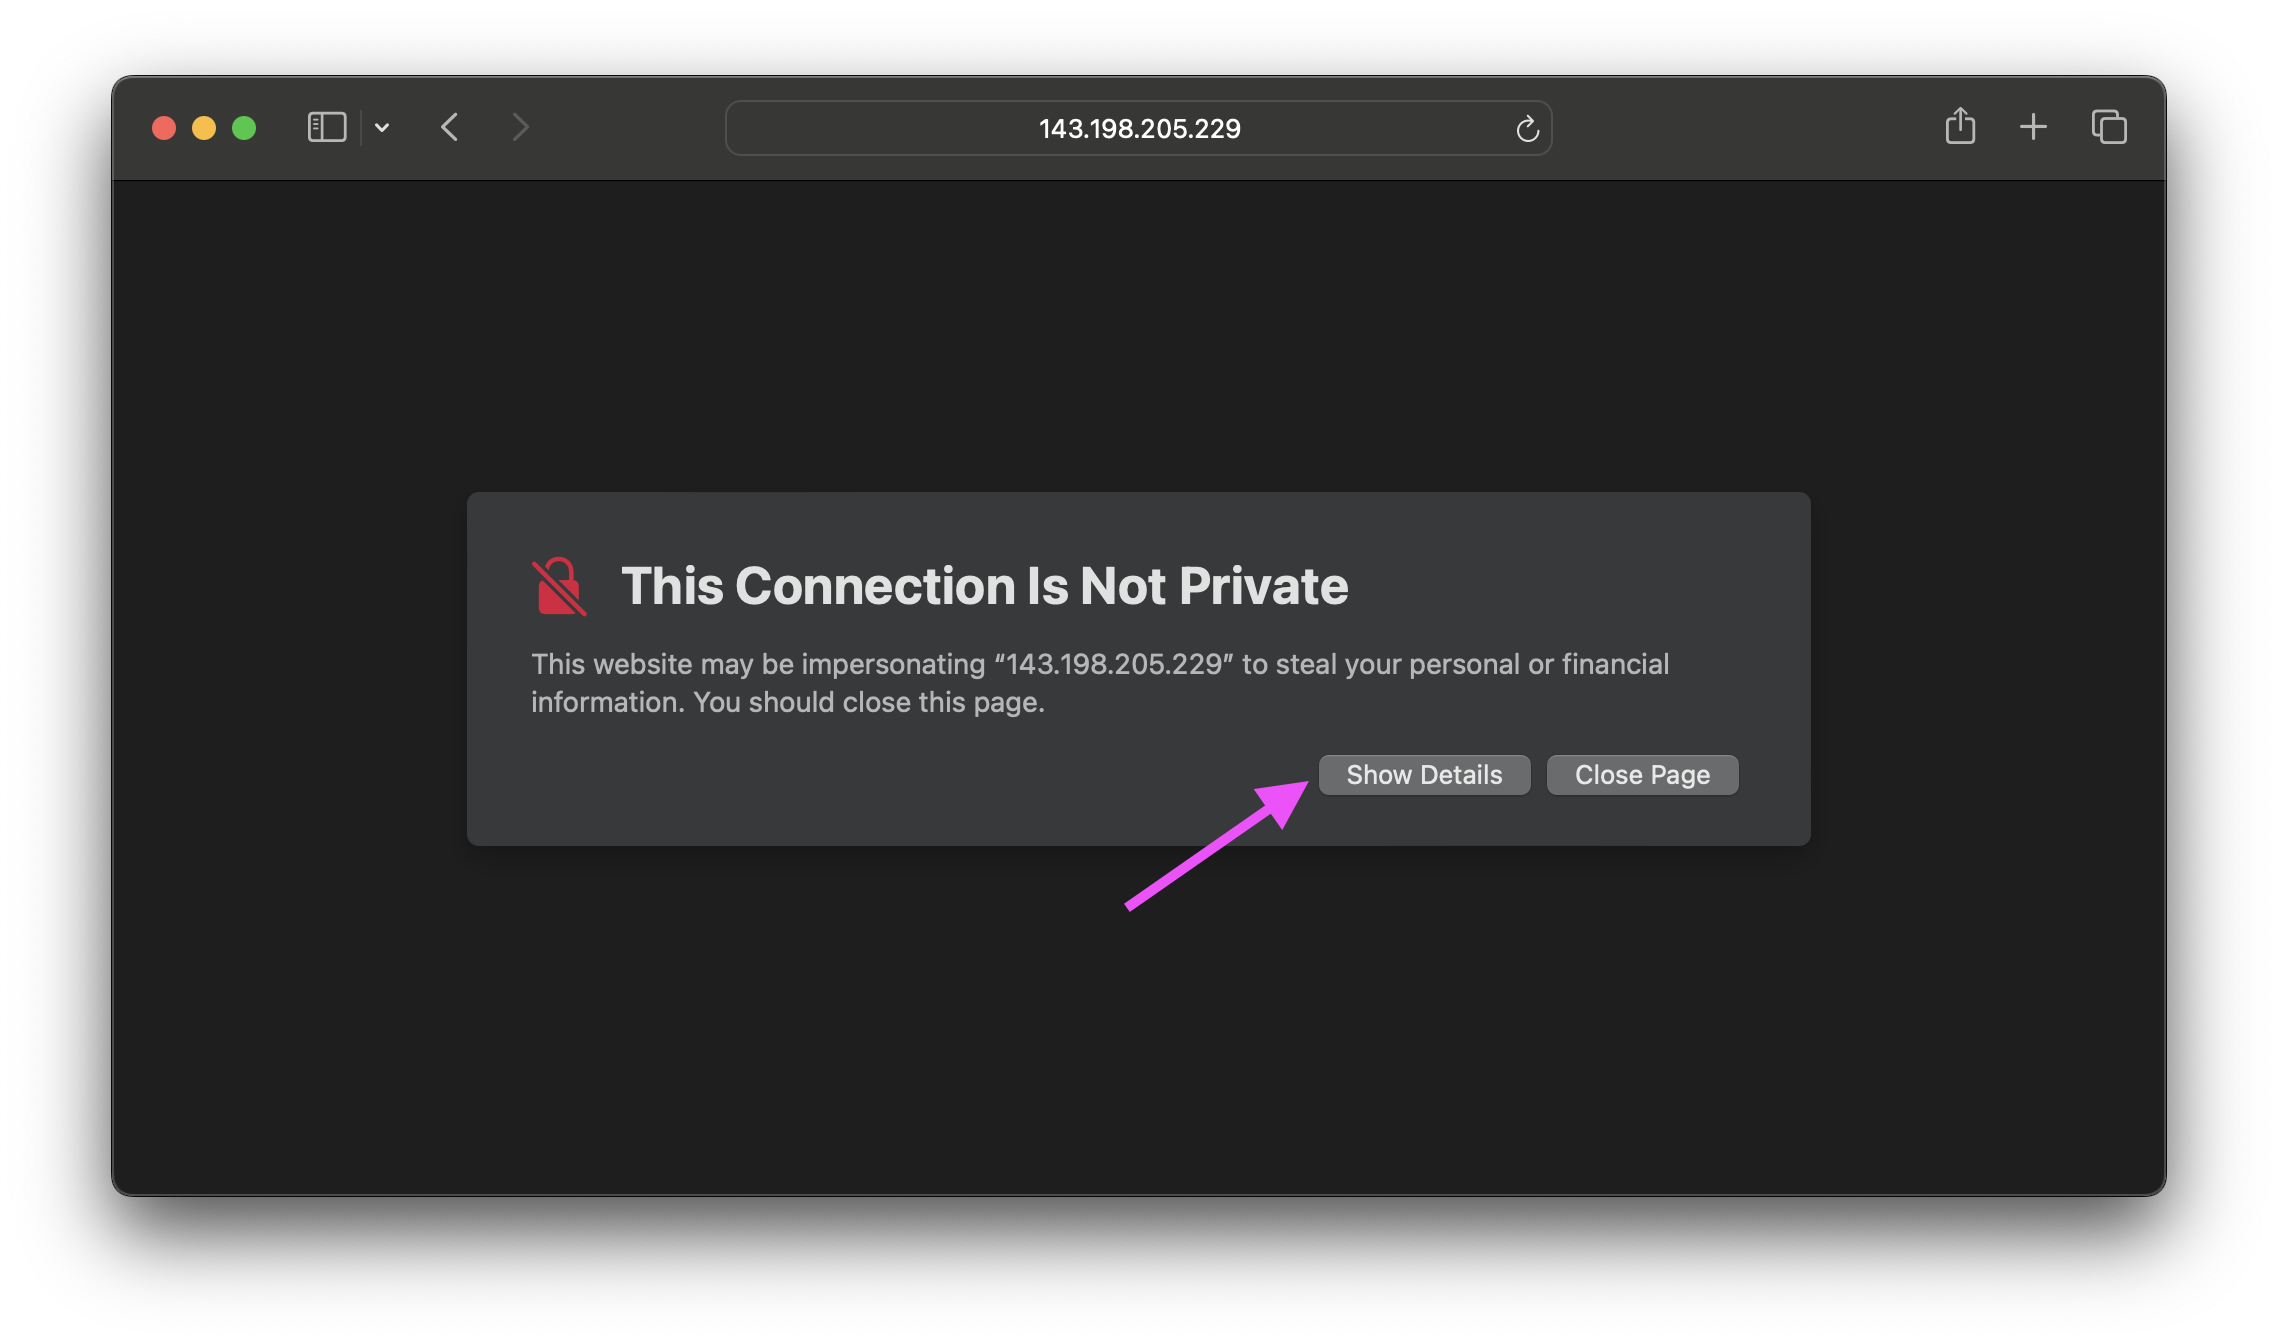
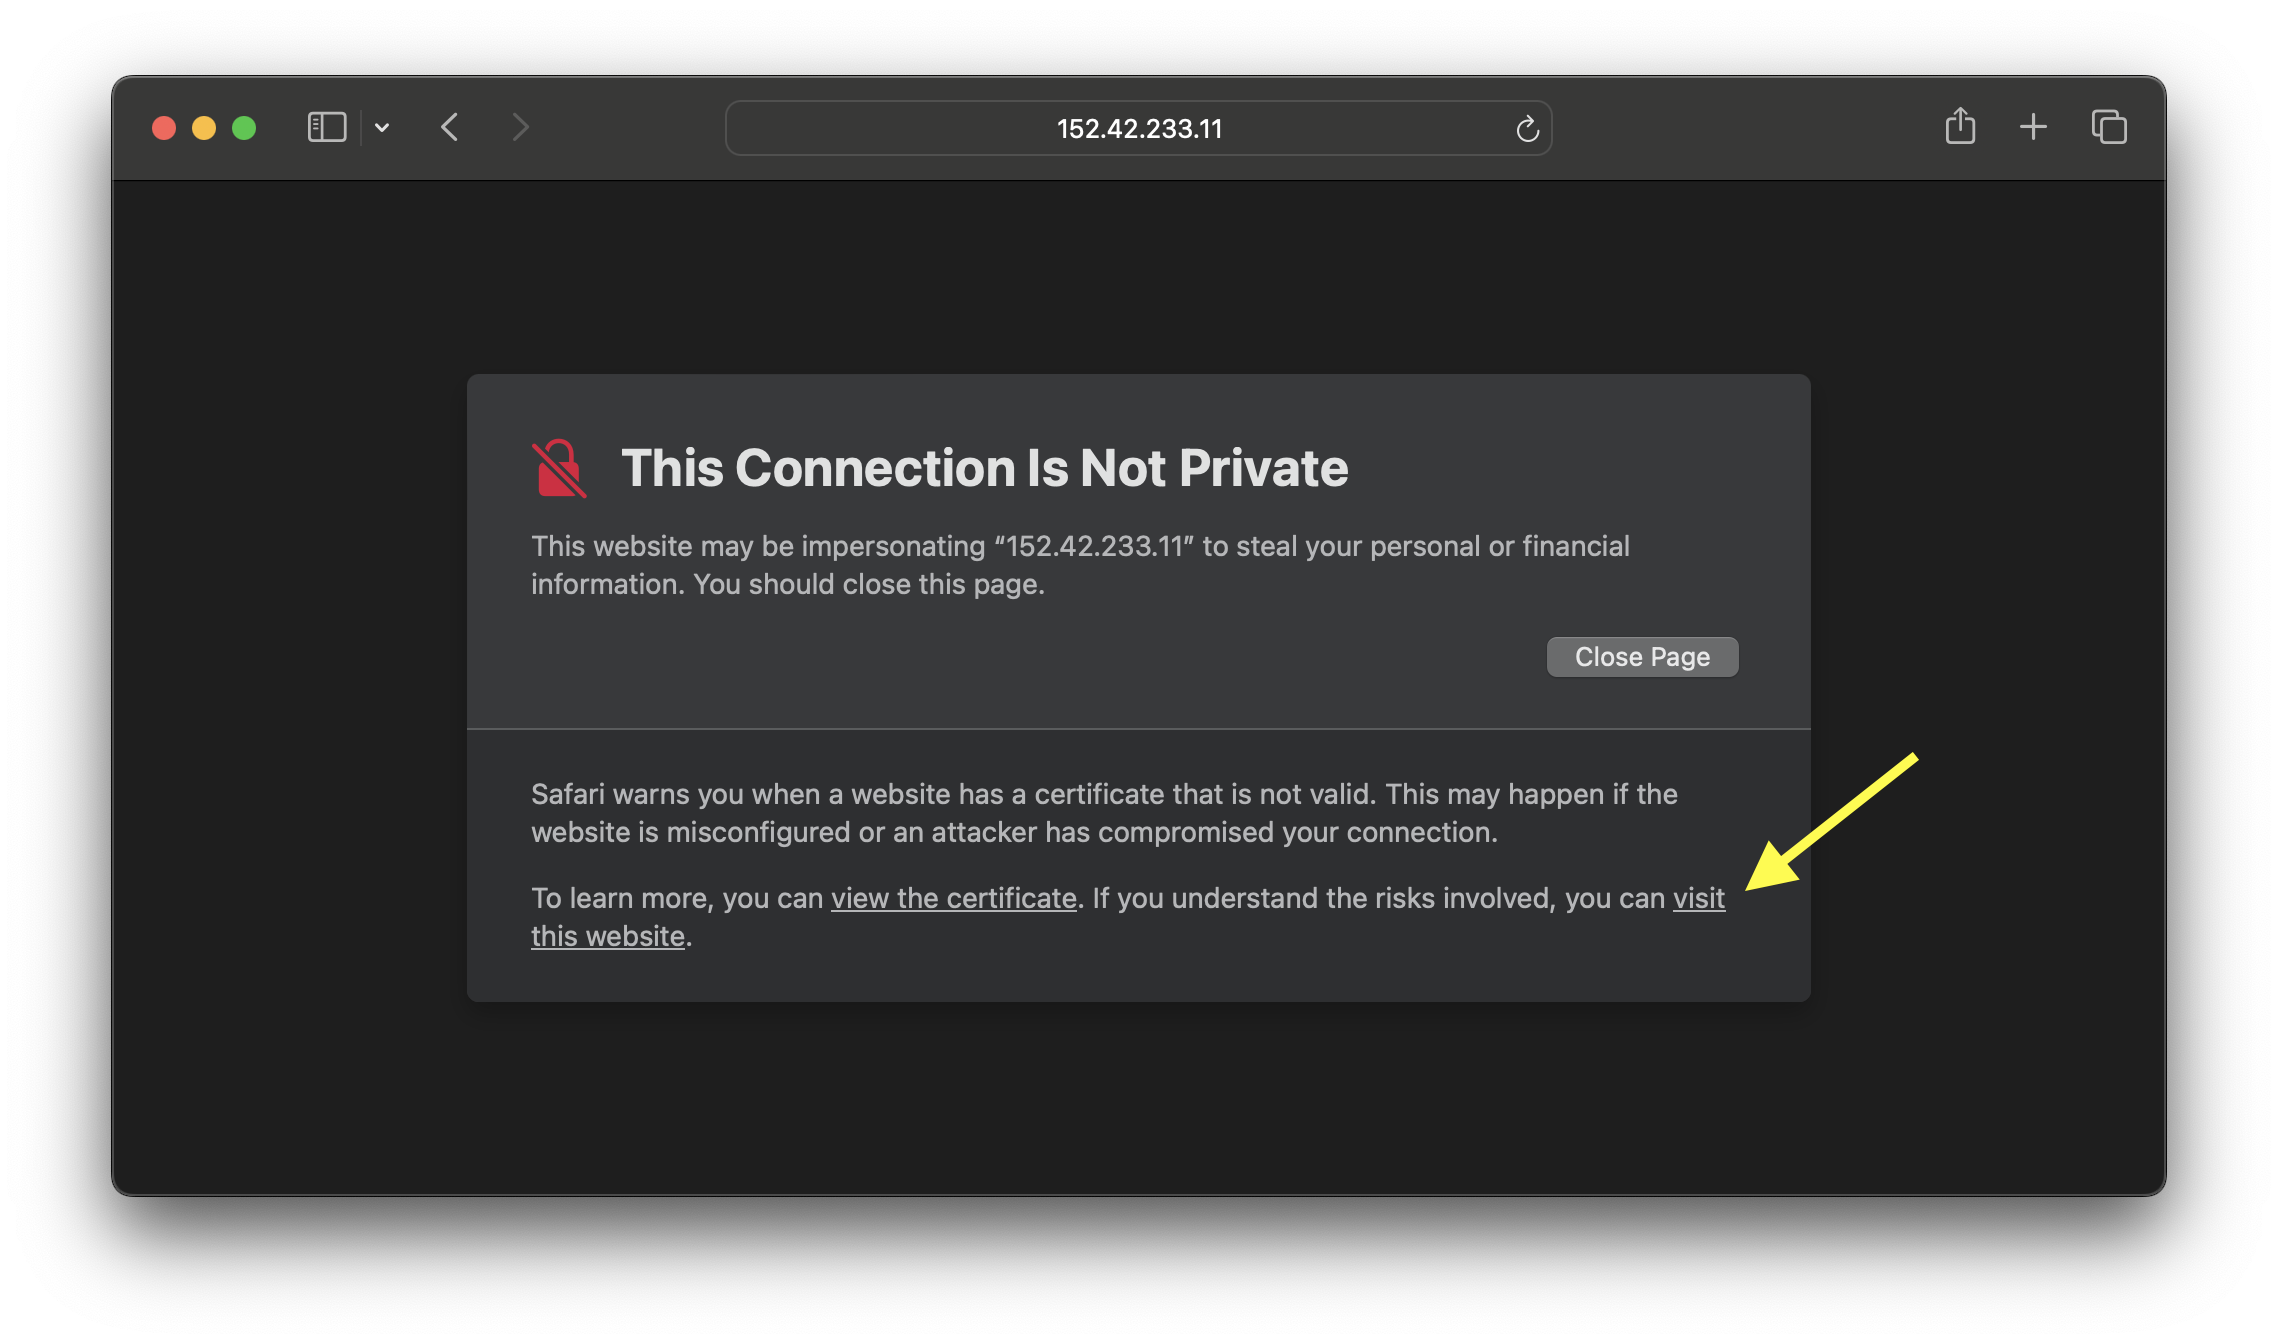
Click Visit Website
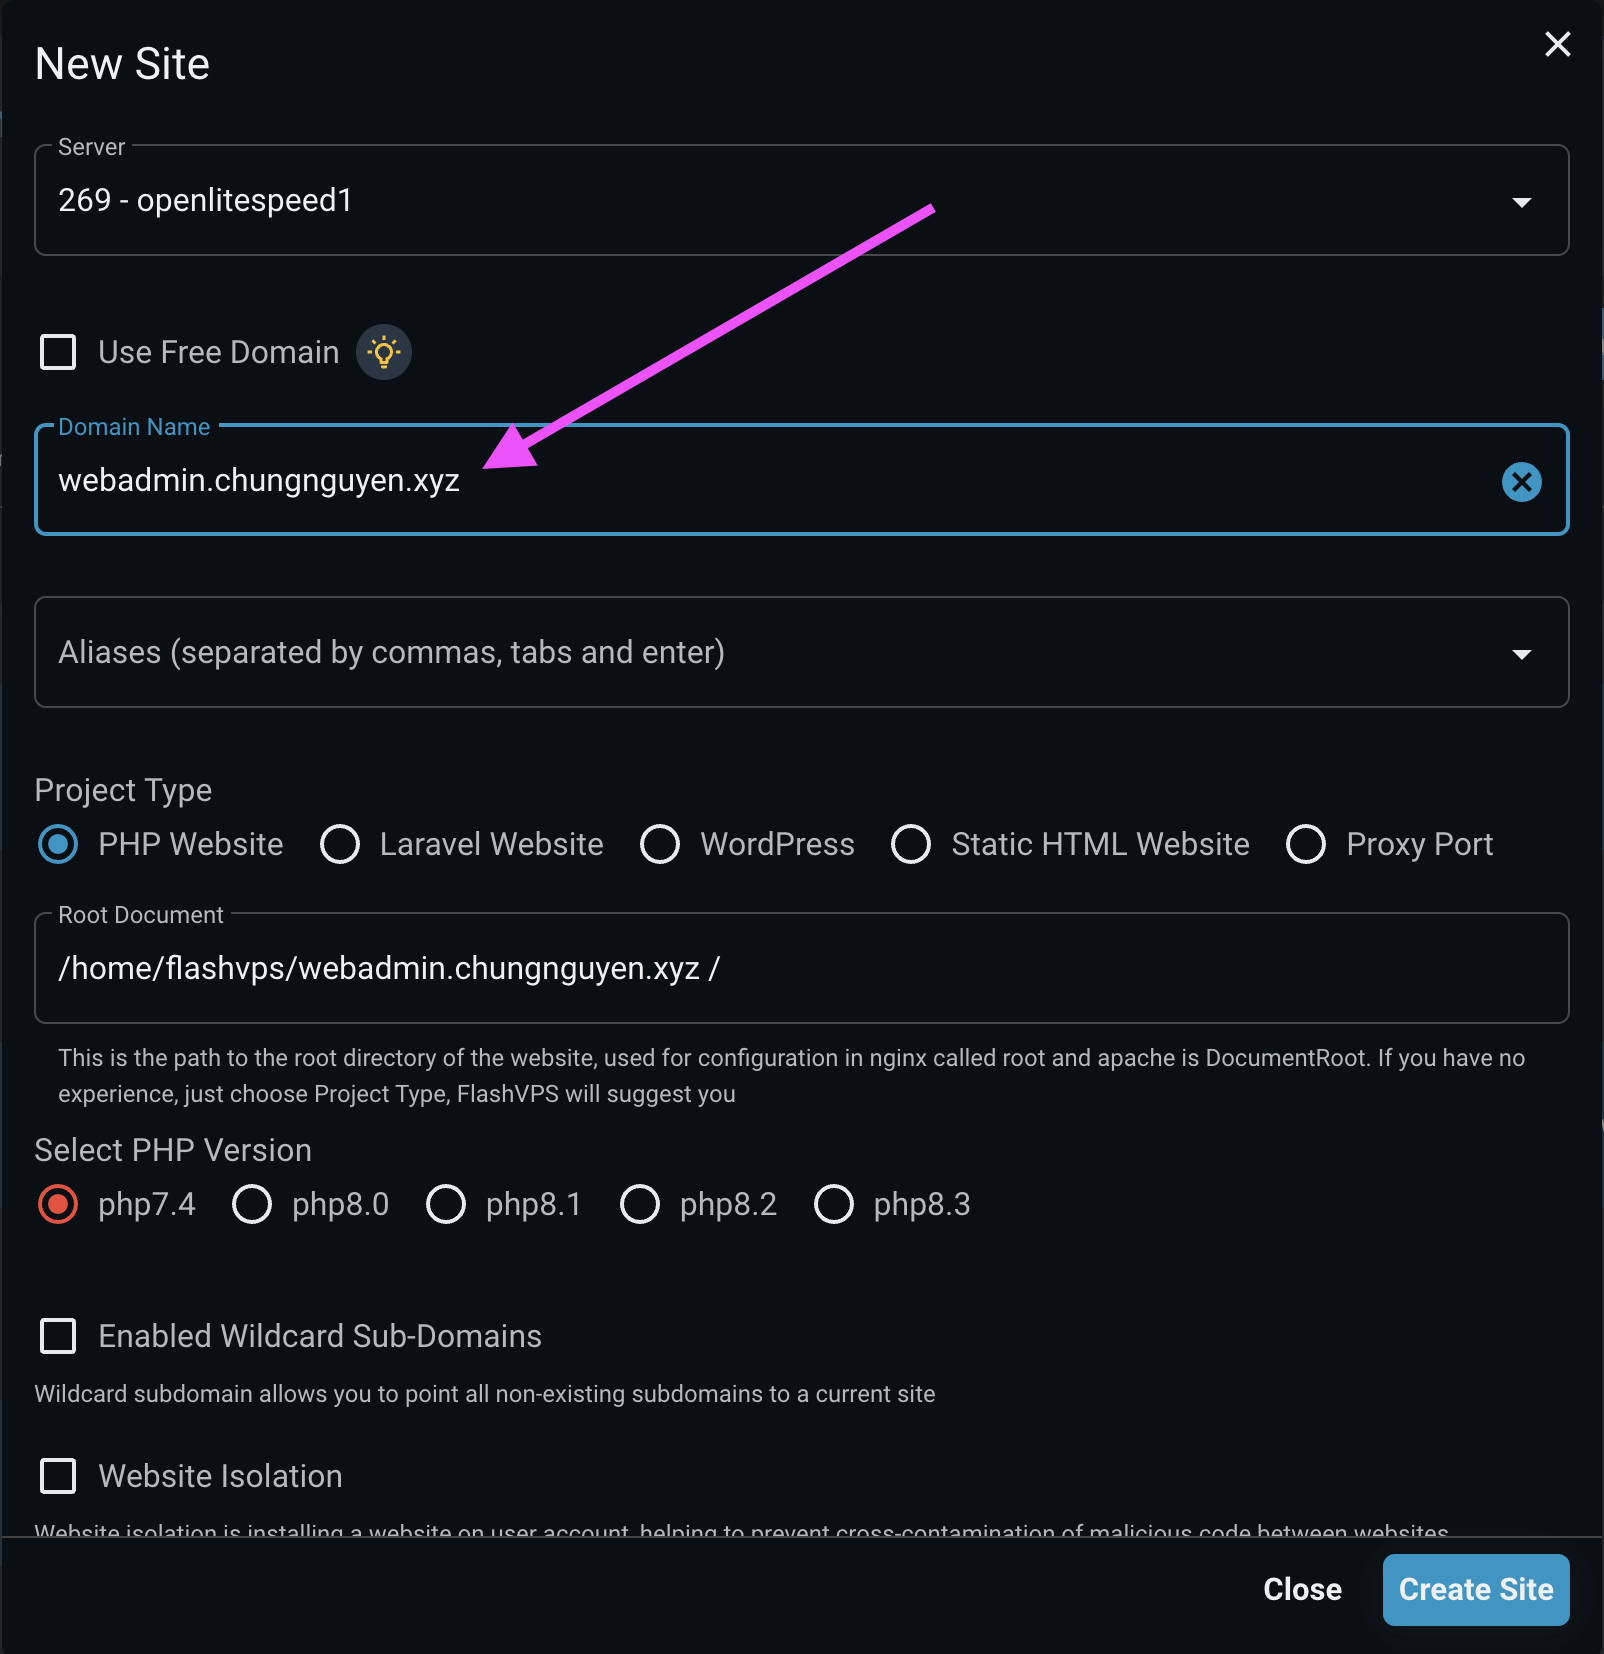
Method 2: Install SSL certificate for web admin
Create a website in
FlashPanel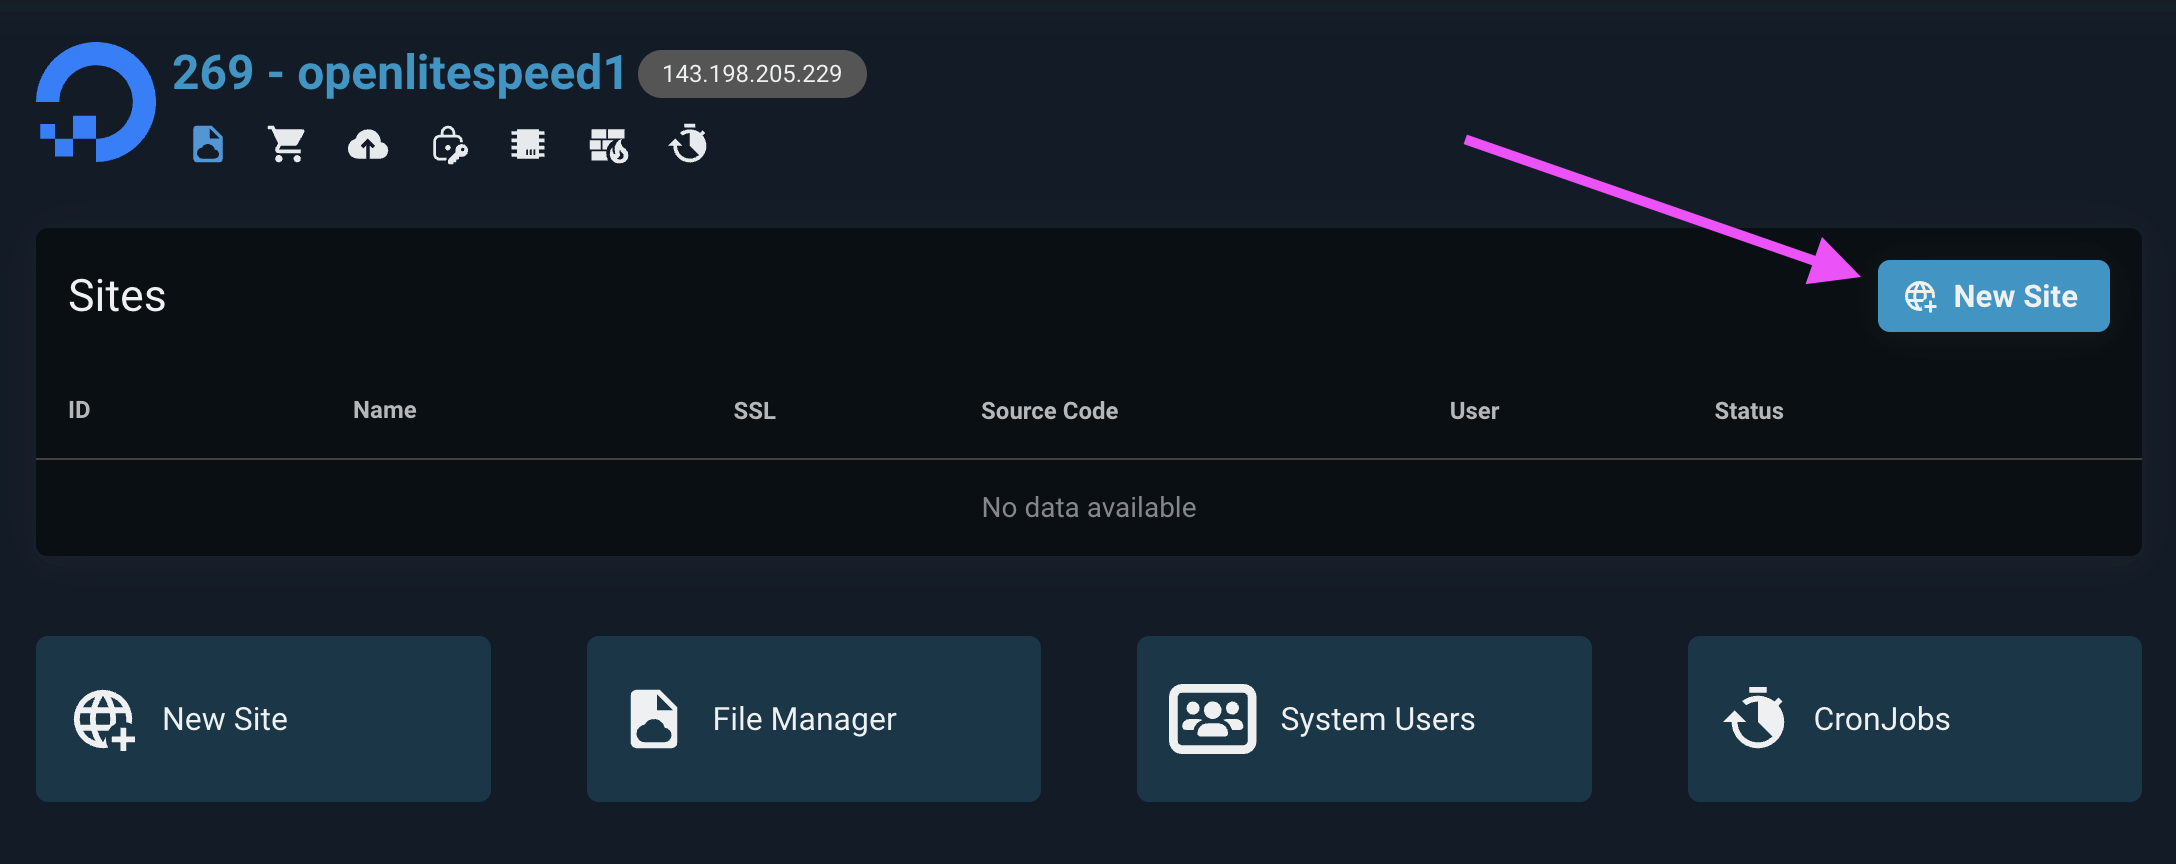
Install SSL for the website you just created, and get the certificate ID in this demo which is
101082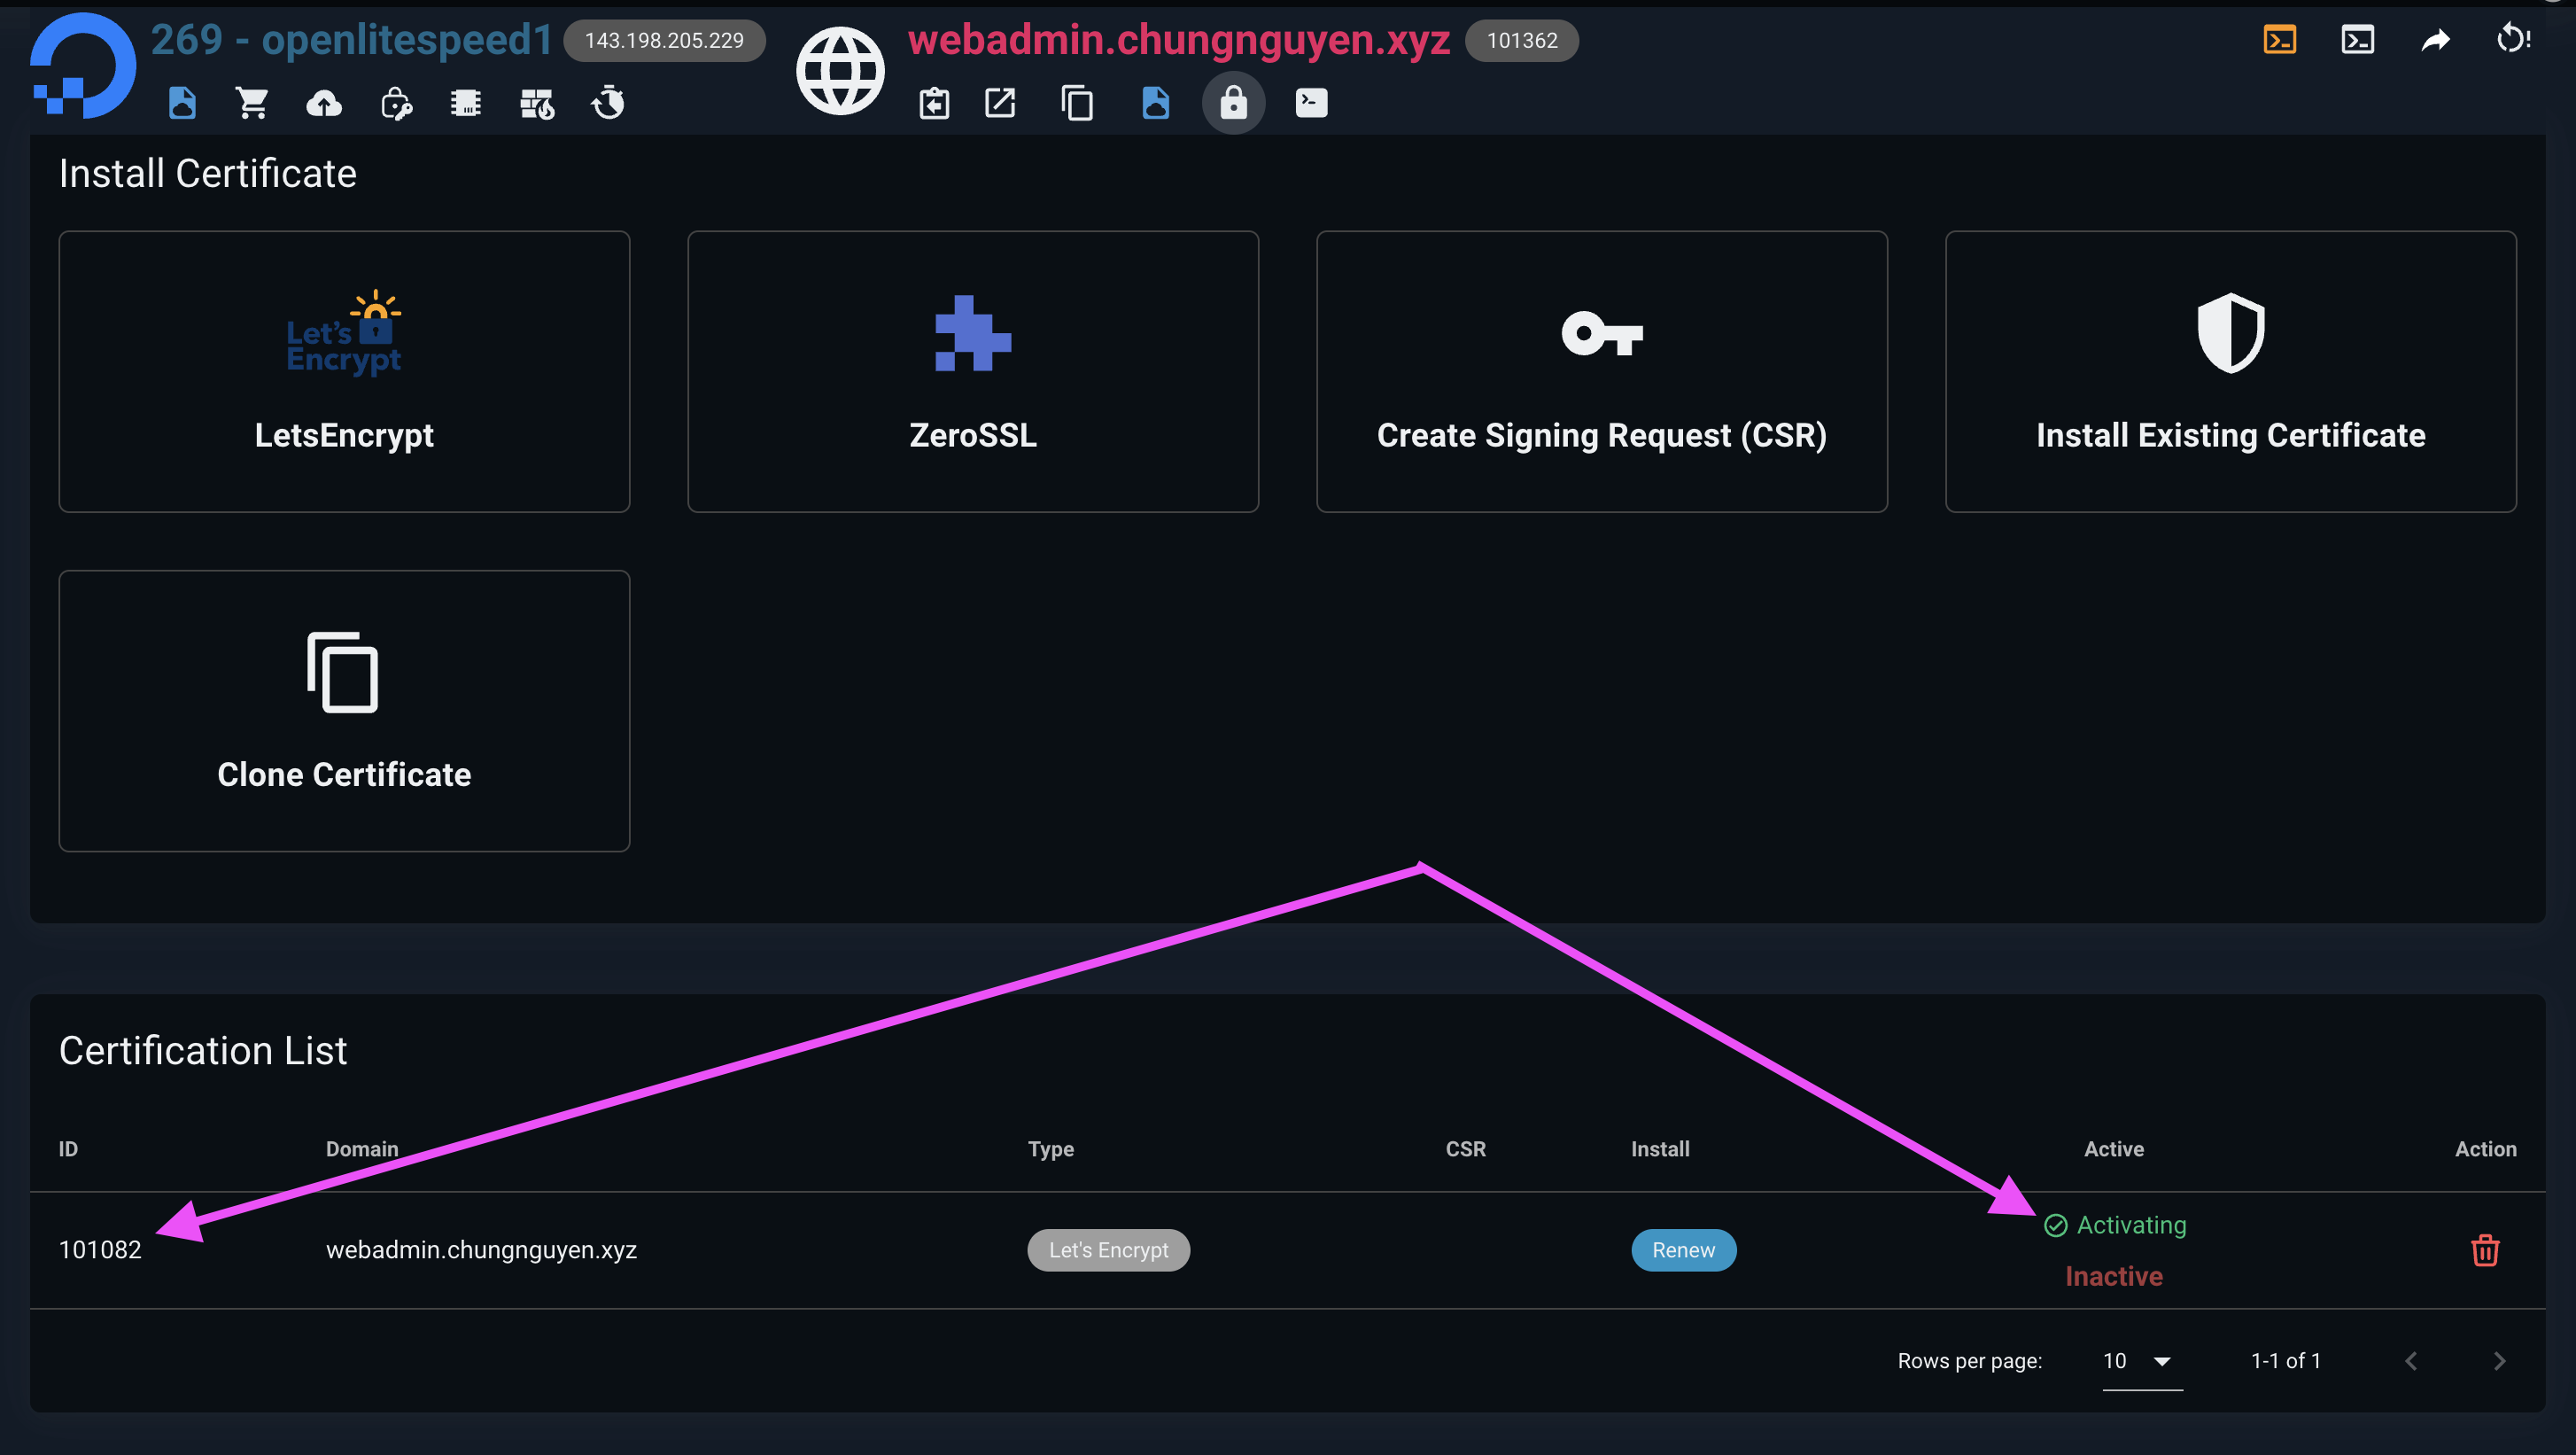
Open terminal and run the command below
bash# change 101082 to the id corresponding to the website's SSL ID # sed -i 's/admin\/conf\/webadmin/conf\/cert\/101082\/server/' /usr/local/lsws/admin/conf/admin_config.conf sudo /usr/local/lsws/bin/lshttpd -t sudo systemctl restart lswsAccess web admin using domain:port (default 7080)
LiteSpeed Cache
INFO
LiteSpeed Cache (also known as LSCache) is built from the ground up and integrated into all LiteSpeed server products. It can:
- significantly speeds up dynamic website content (like PHP pages)
- provides more efficient handling of static content (like images)
- reduce server load
LiteSpeed Cache for WordPress
- Install the plugin directly from the Plugin > Add New screen
- Search for
LiteSpeed Cachein the search box. Click Install Now and Activate the plugin.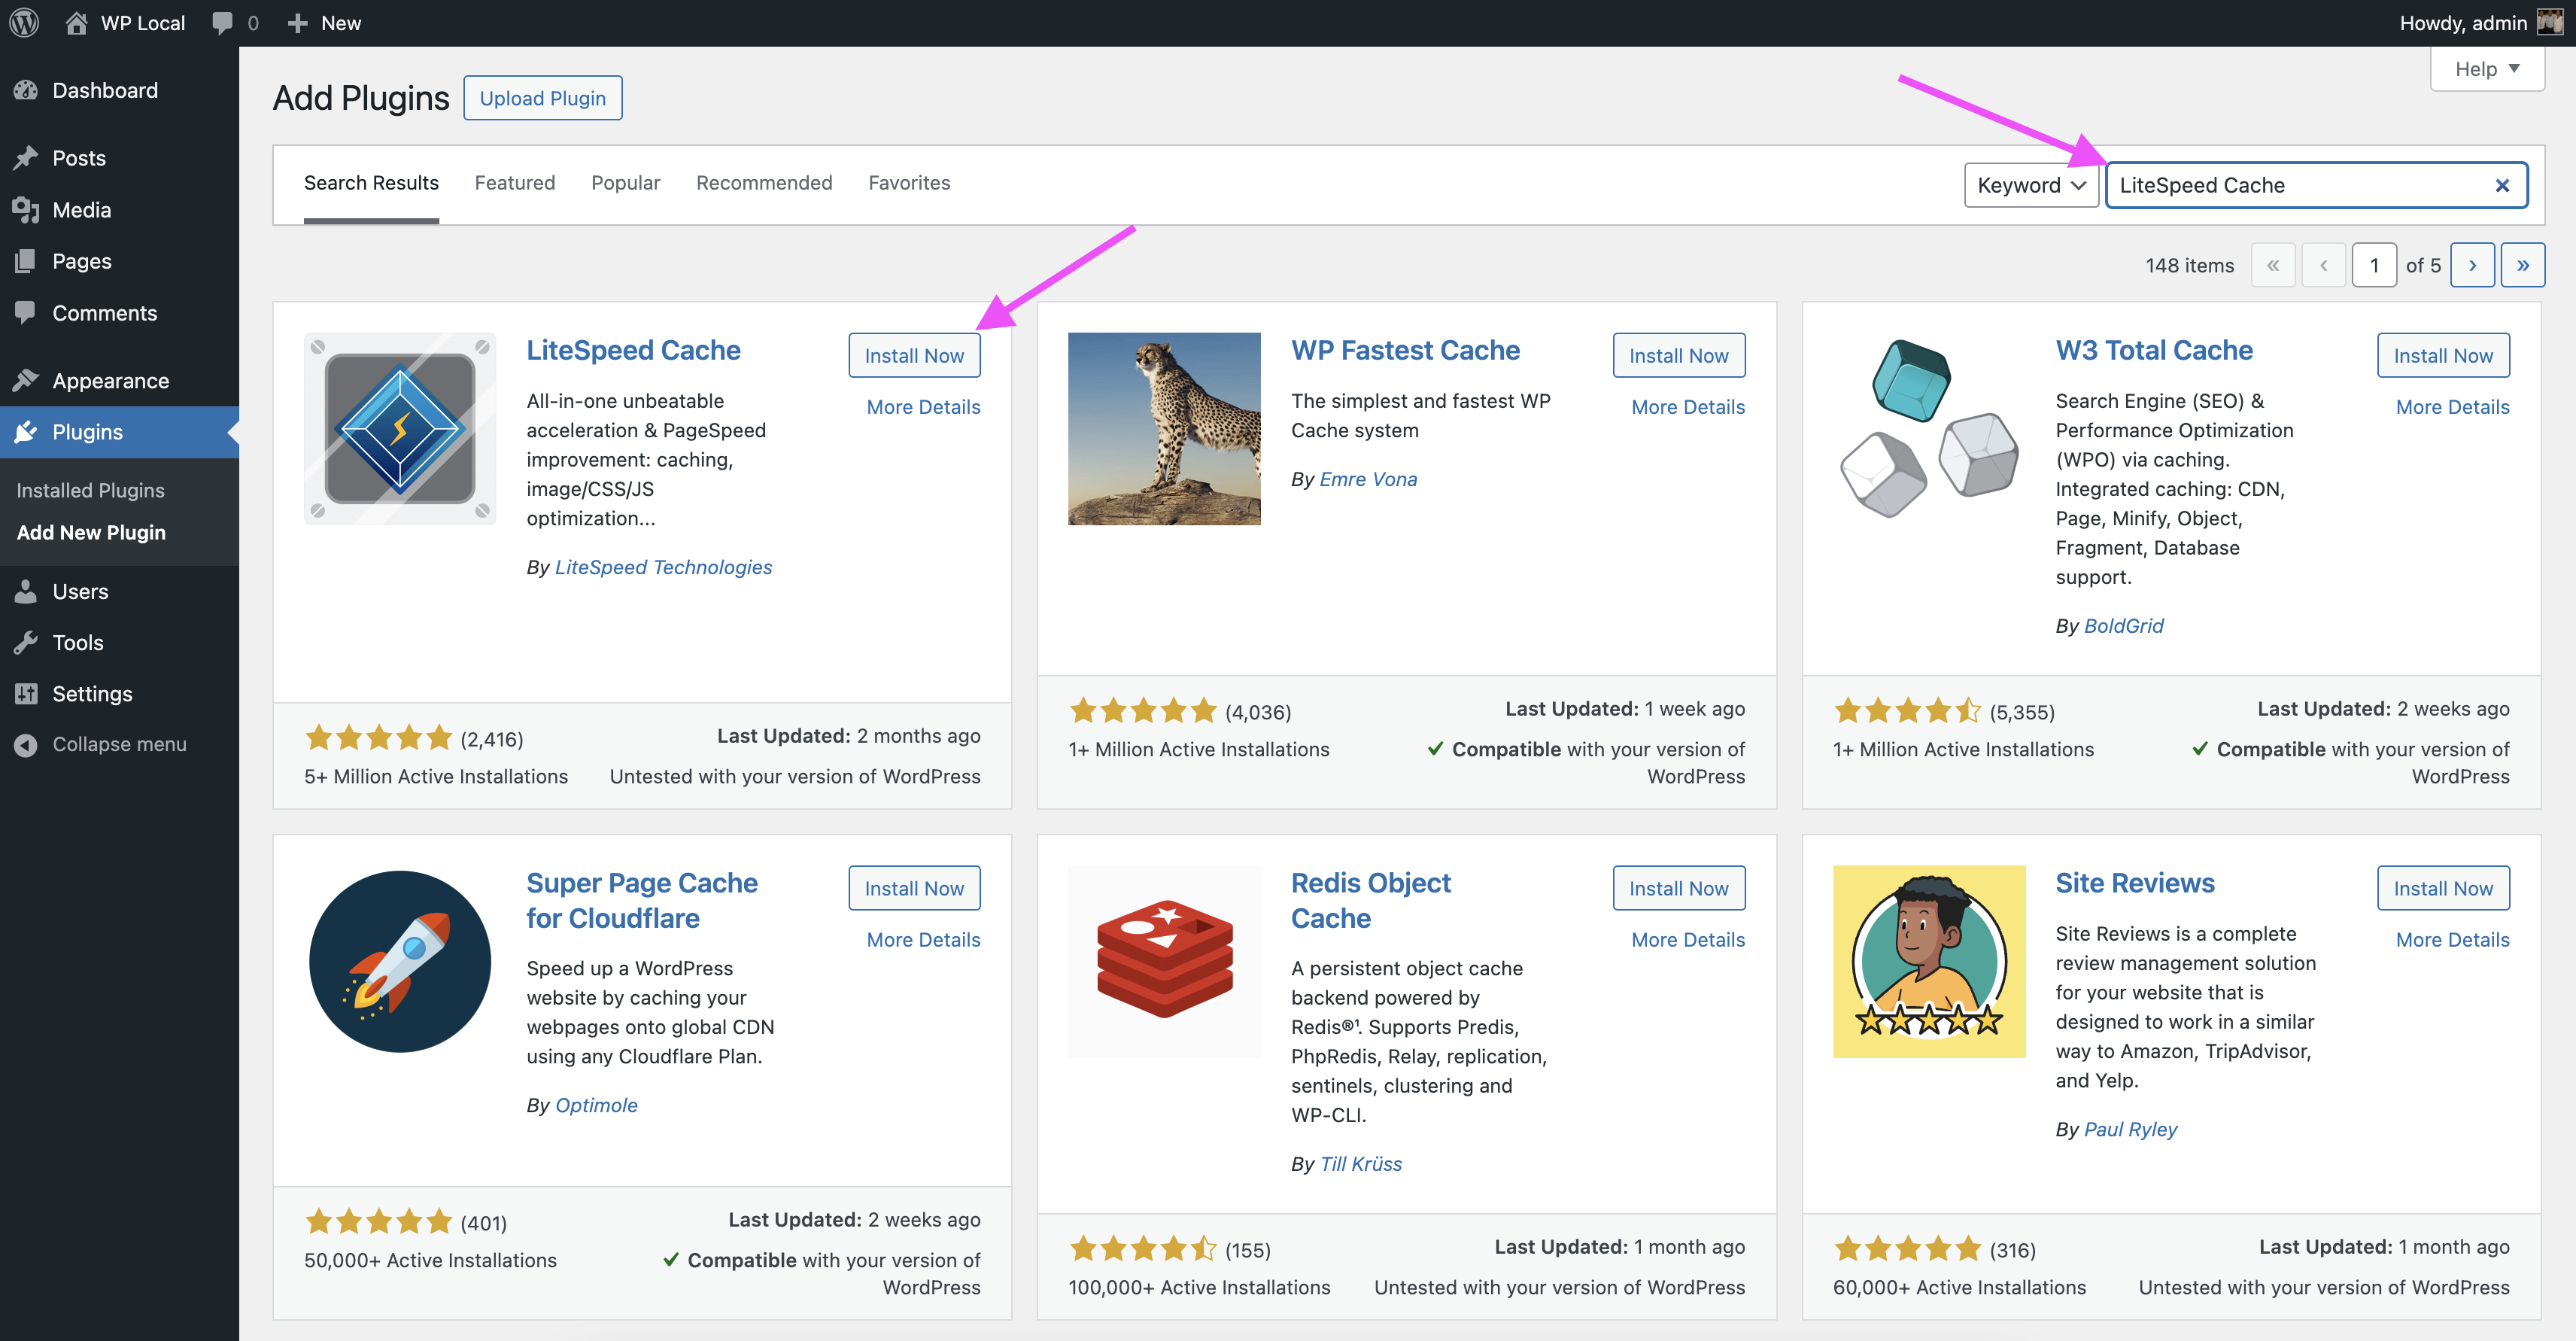
- Check by visiting the page: Check LSCache
413 Request Entity Too Large
- Check the php version your website is using, in this example it is
7.4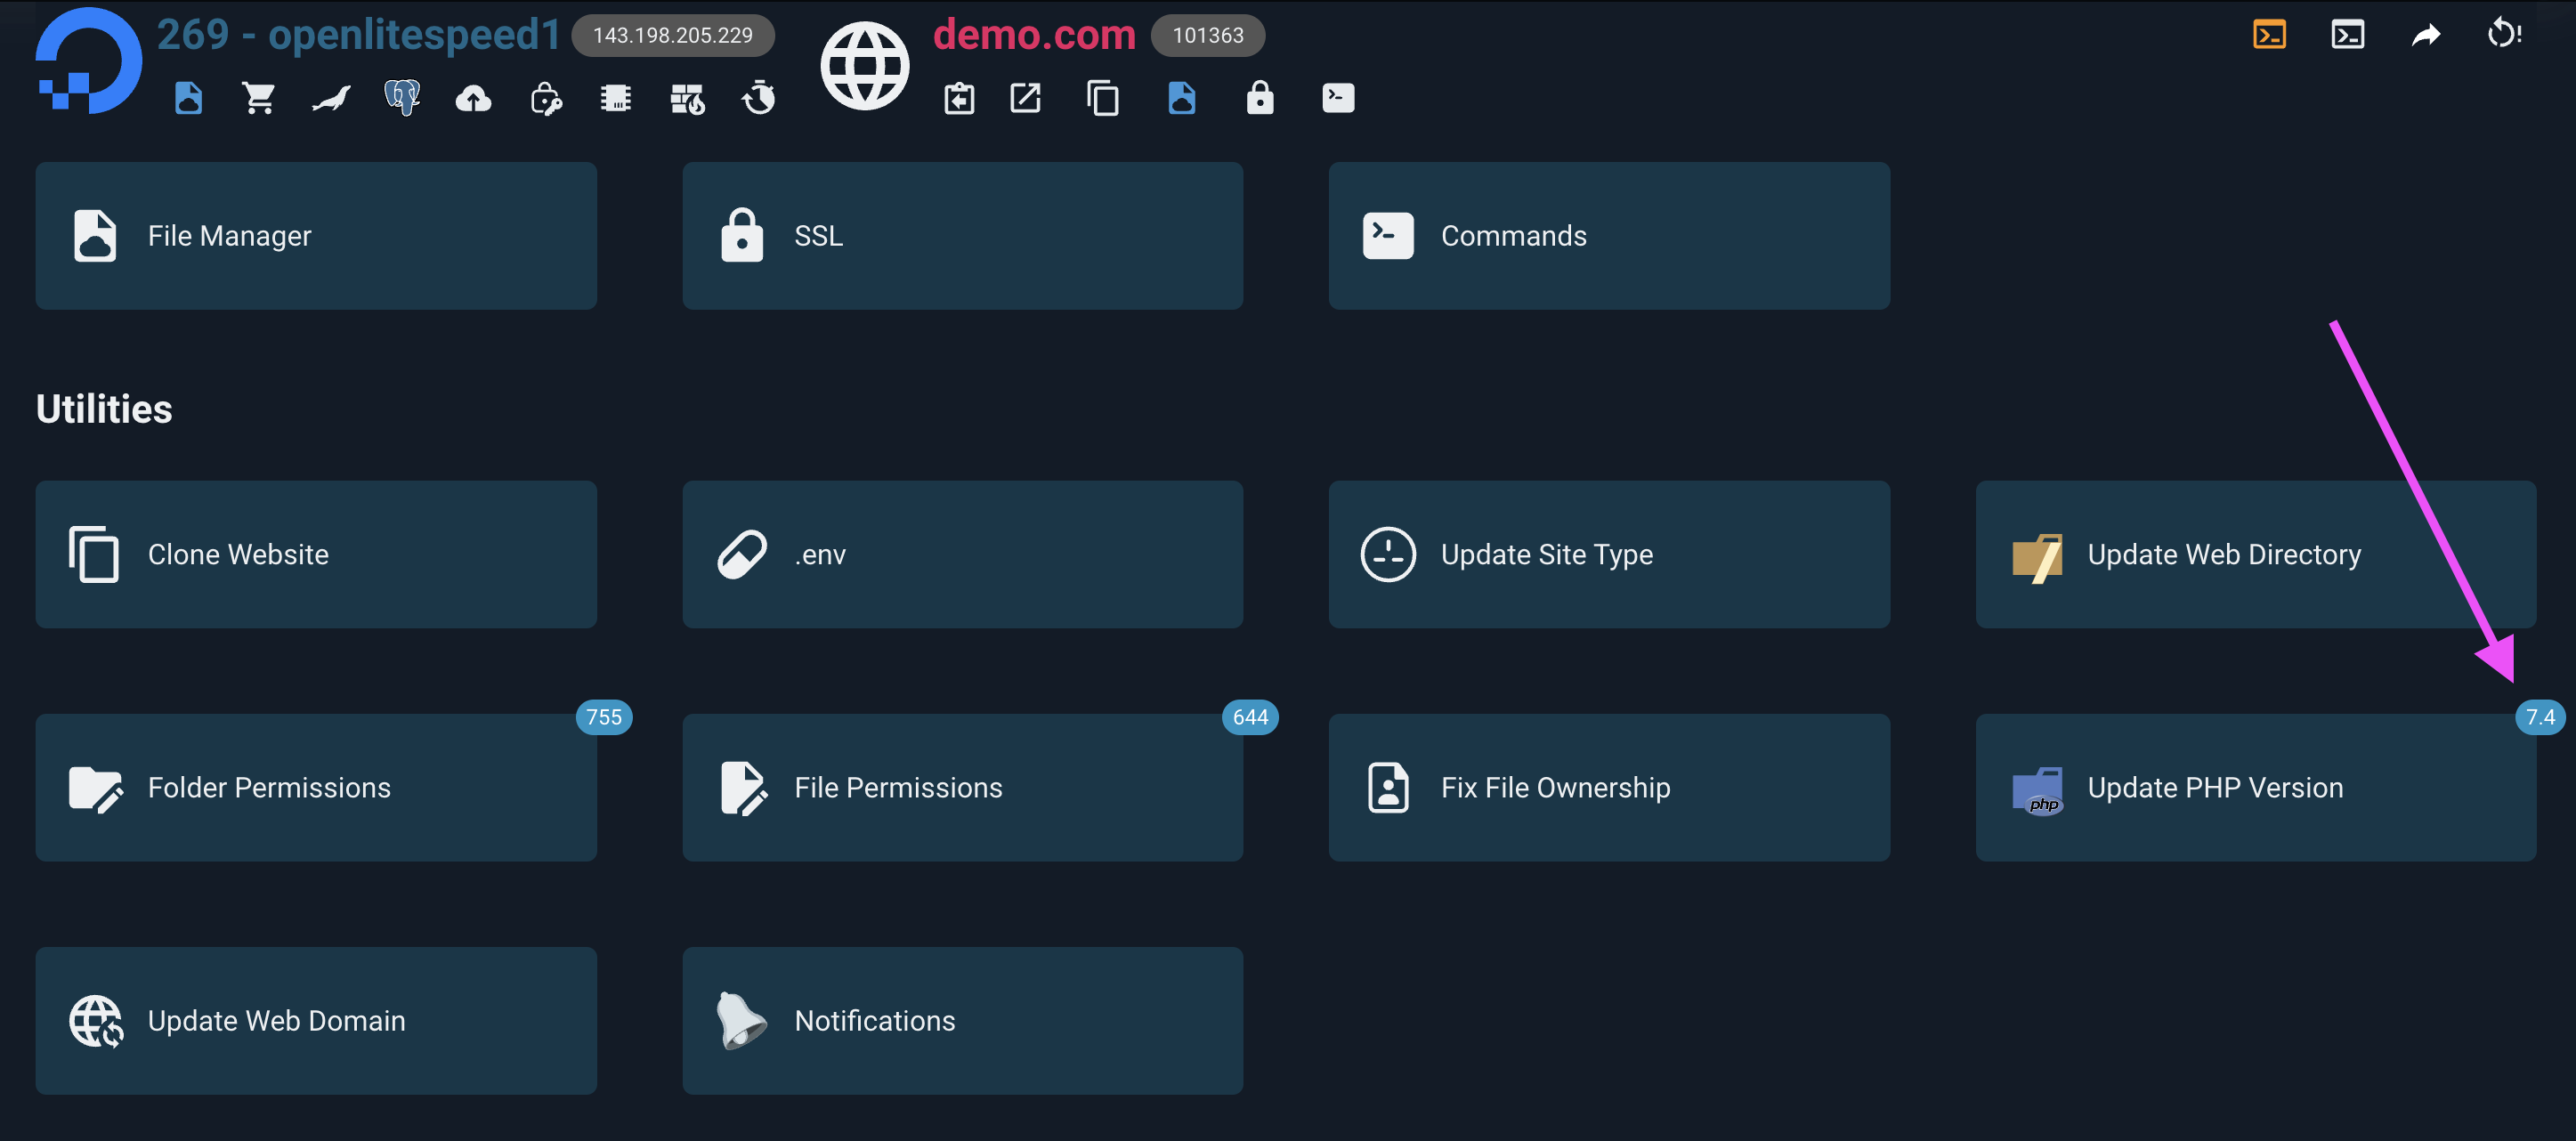
- Go to
OpenLiteSpeedsettings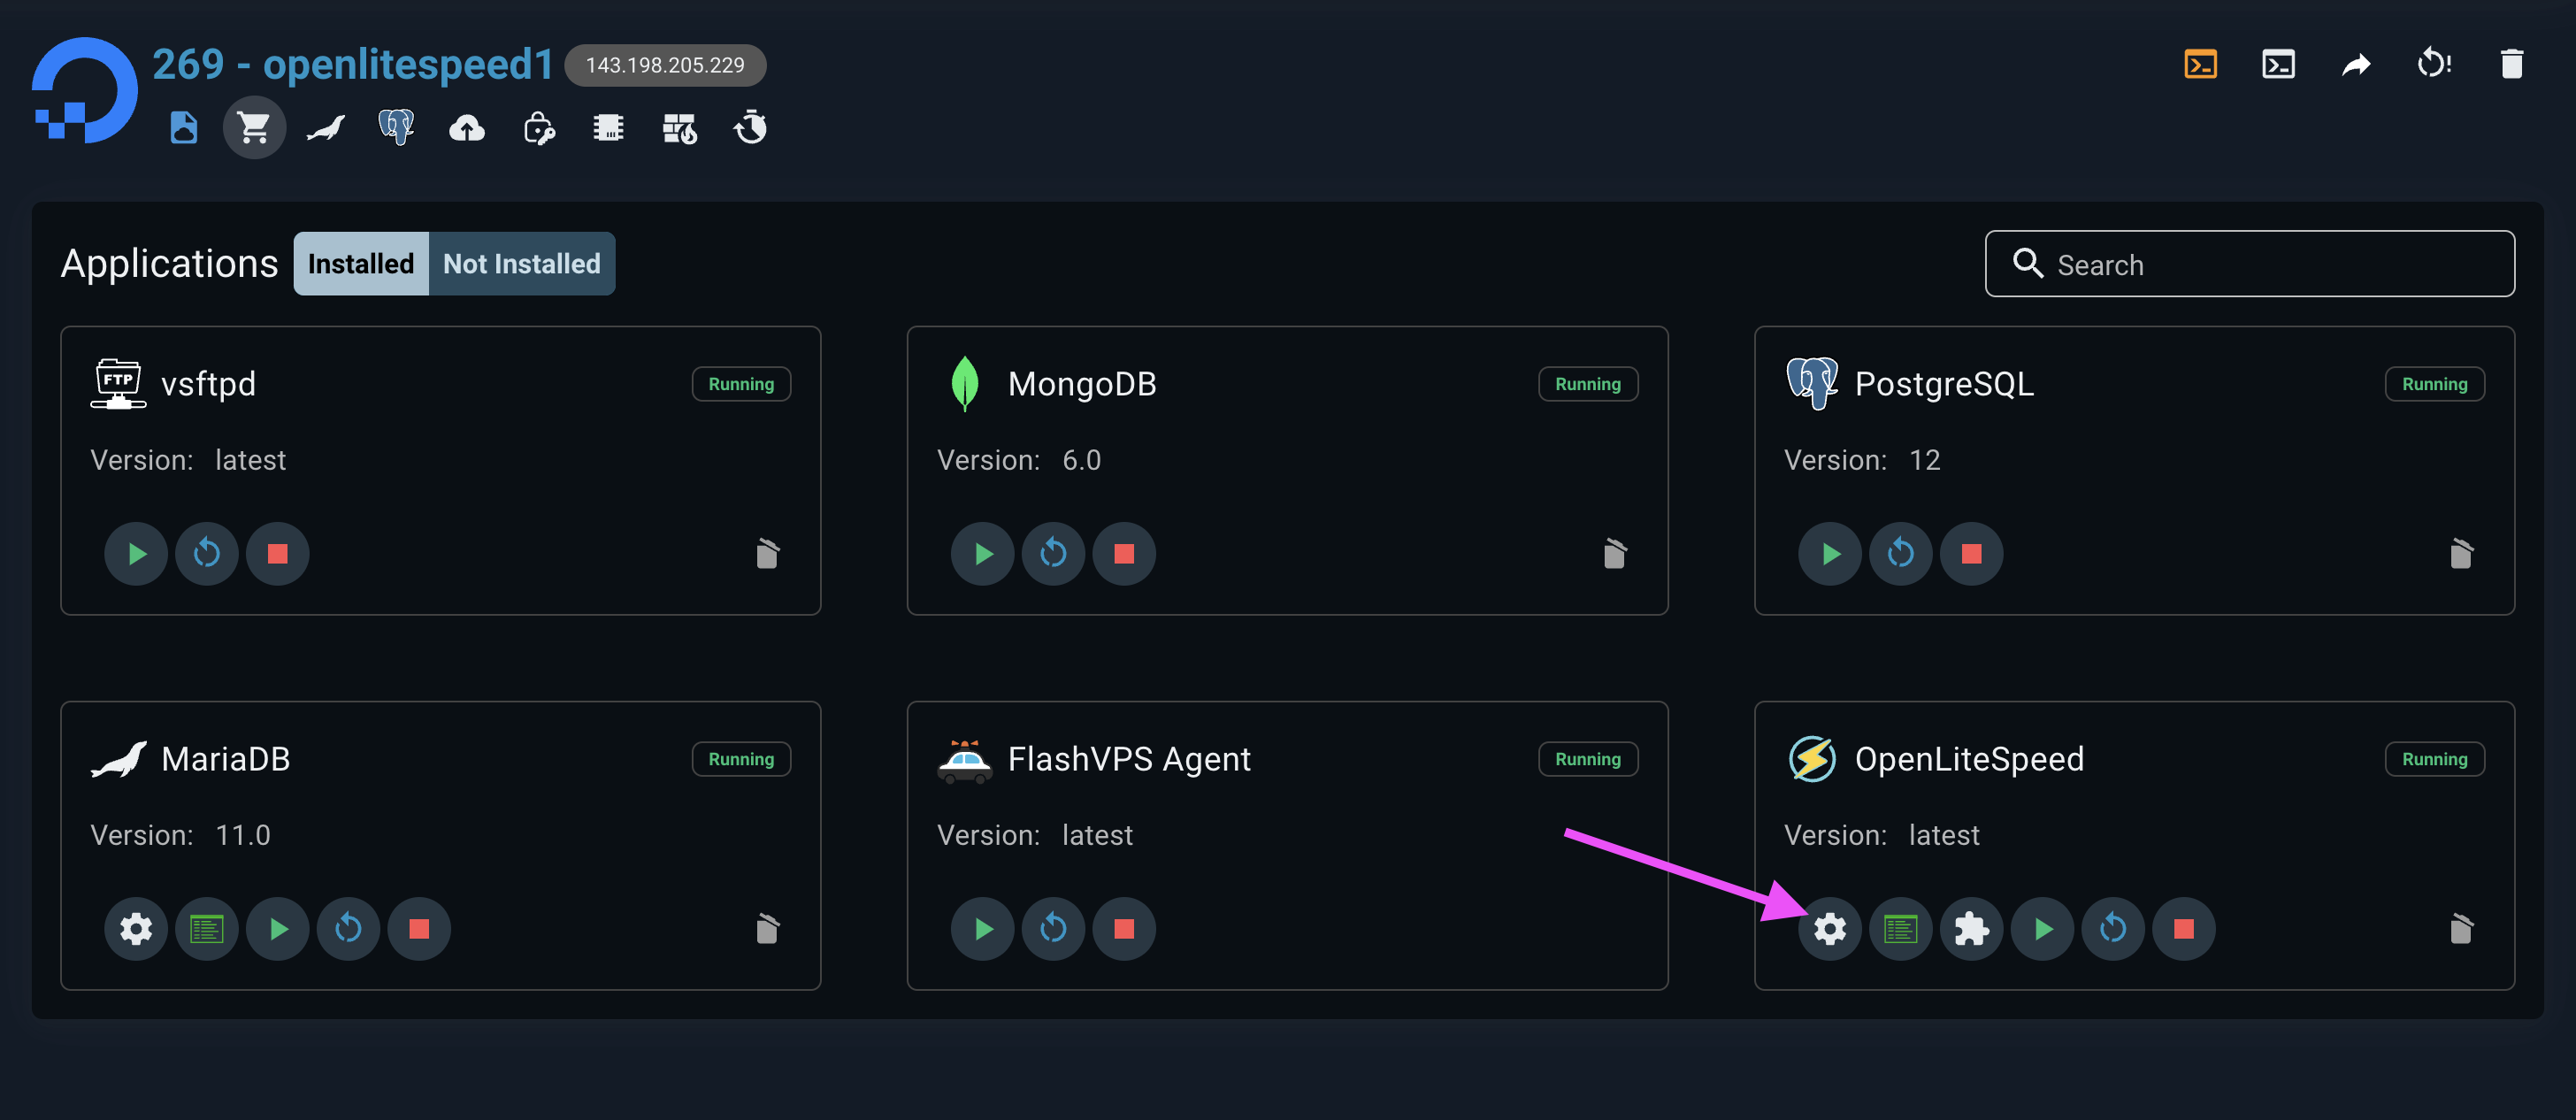
- Navigate to the path
lsphp74/etc/php/7.4and open the filephp.ini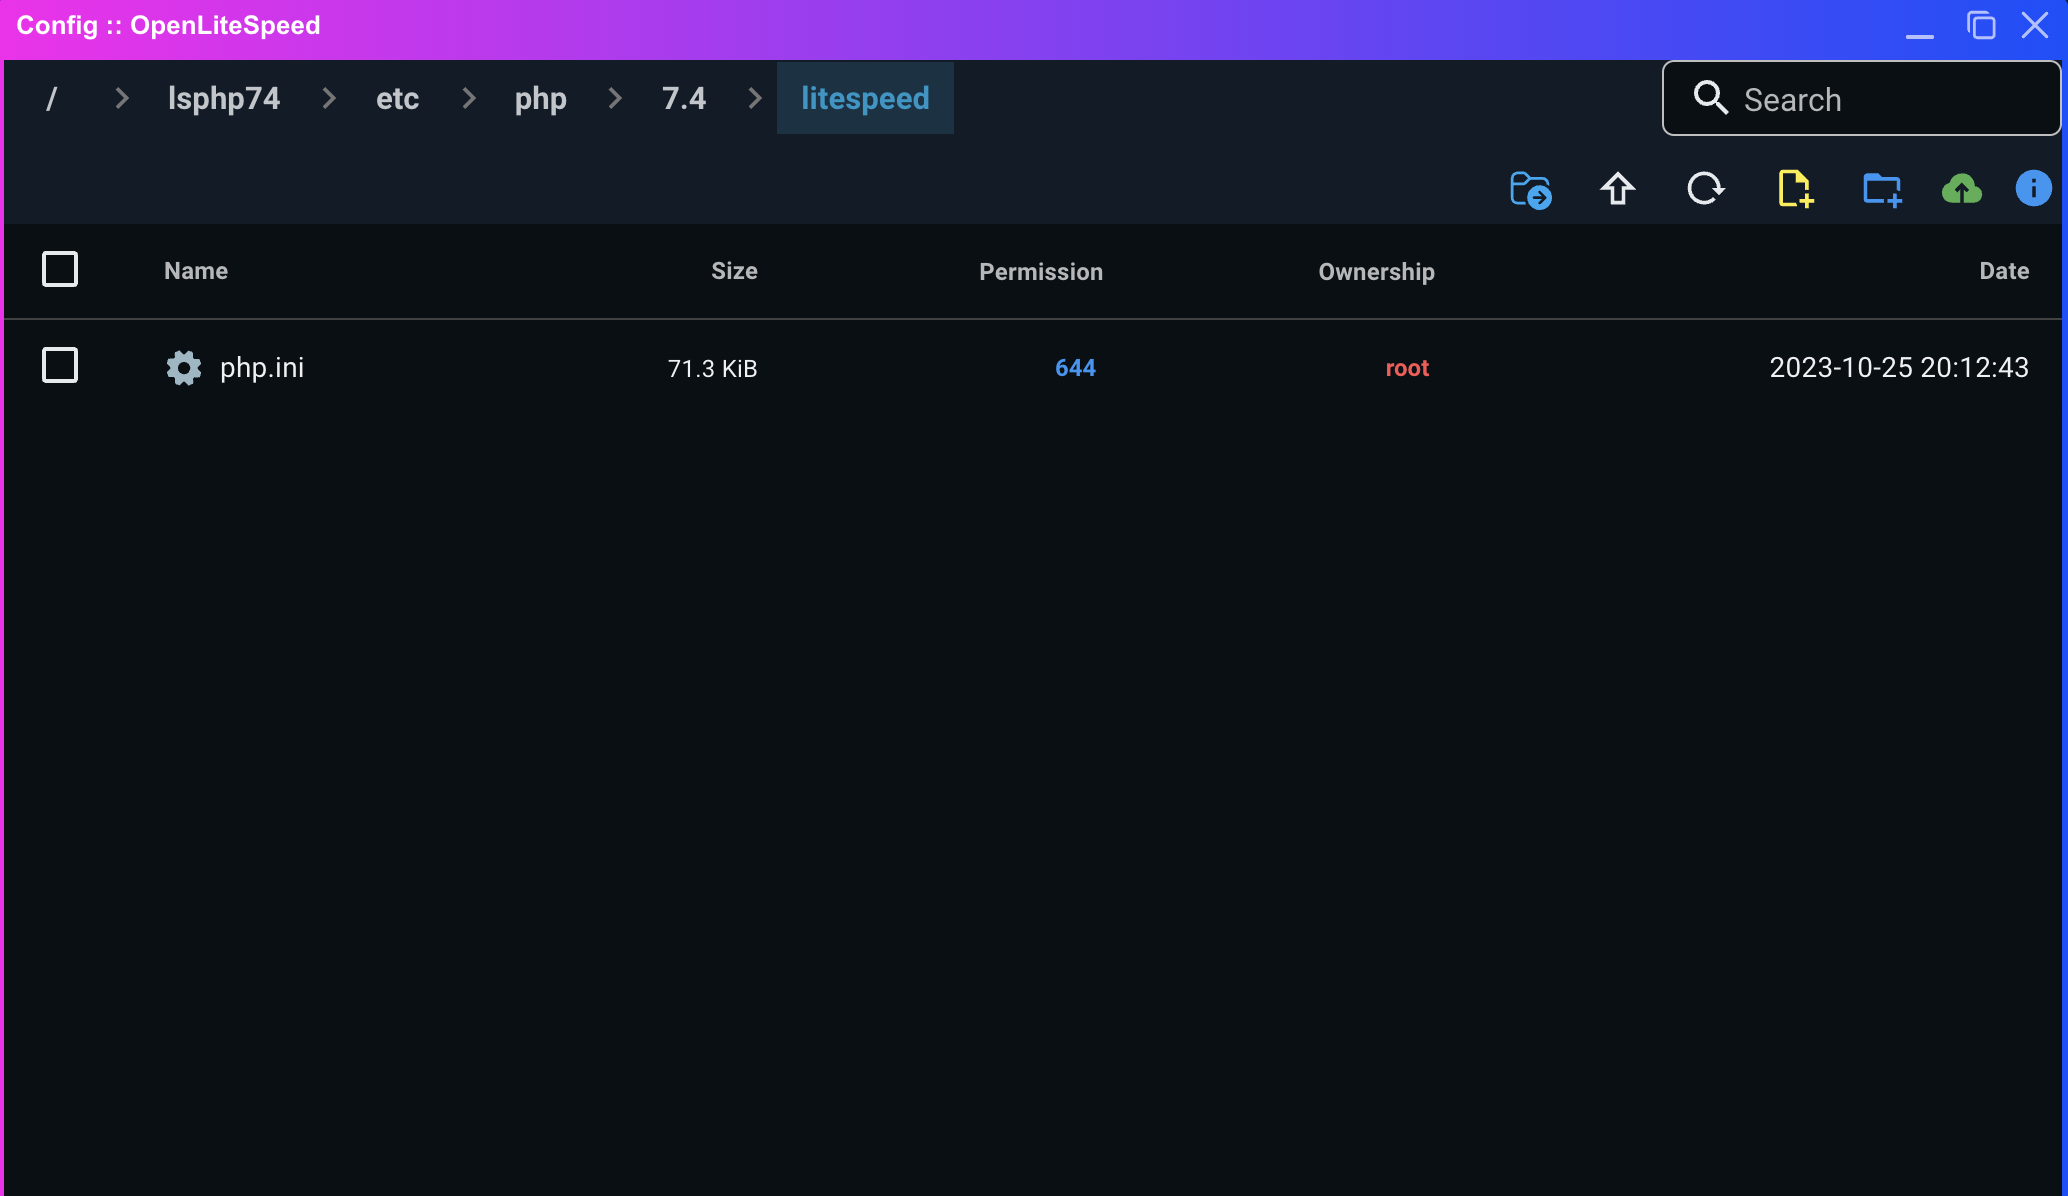
- Search for the
upload_max_filesizesetting value in thephp.inifile. The default is2M, which is 2 megabytes, and change it to the value you desire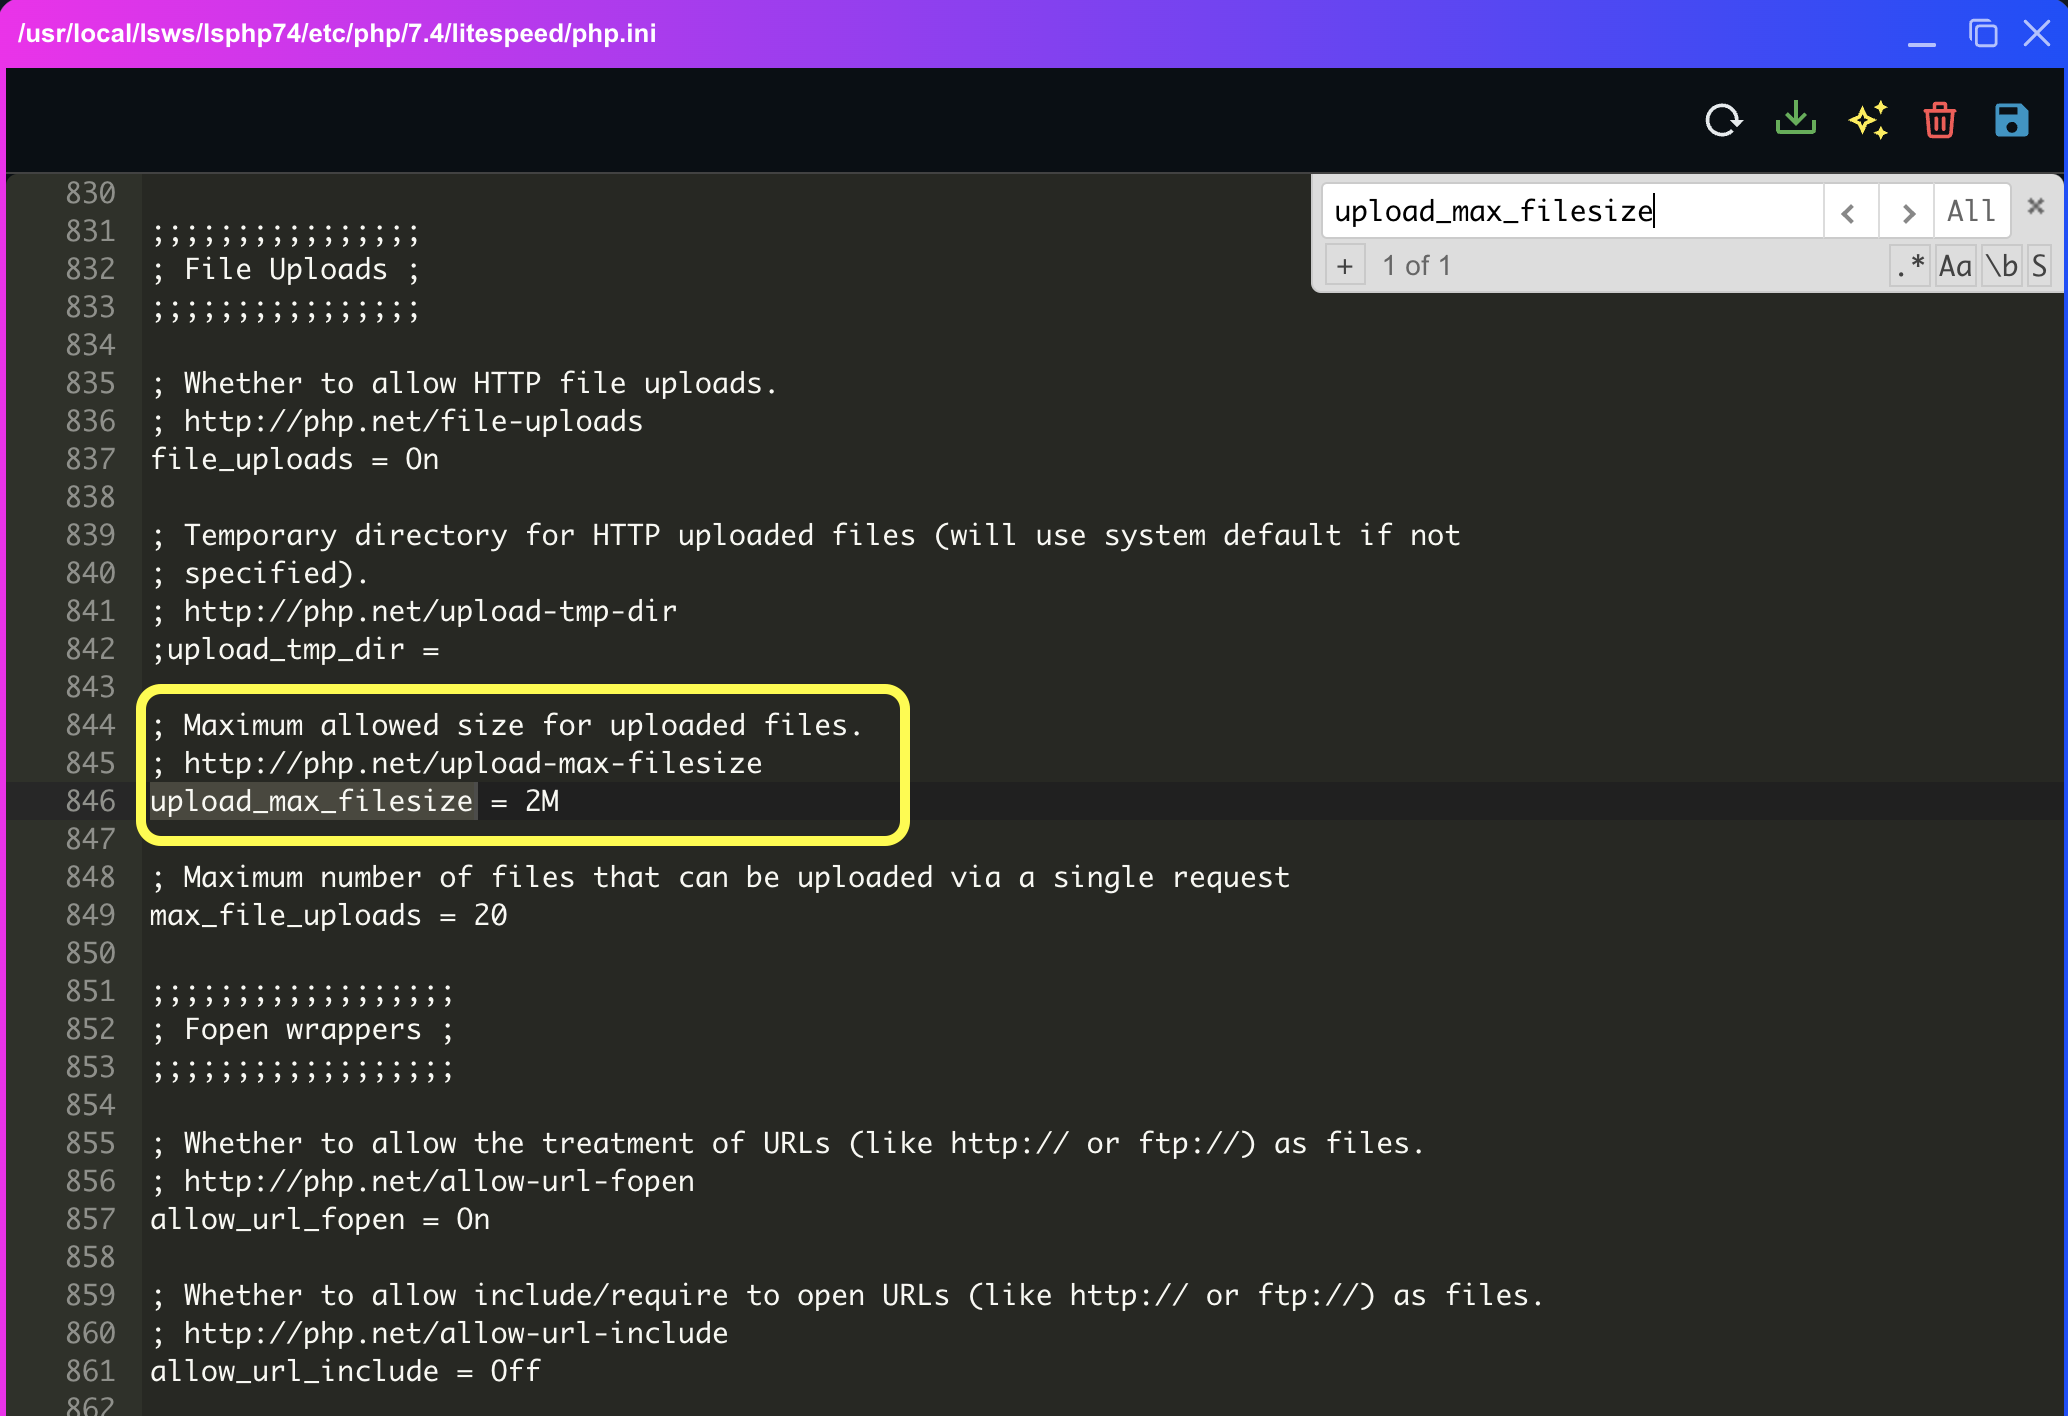
- Click the OpenLiteSpeed
restartbutton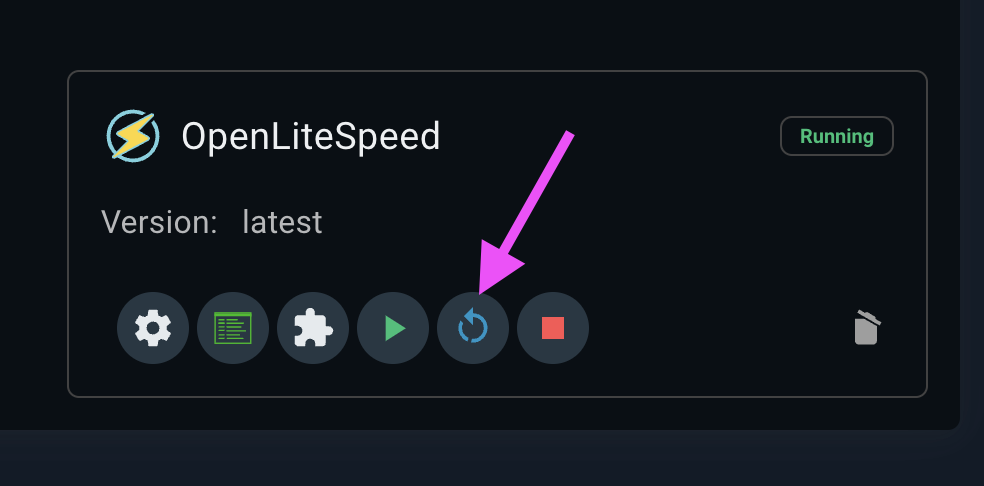
Configure redirects in OpenLiteSpeed
Access web admin and Select Virtual Host to redirect
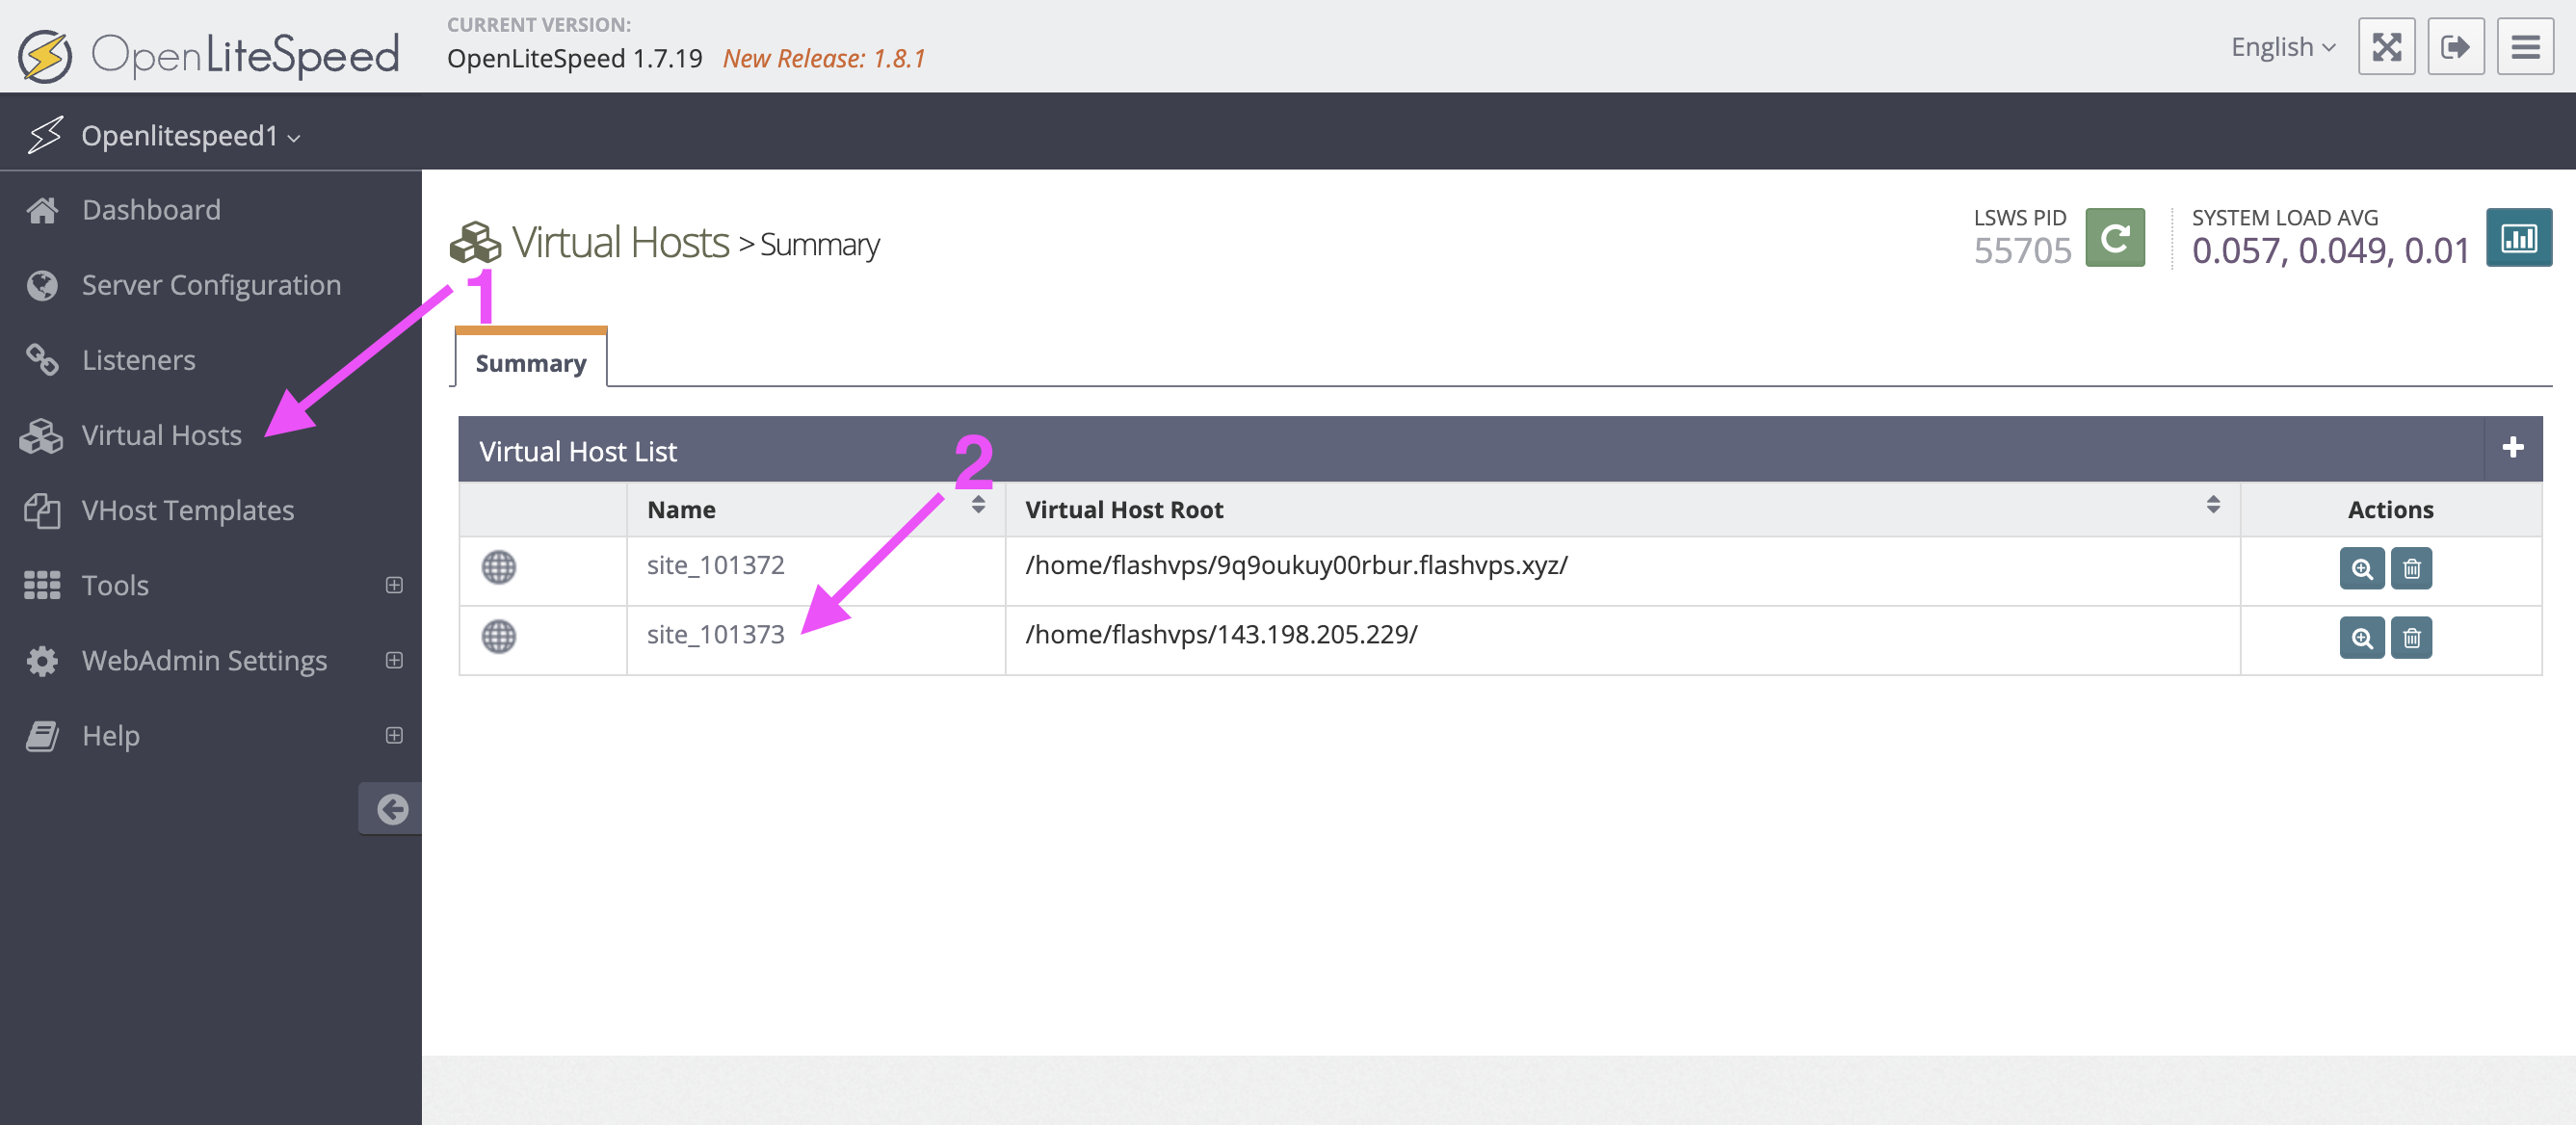
Select the
Contexttab and clickAdd New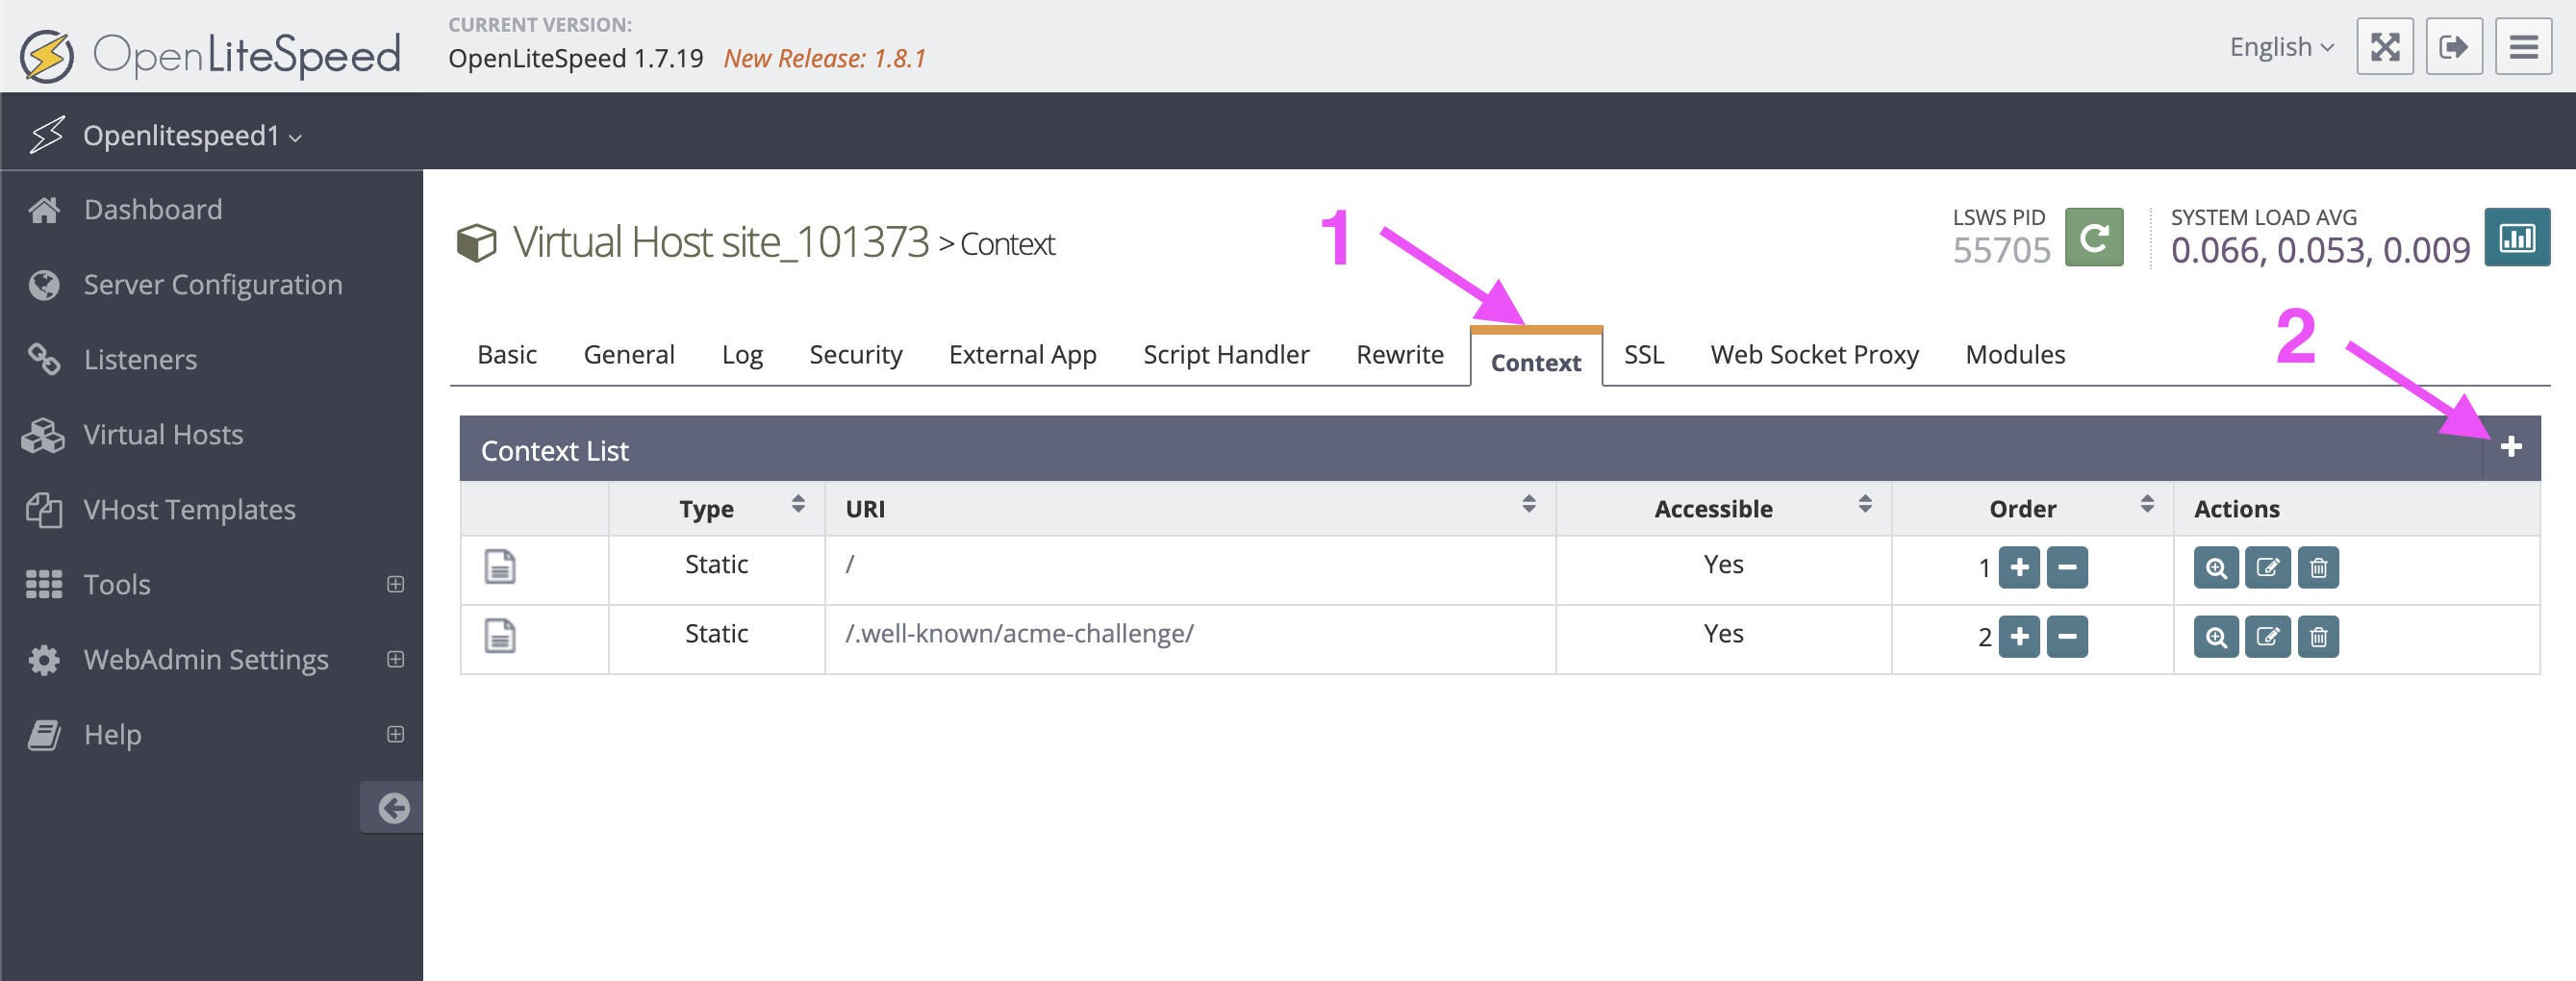
Select type
Redirectand clickNext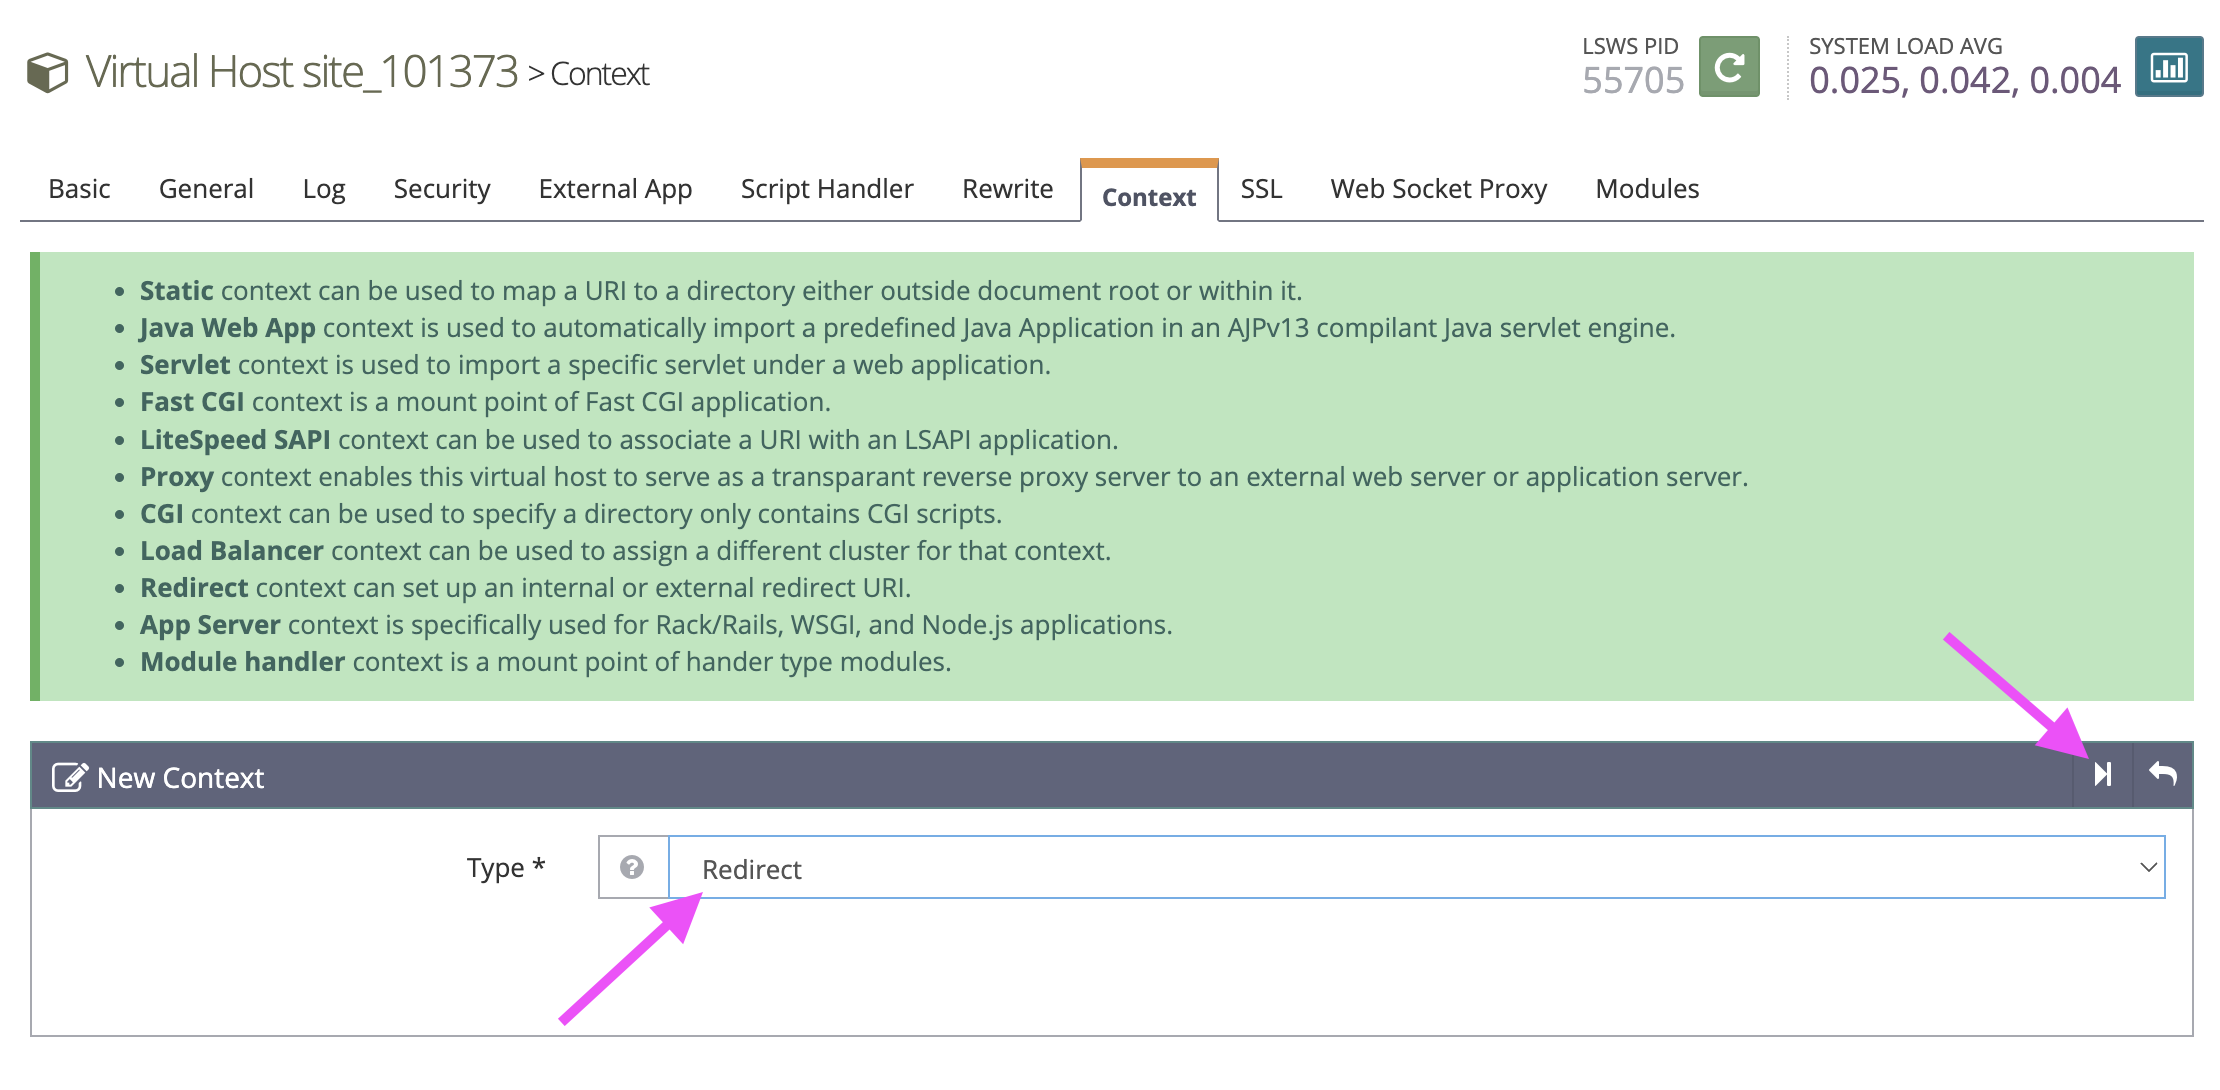
Here you can start configuration.
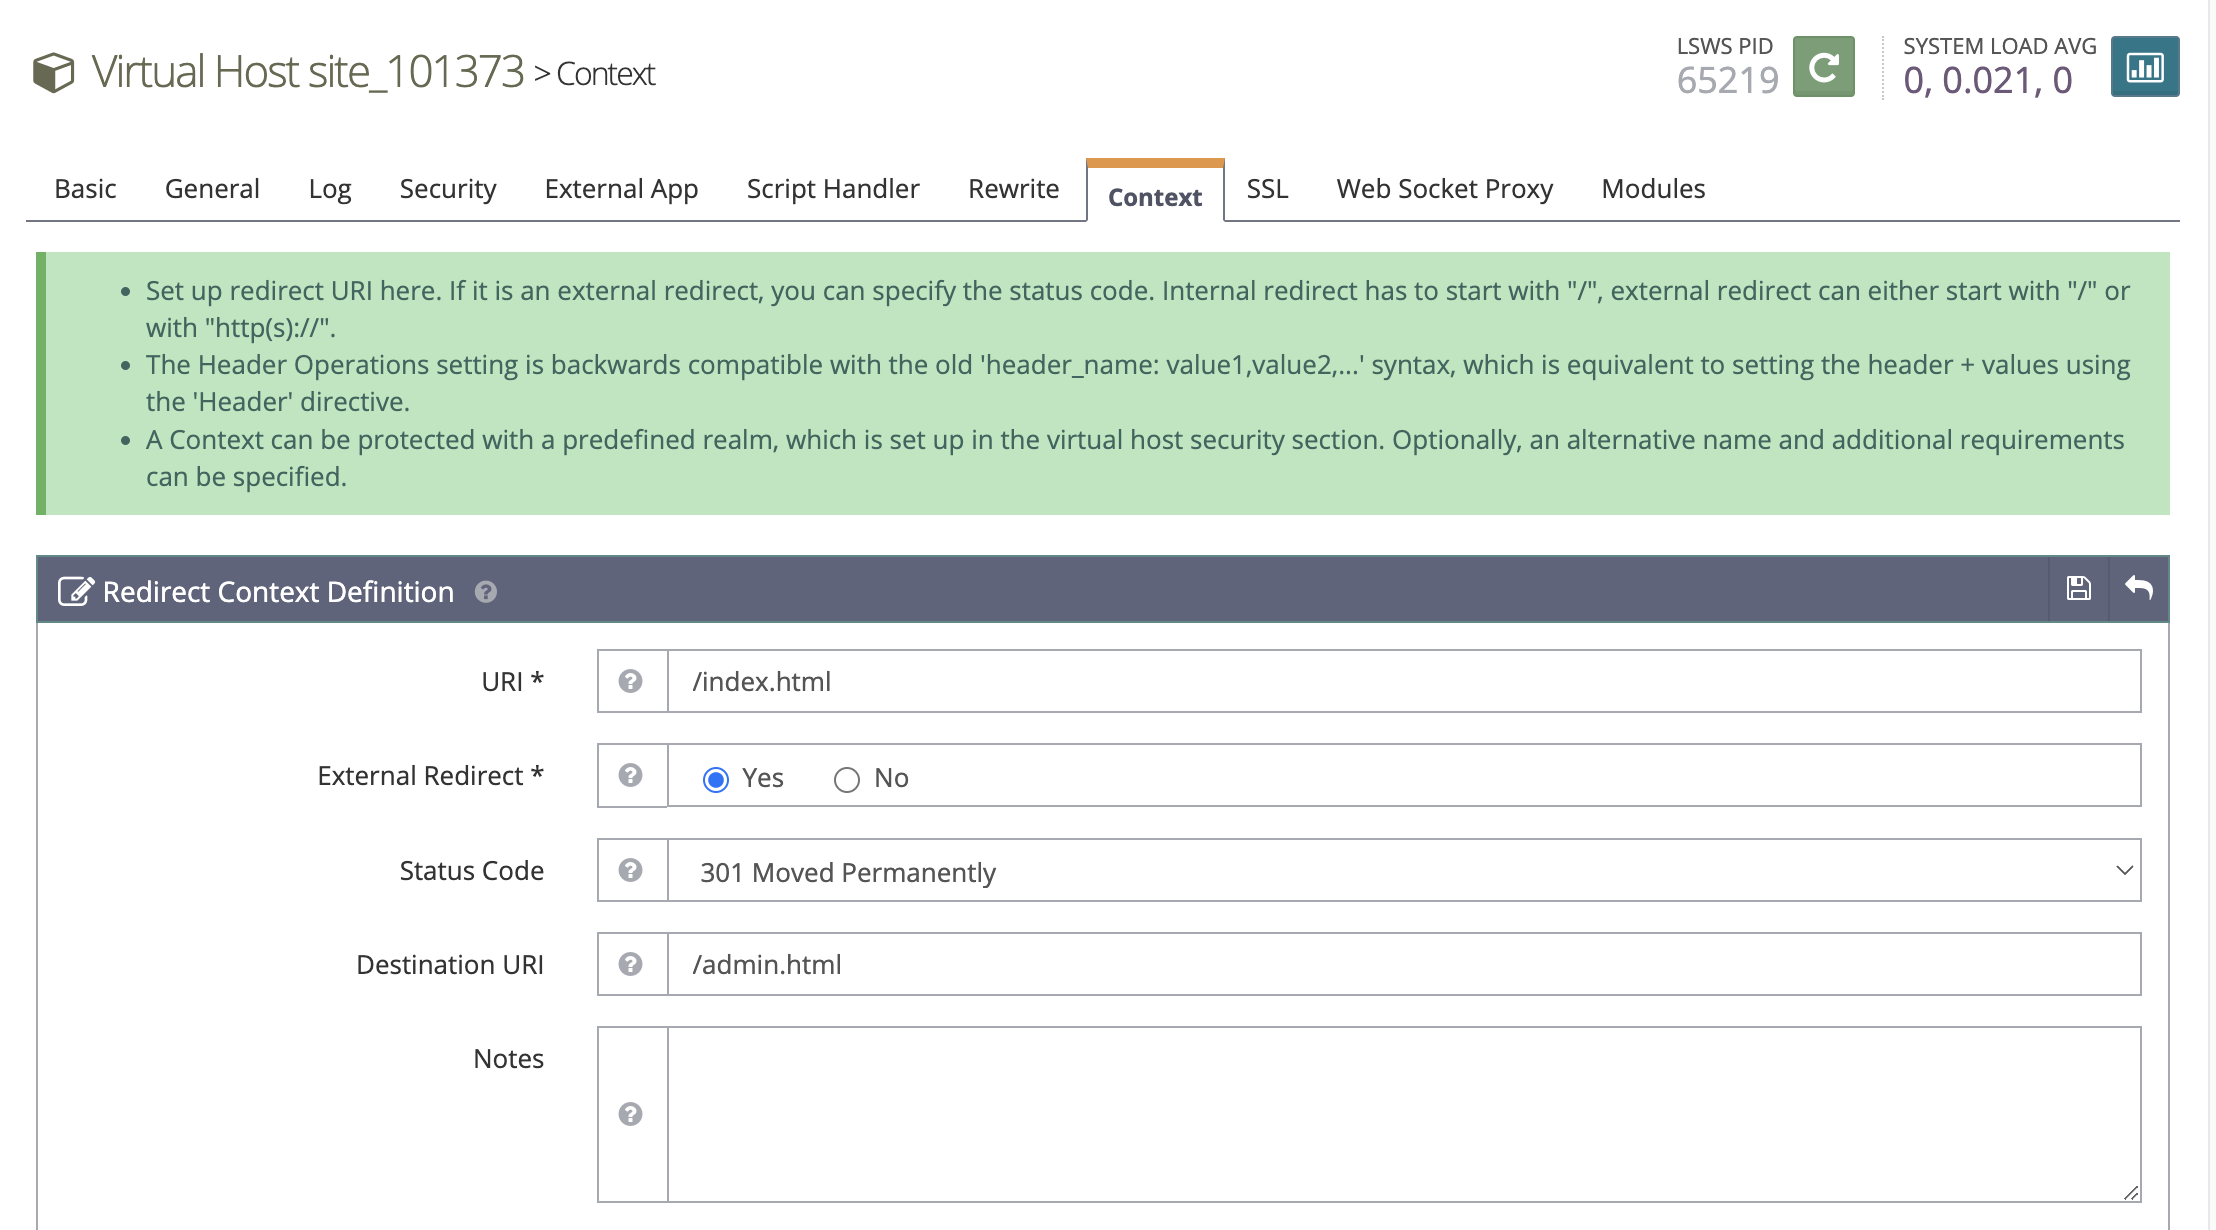
- URL: path to redirect. Here you only enter the URL. No domain name included (For example, here I put it /index.html)
- External Redirect: Choose Yes
- Status Code: There are many types of HTTP codes. Because I redirected, I chose 301 (permanent redirect).
- Destination URI: Destination URL to transfer.
- Save configuration
With the above configuration, when users access https:/domain.com/index.html, the system will automatically switch to https:/domain.com/admin.html
Finally, you restart the service to apply the changes.