n8n
1-Click Install N8N
Step 1: Create a New Website
Step 2: After the website is successfully created, click Manage to open the management interface.
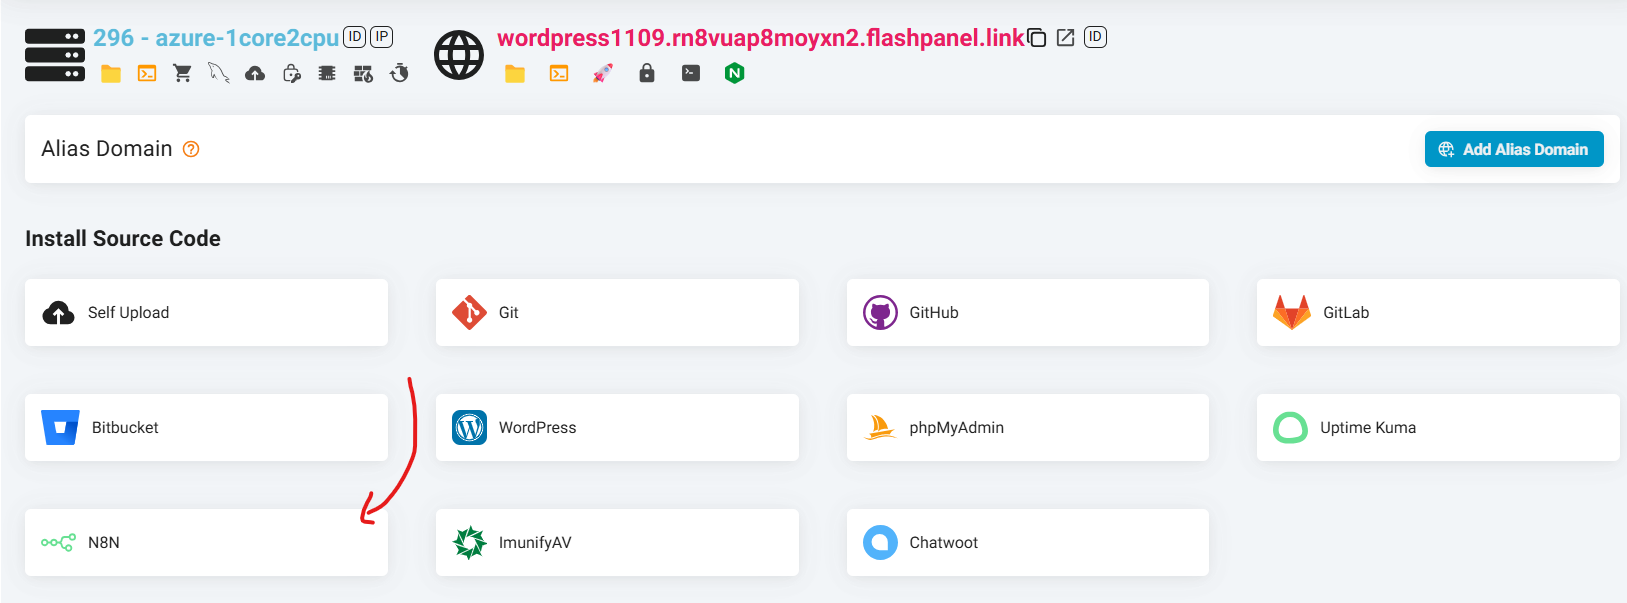
Step 3: Install N8N
- In the website management interface, find Install Source Code.
- Here, you will see the N8N option in the list.
- Click the N8N icon, then click the Install button.
Step 4: Complete
- FlashPanel will automatically download and install the N8N source code.
- Once completed, you can access the website you just installed to start using N8N immediately.
With the One-Click Install feature, FlashPanel helps you deploy N8N quickly without spending a lot of time and effort. Try it now to take full advantage of the potential of this powerful monitoring tool!
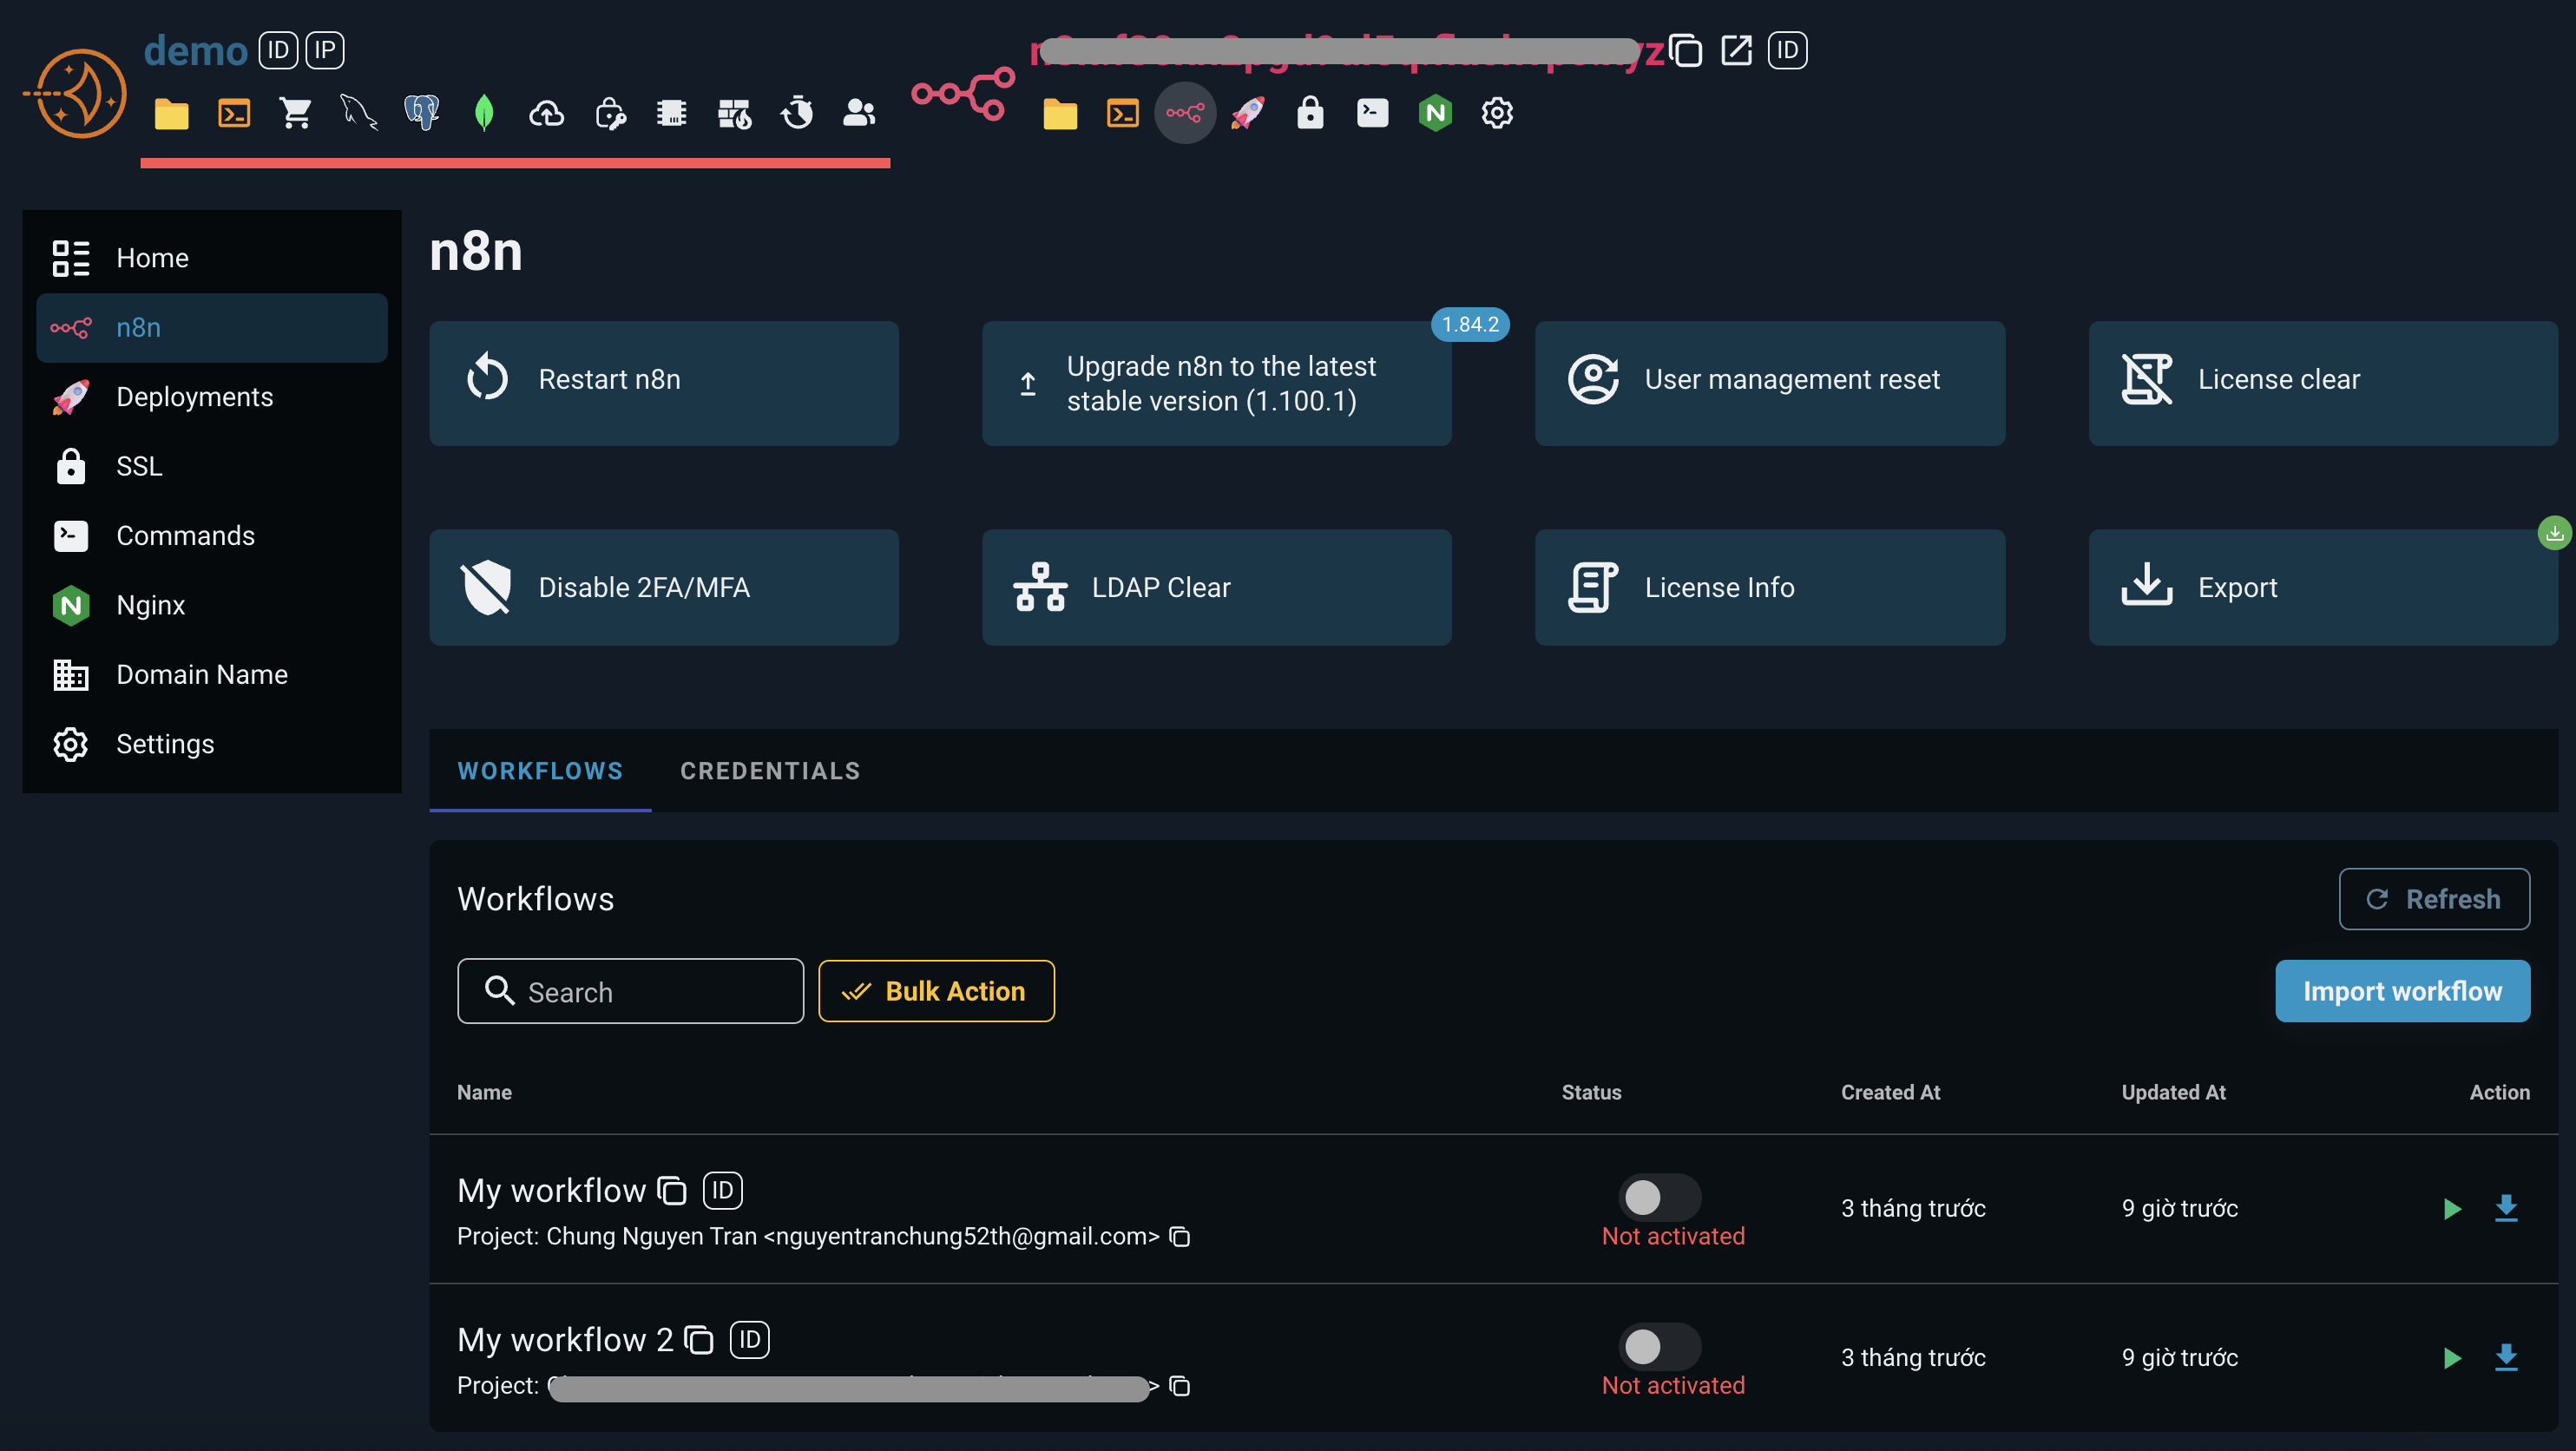
N8N Dashboard
We’re excited to introduce the brand-new N8N Dashboard – a simple, intuitive, and user-friendly interface, even for non-technical users!
Key Features
1. Quick N8N System Management
Perform administrative actions with just a click:
- 🔄 Restart N8N
- ⬆️ Upgrade to the latest stable version
- 👤 Reset user management
- 🔐 Disable or delete 2FA/MFA
- 🧹 Remove LDAP configuration
- 🗑 Delete License
- 📋 View License information
2. Easy Data Export
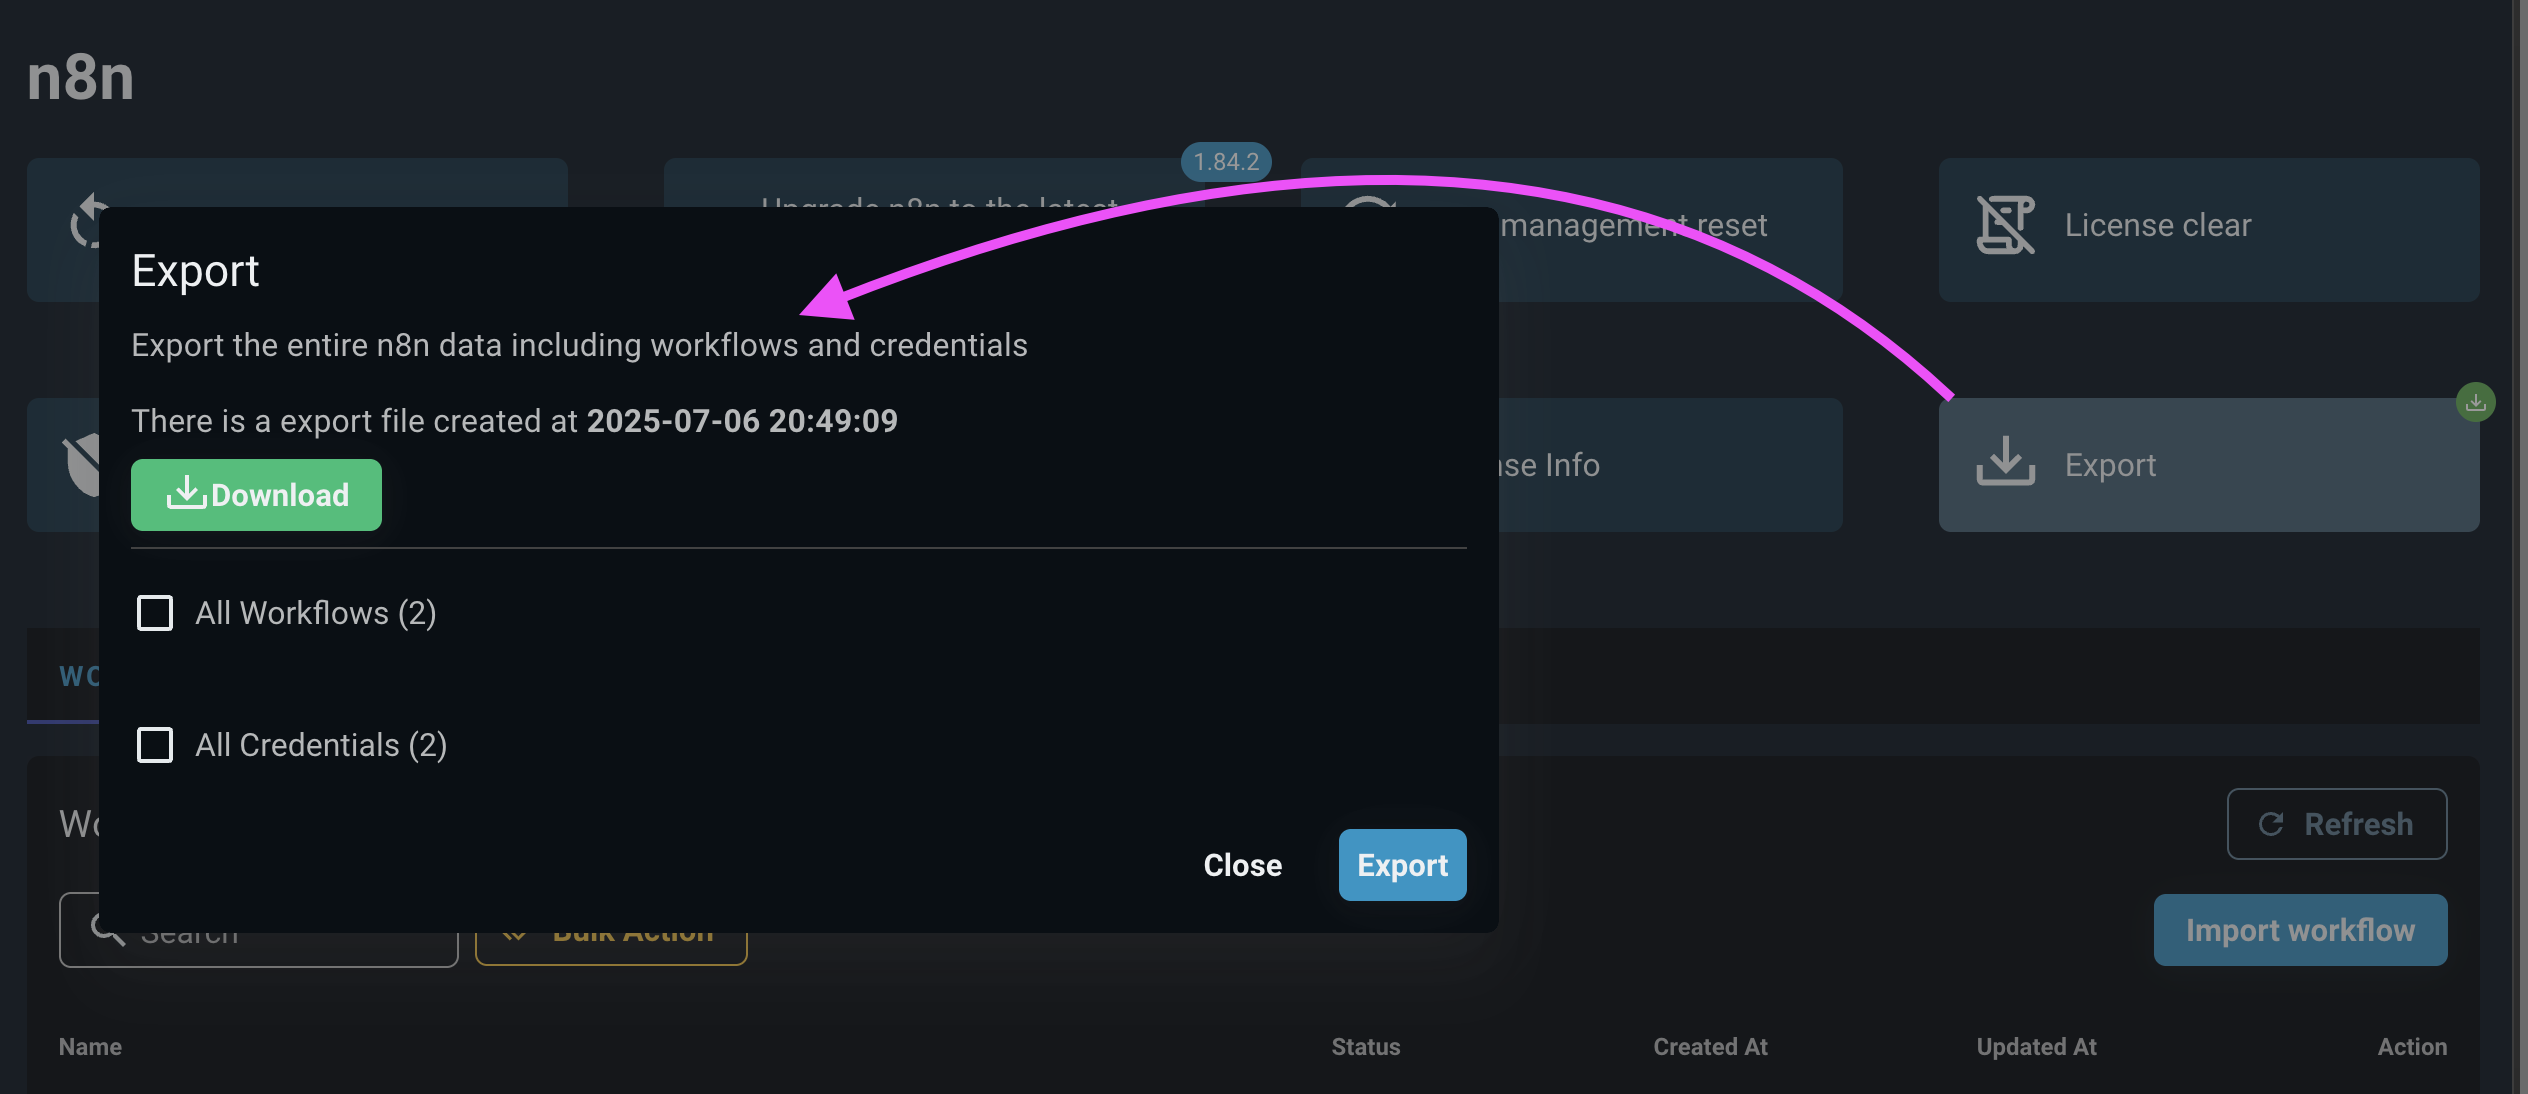
With the N8N Export Tool, you can:
- Choose the type of data to export:
Workflows,Credentials, or both. - Once complete, a Download button appears for you to easily retrieve the file.
Workflow Management
The Workflows tab displays a table with:
- Workflow name
- Project
- Status: Toggle workflows ON/OFF
- Tags
- Created At and Updated At
Quick Actions
- ✅ Activate all workflows
- ❌ Deactivate all workflows
- 📥 Import workflows via drag-and-drop
.jsonfiles - ▶️ Execute or 📤 Export workflows individually
Credential Management
In the Credentials tab, you can view:
- Credential Name
- Project
- Created At
- Updated At
You can:
- 📤 Export individual credentials
- 📥 Import credentials by dragging
.jsonfiles into the dashboard
Manual Install N8N
Install application
nodejsInstall application
pm2Open terminal and type install command
n8n bash
bashnpm -g install n8n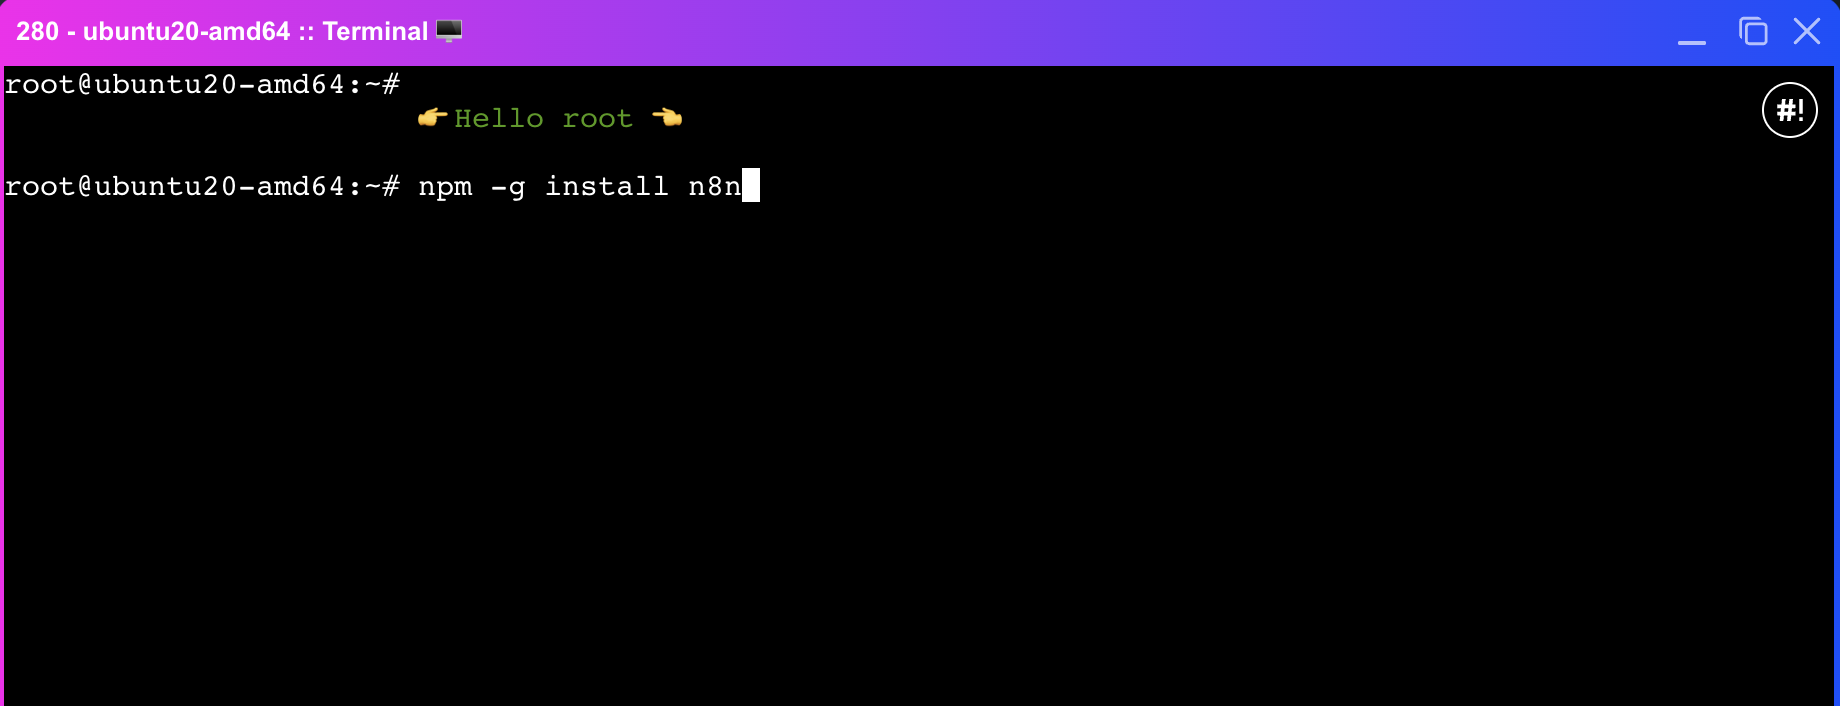
Still in terminal step 3, start
n8nwith the commandbashN8N_SECURE_COOKIE=false pm2 start n8n pm2 savebash# change domain.com to your website address N8N_SECURE_COOKIE=false WEBHOOK_URL=http://domain.com pm2 start n8n pm2 savebash# change domain.com to your website address WEBHOOK_URL=https://domain.com pm2 start n8n pm2 save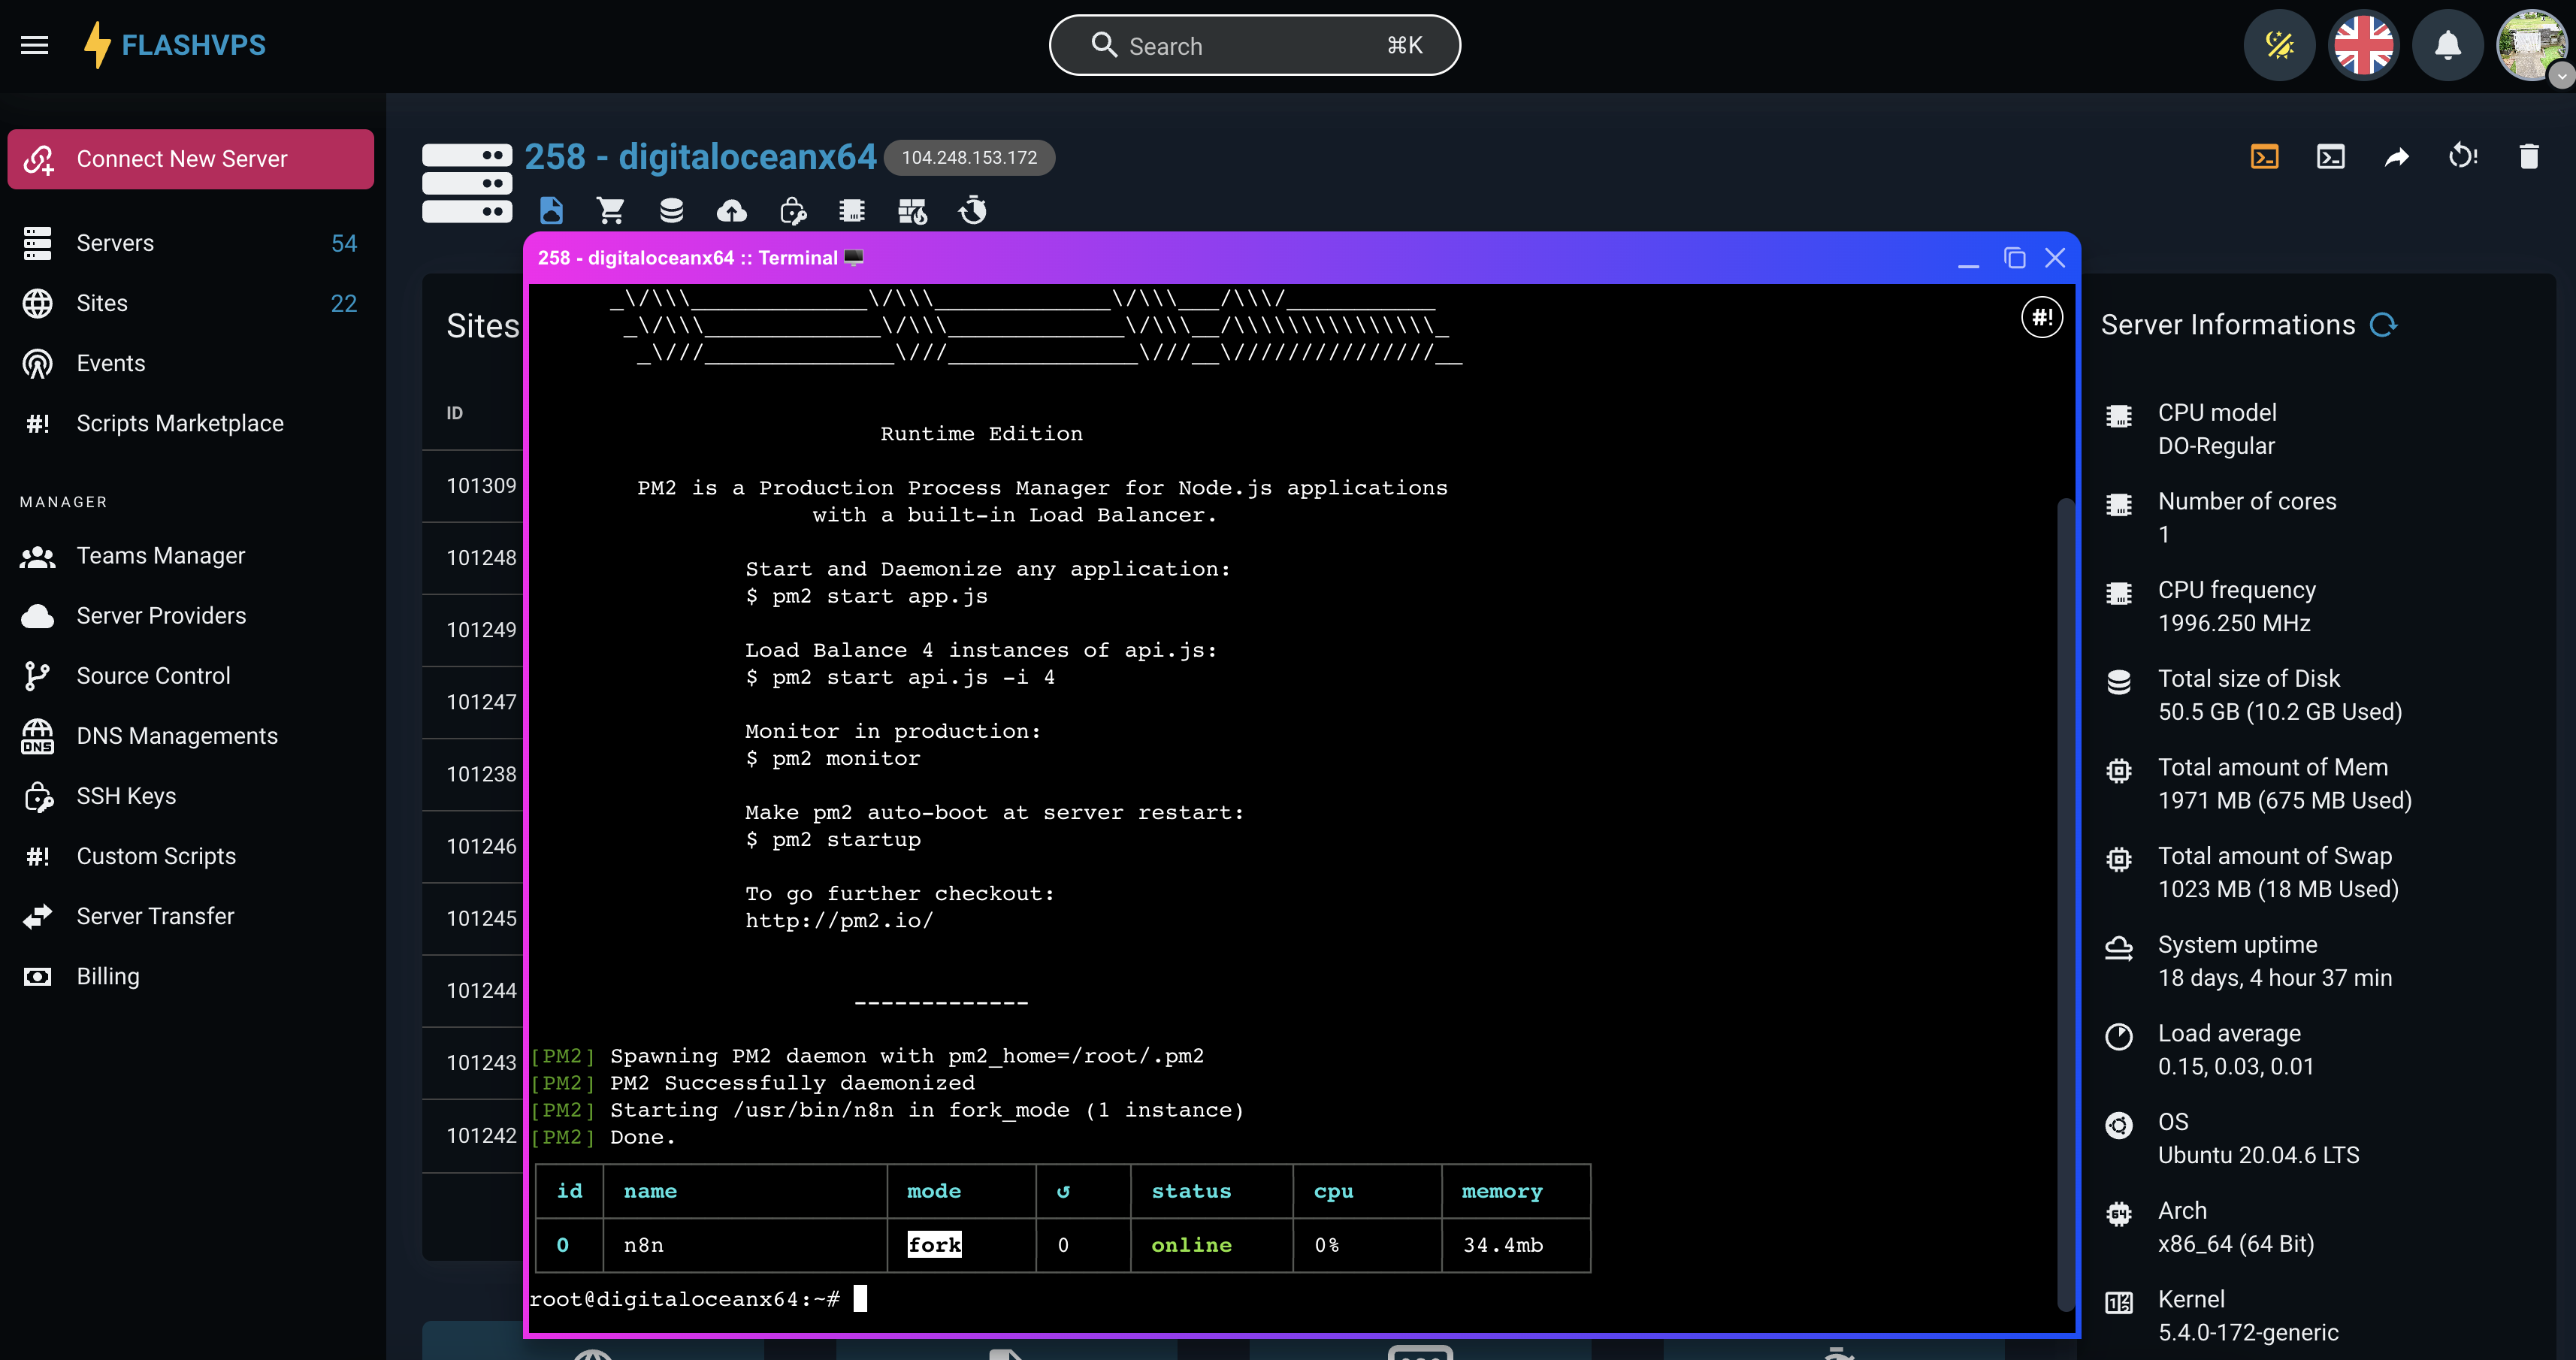
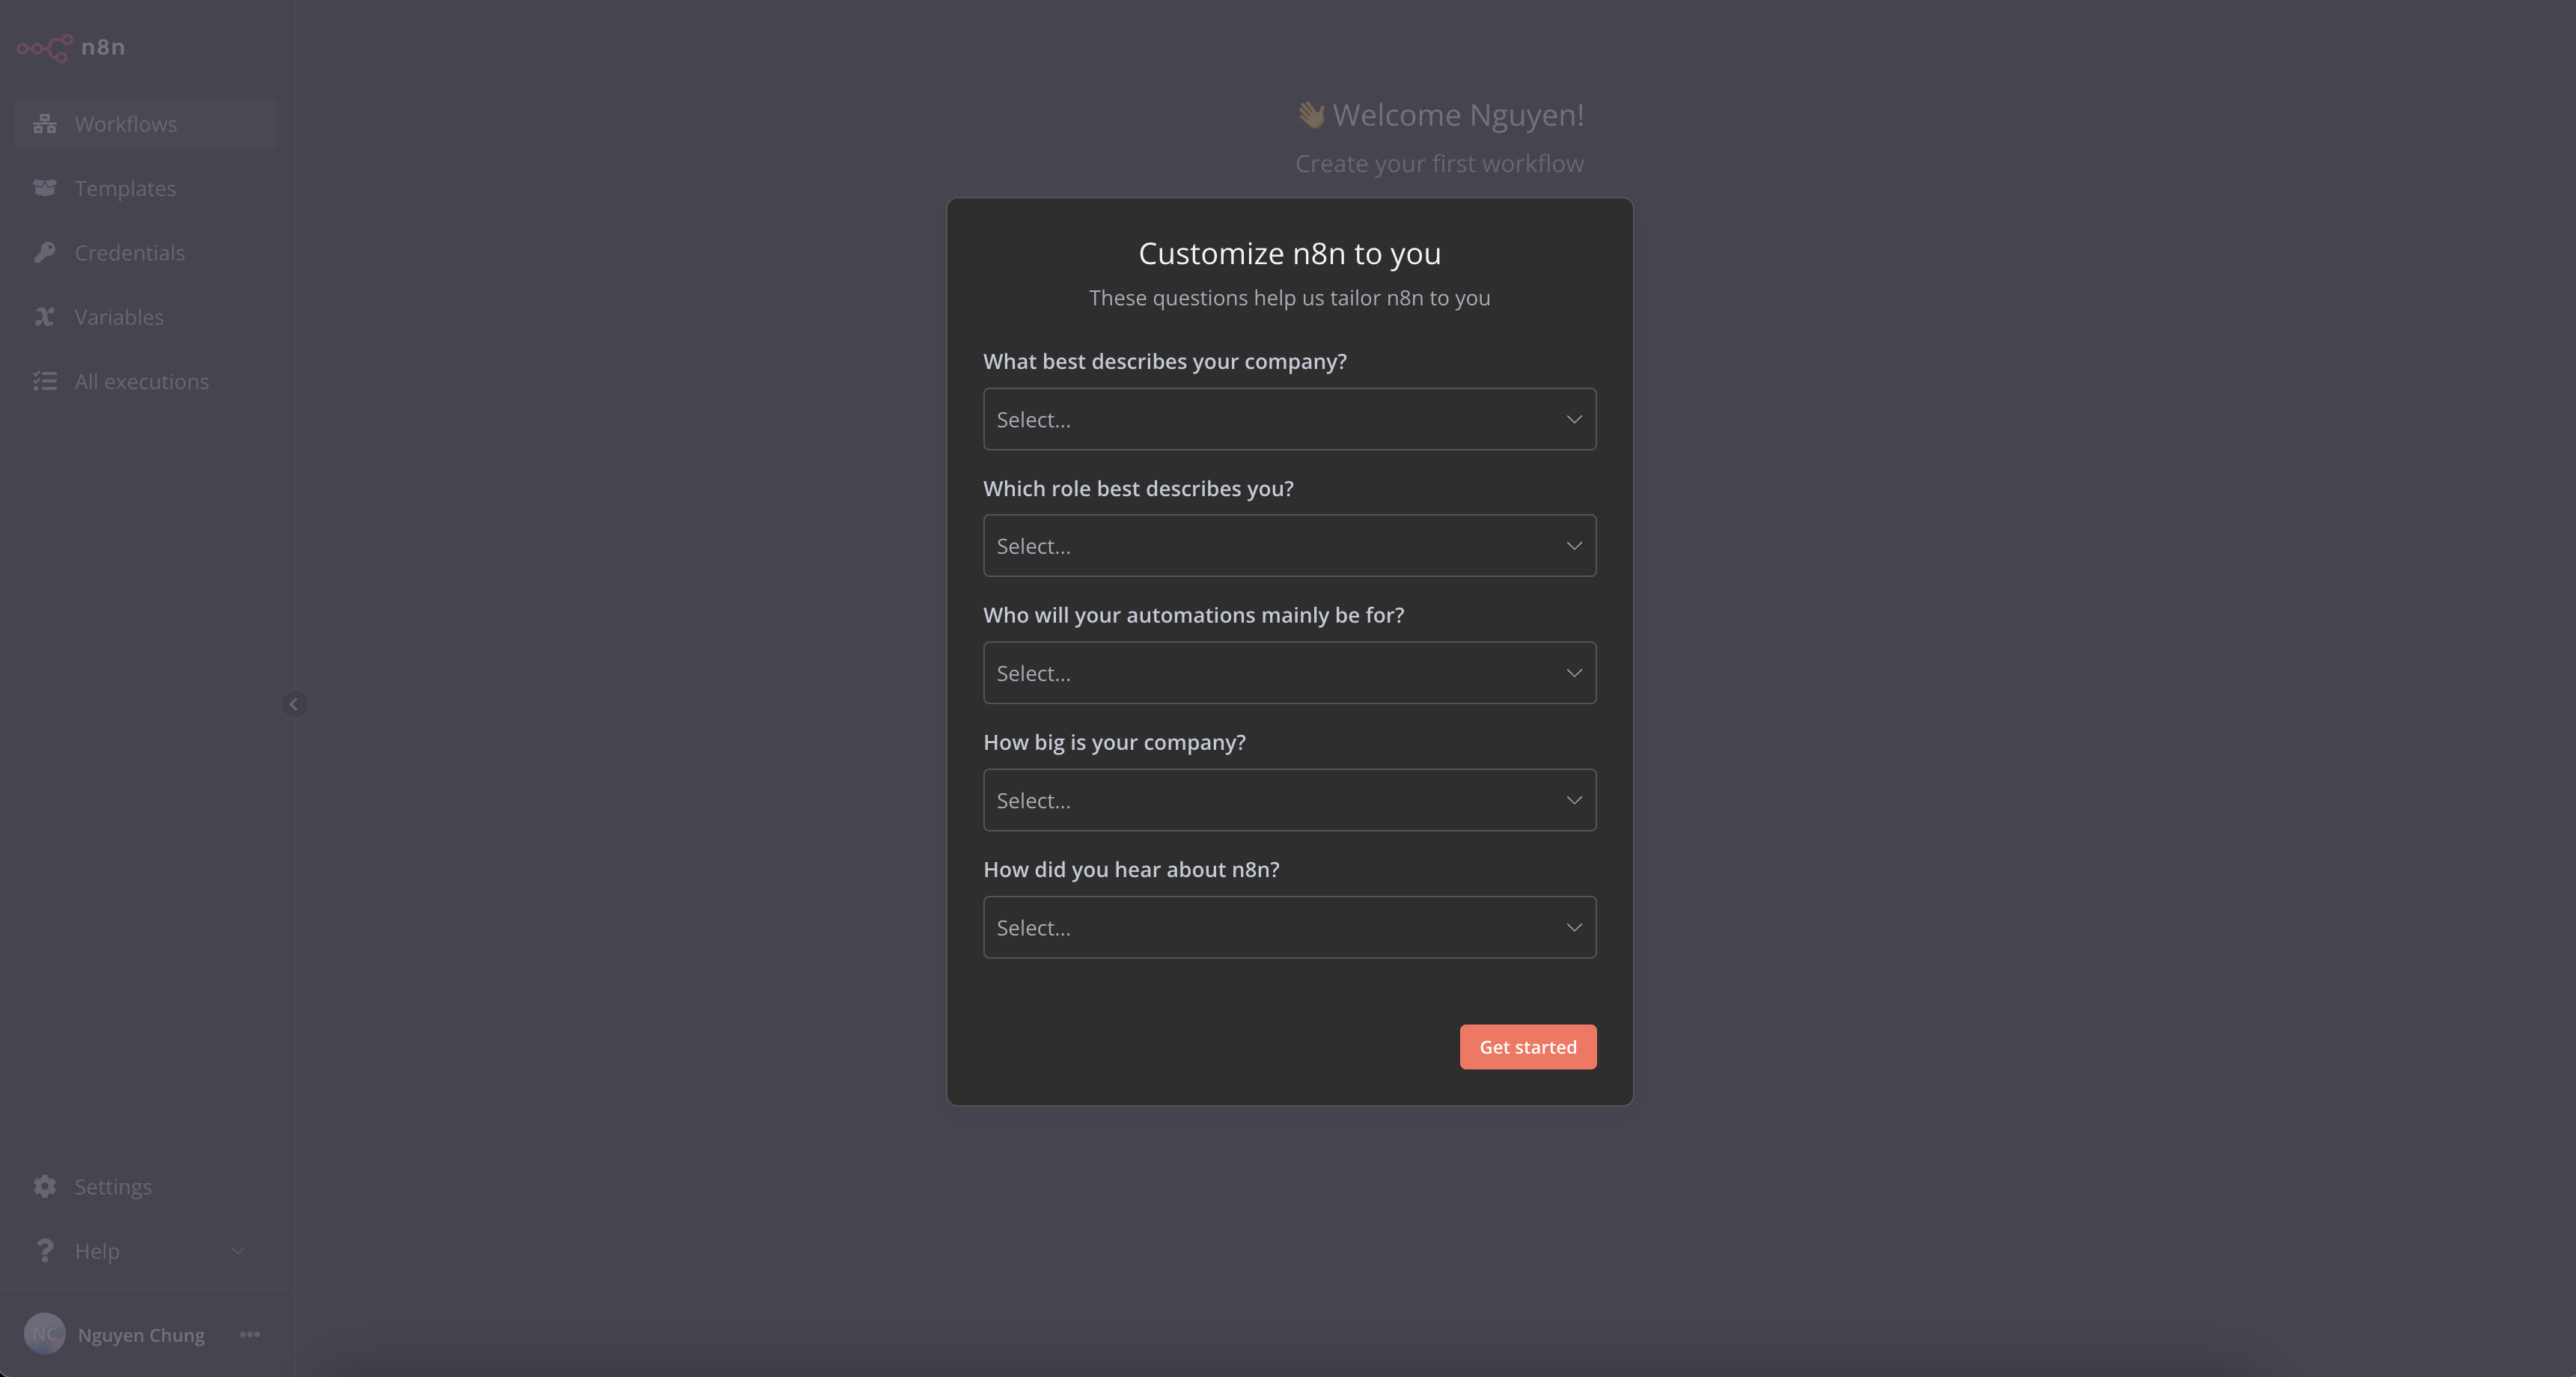
Access N8N Interface
After successful installation, to access UI n8n you have 2 options, use the form http://ip:port or domain
Used with the form ip:port
Use the Firewall Rule feature
Add firewall rule as follows:
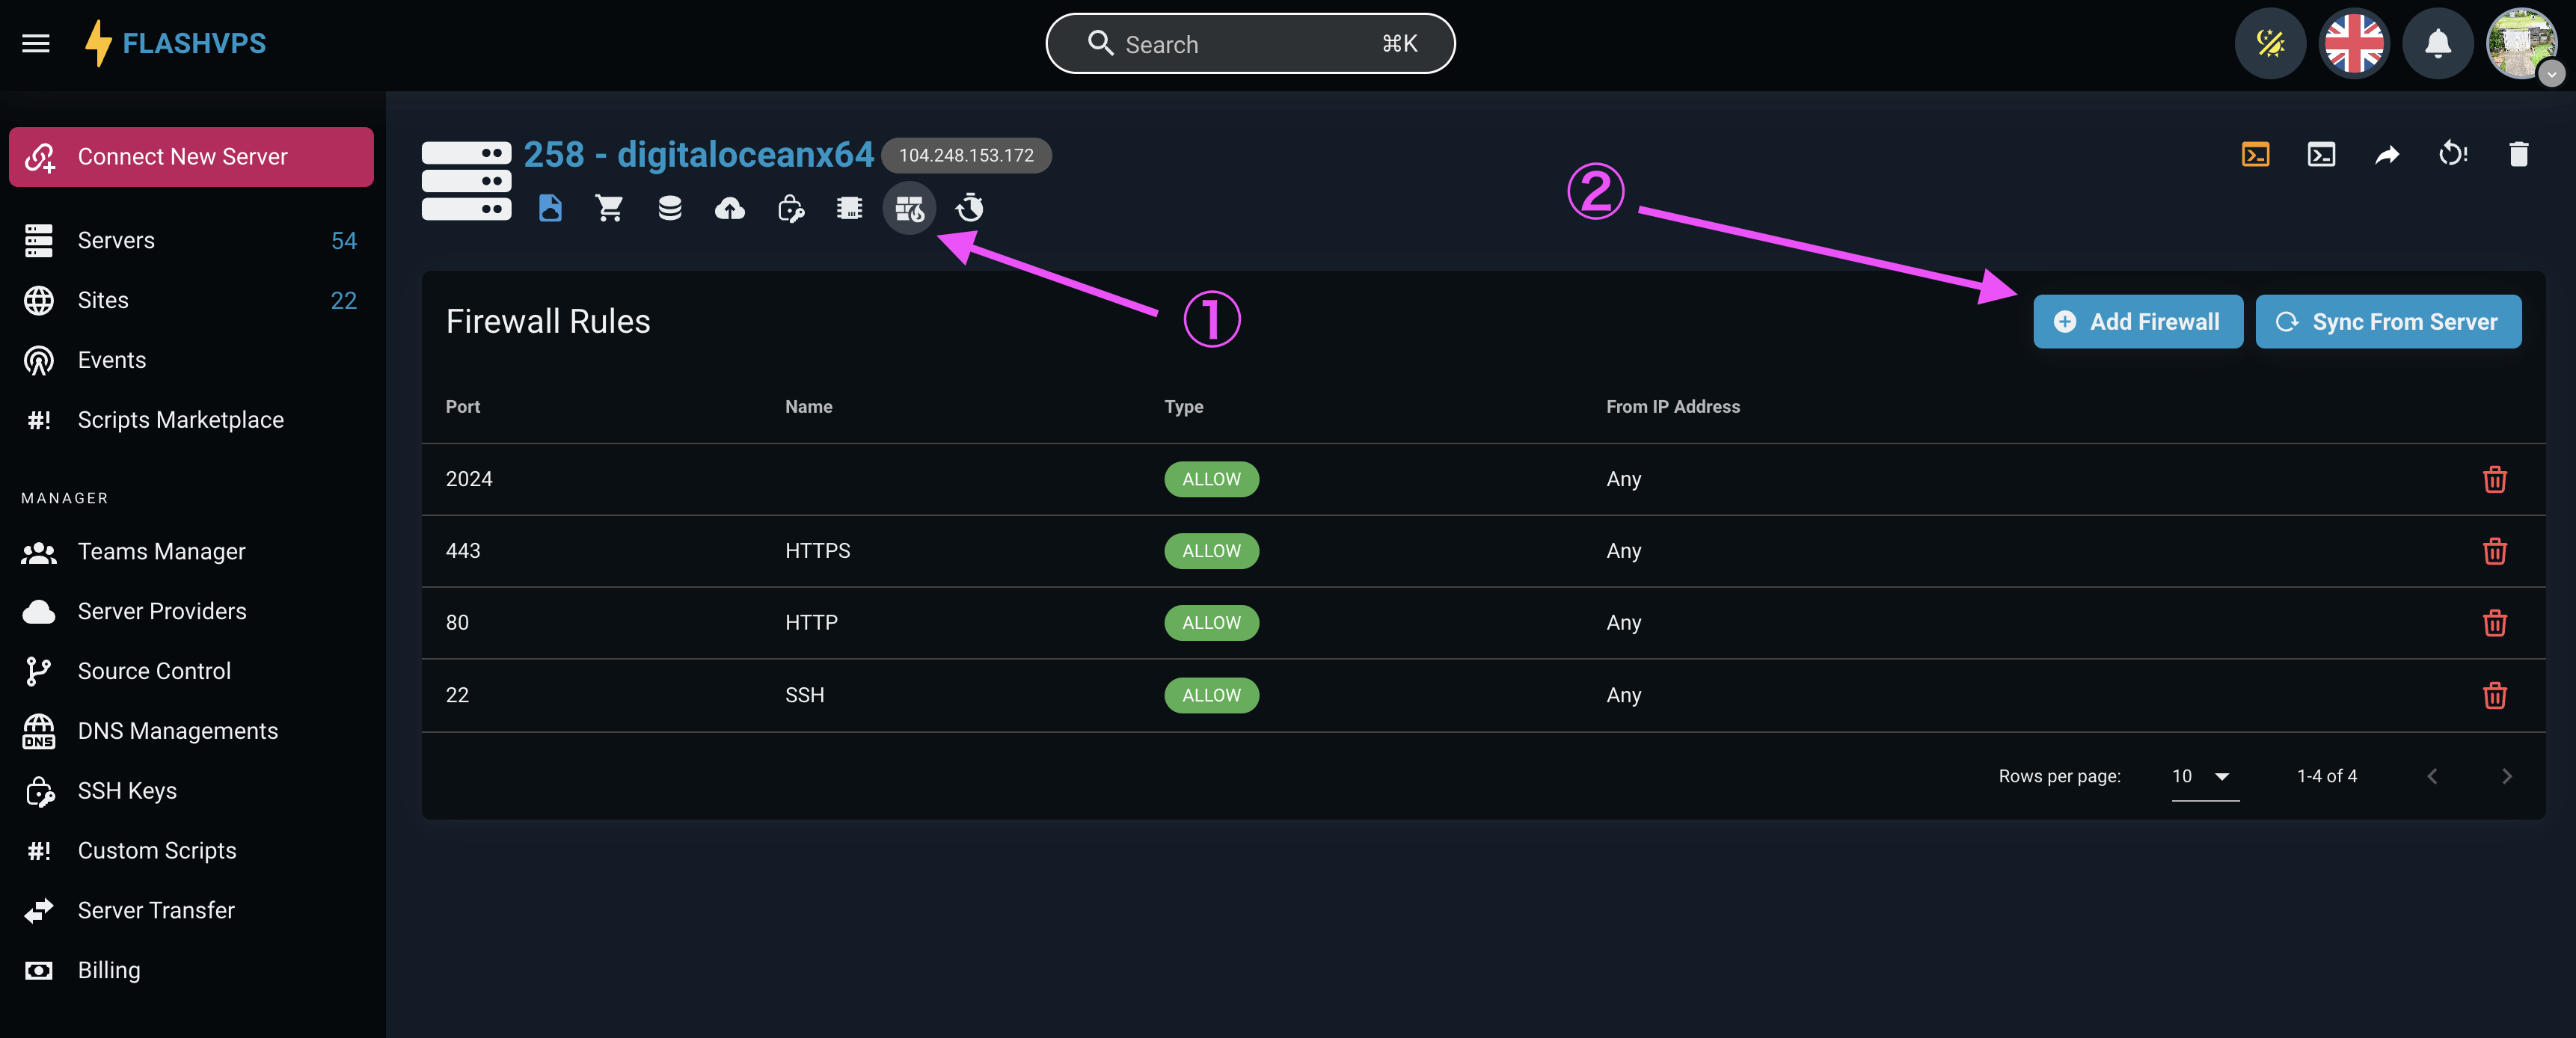
Name: enter
n8nPort: enter5678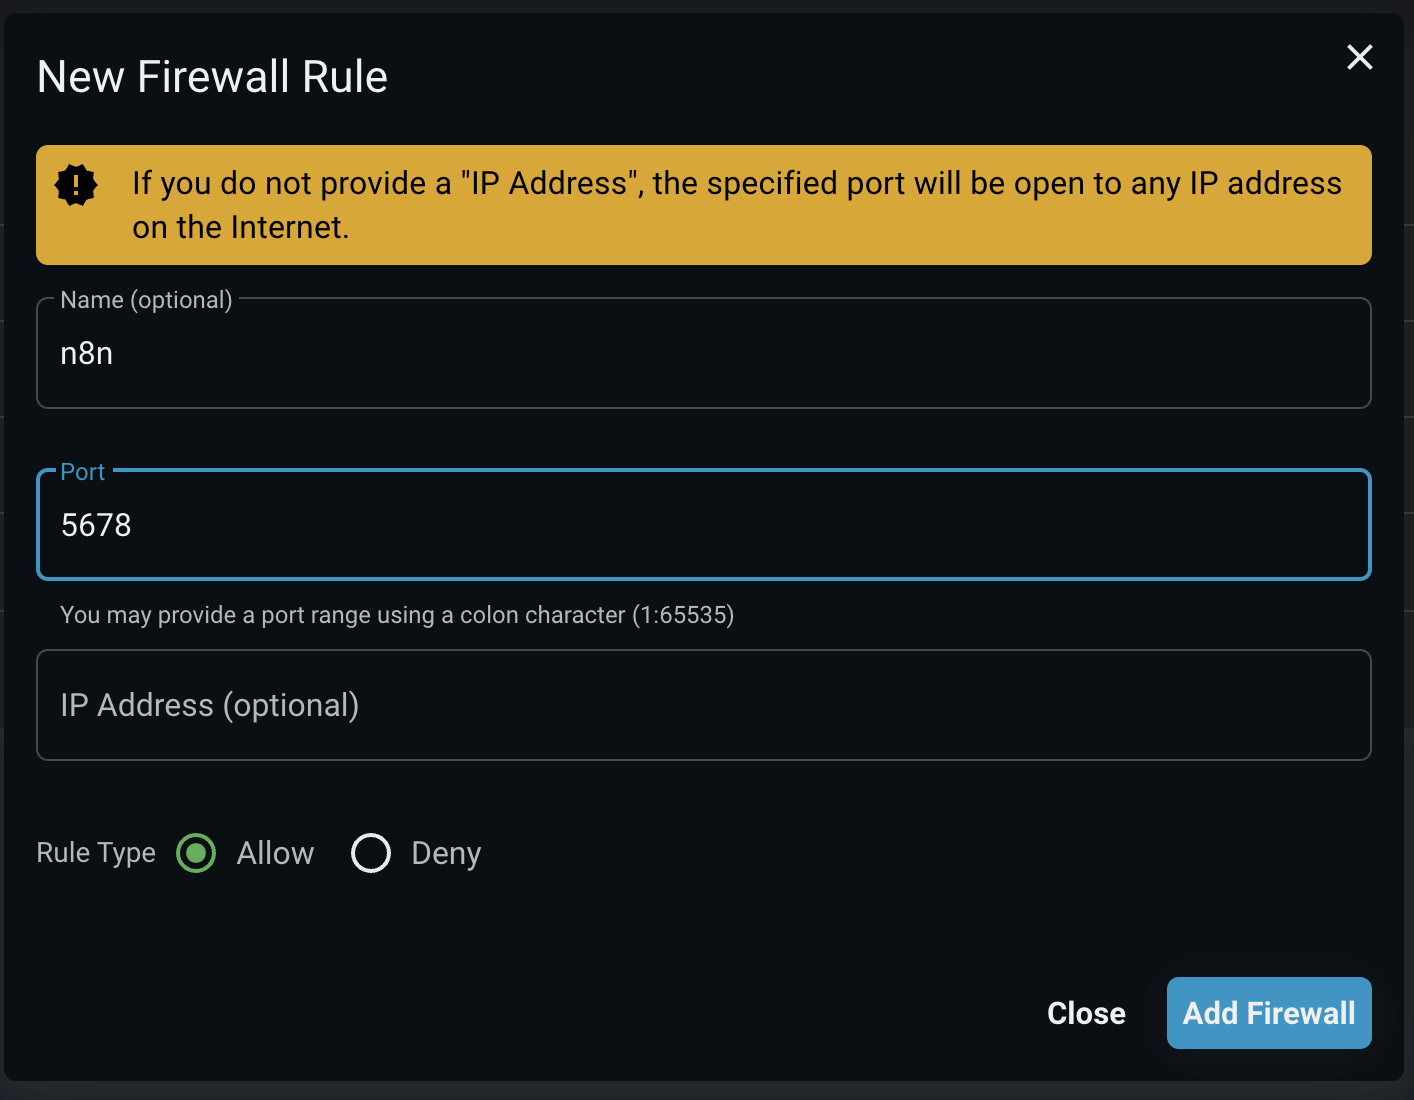 Press the
 Add FirewallbuttonOpen browser enter with
http://ip:5678replaceipwith your server ip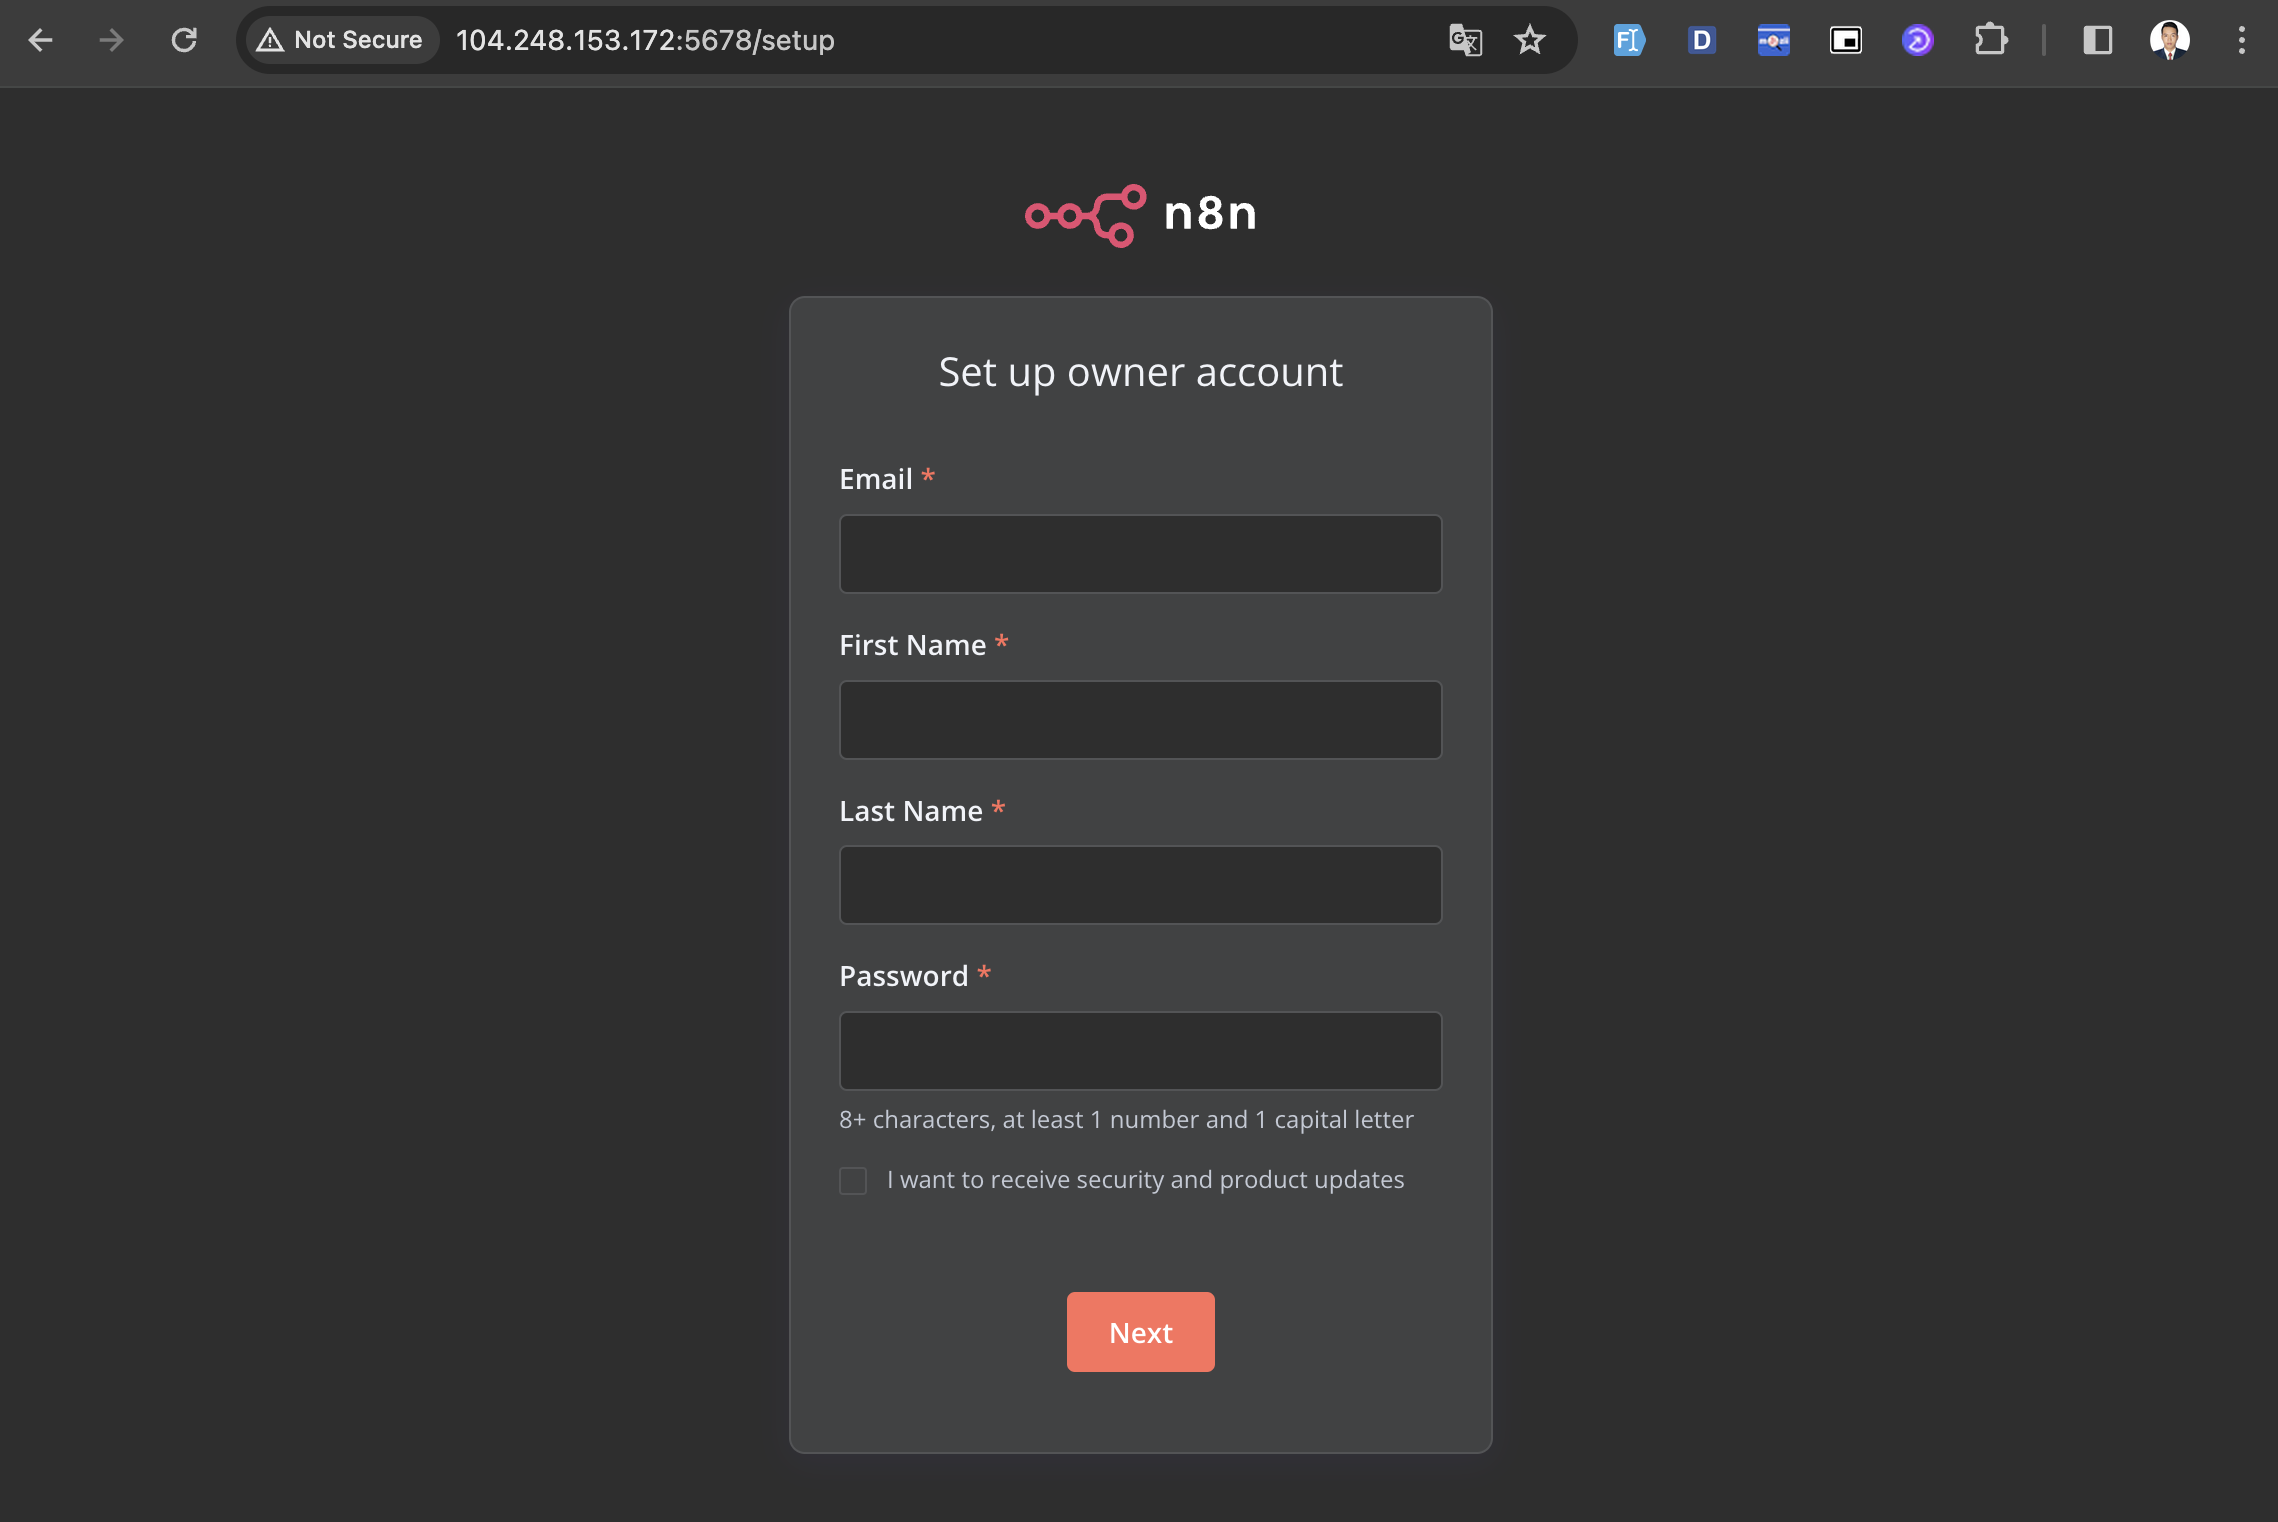
Used with the form domain
Let's say you have a domain name of domain.com and you want to use n8n.domain.com to access the n8n UI:
Create a website named
n8n.domain.com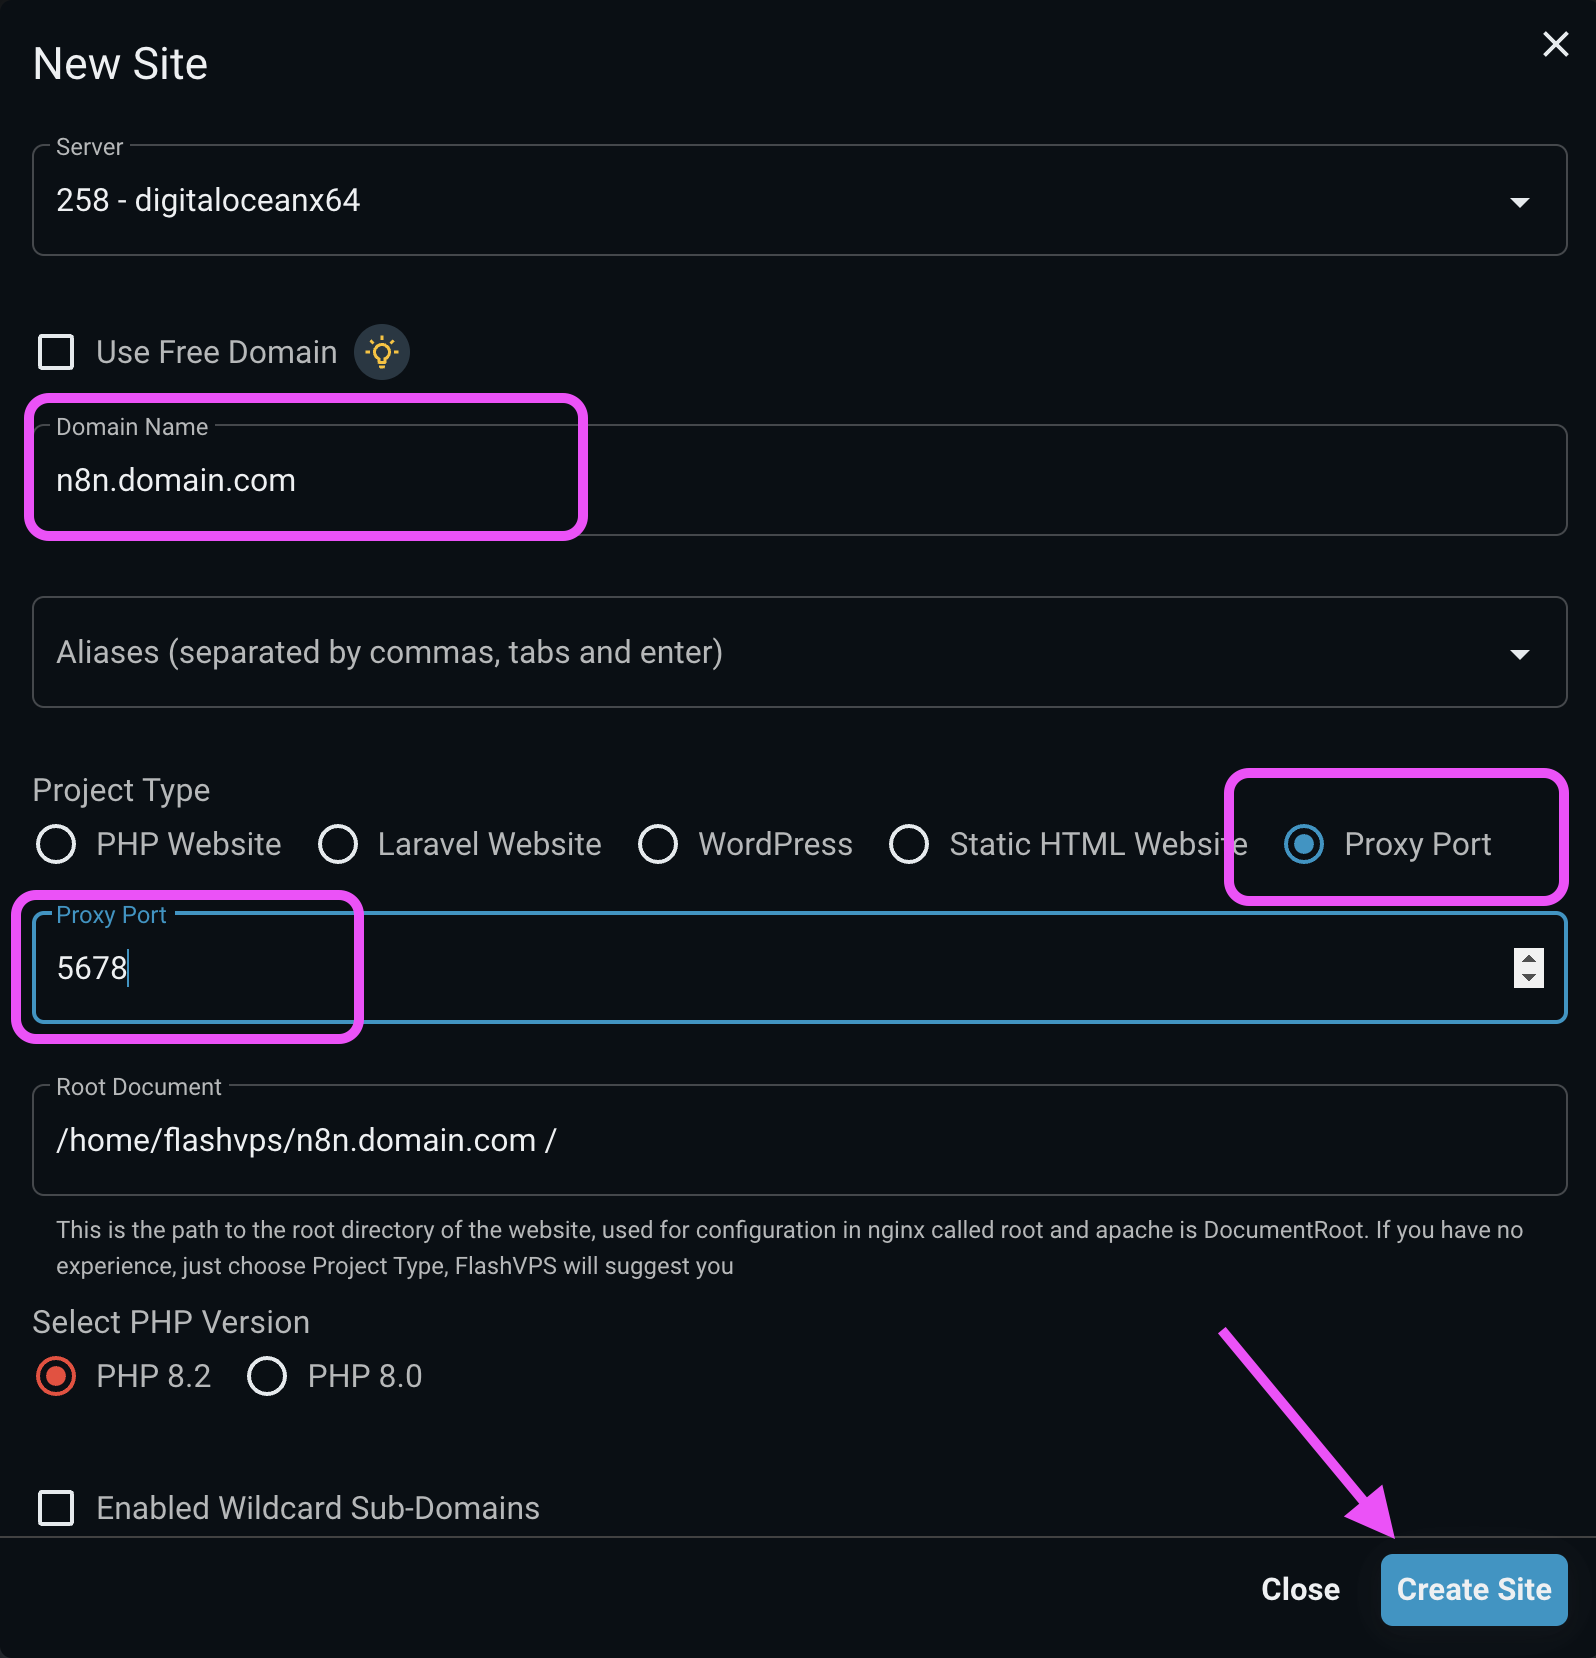
Go to the
nginxsection of the website to edit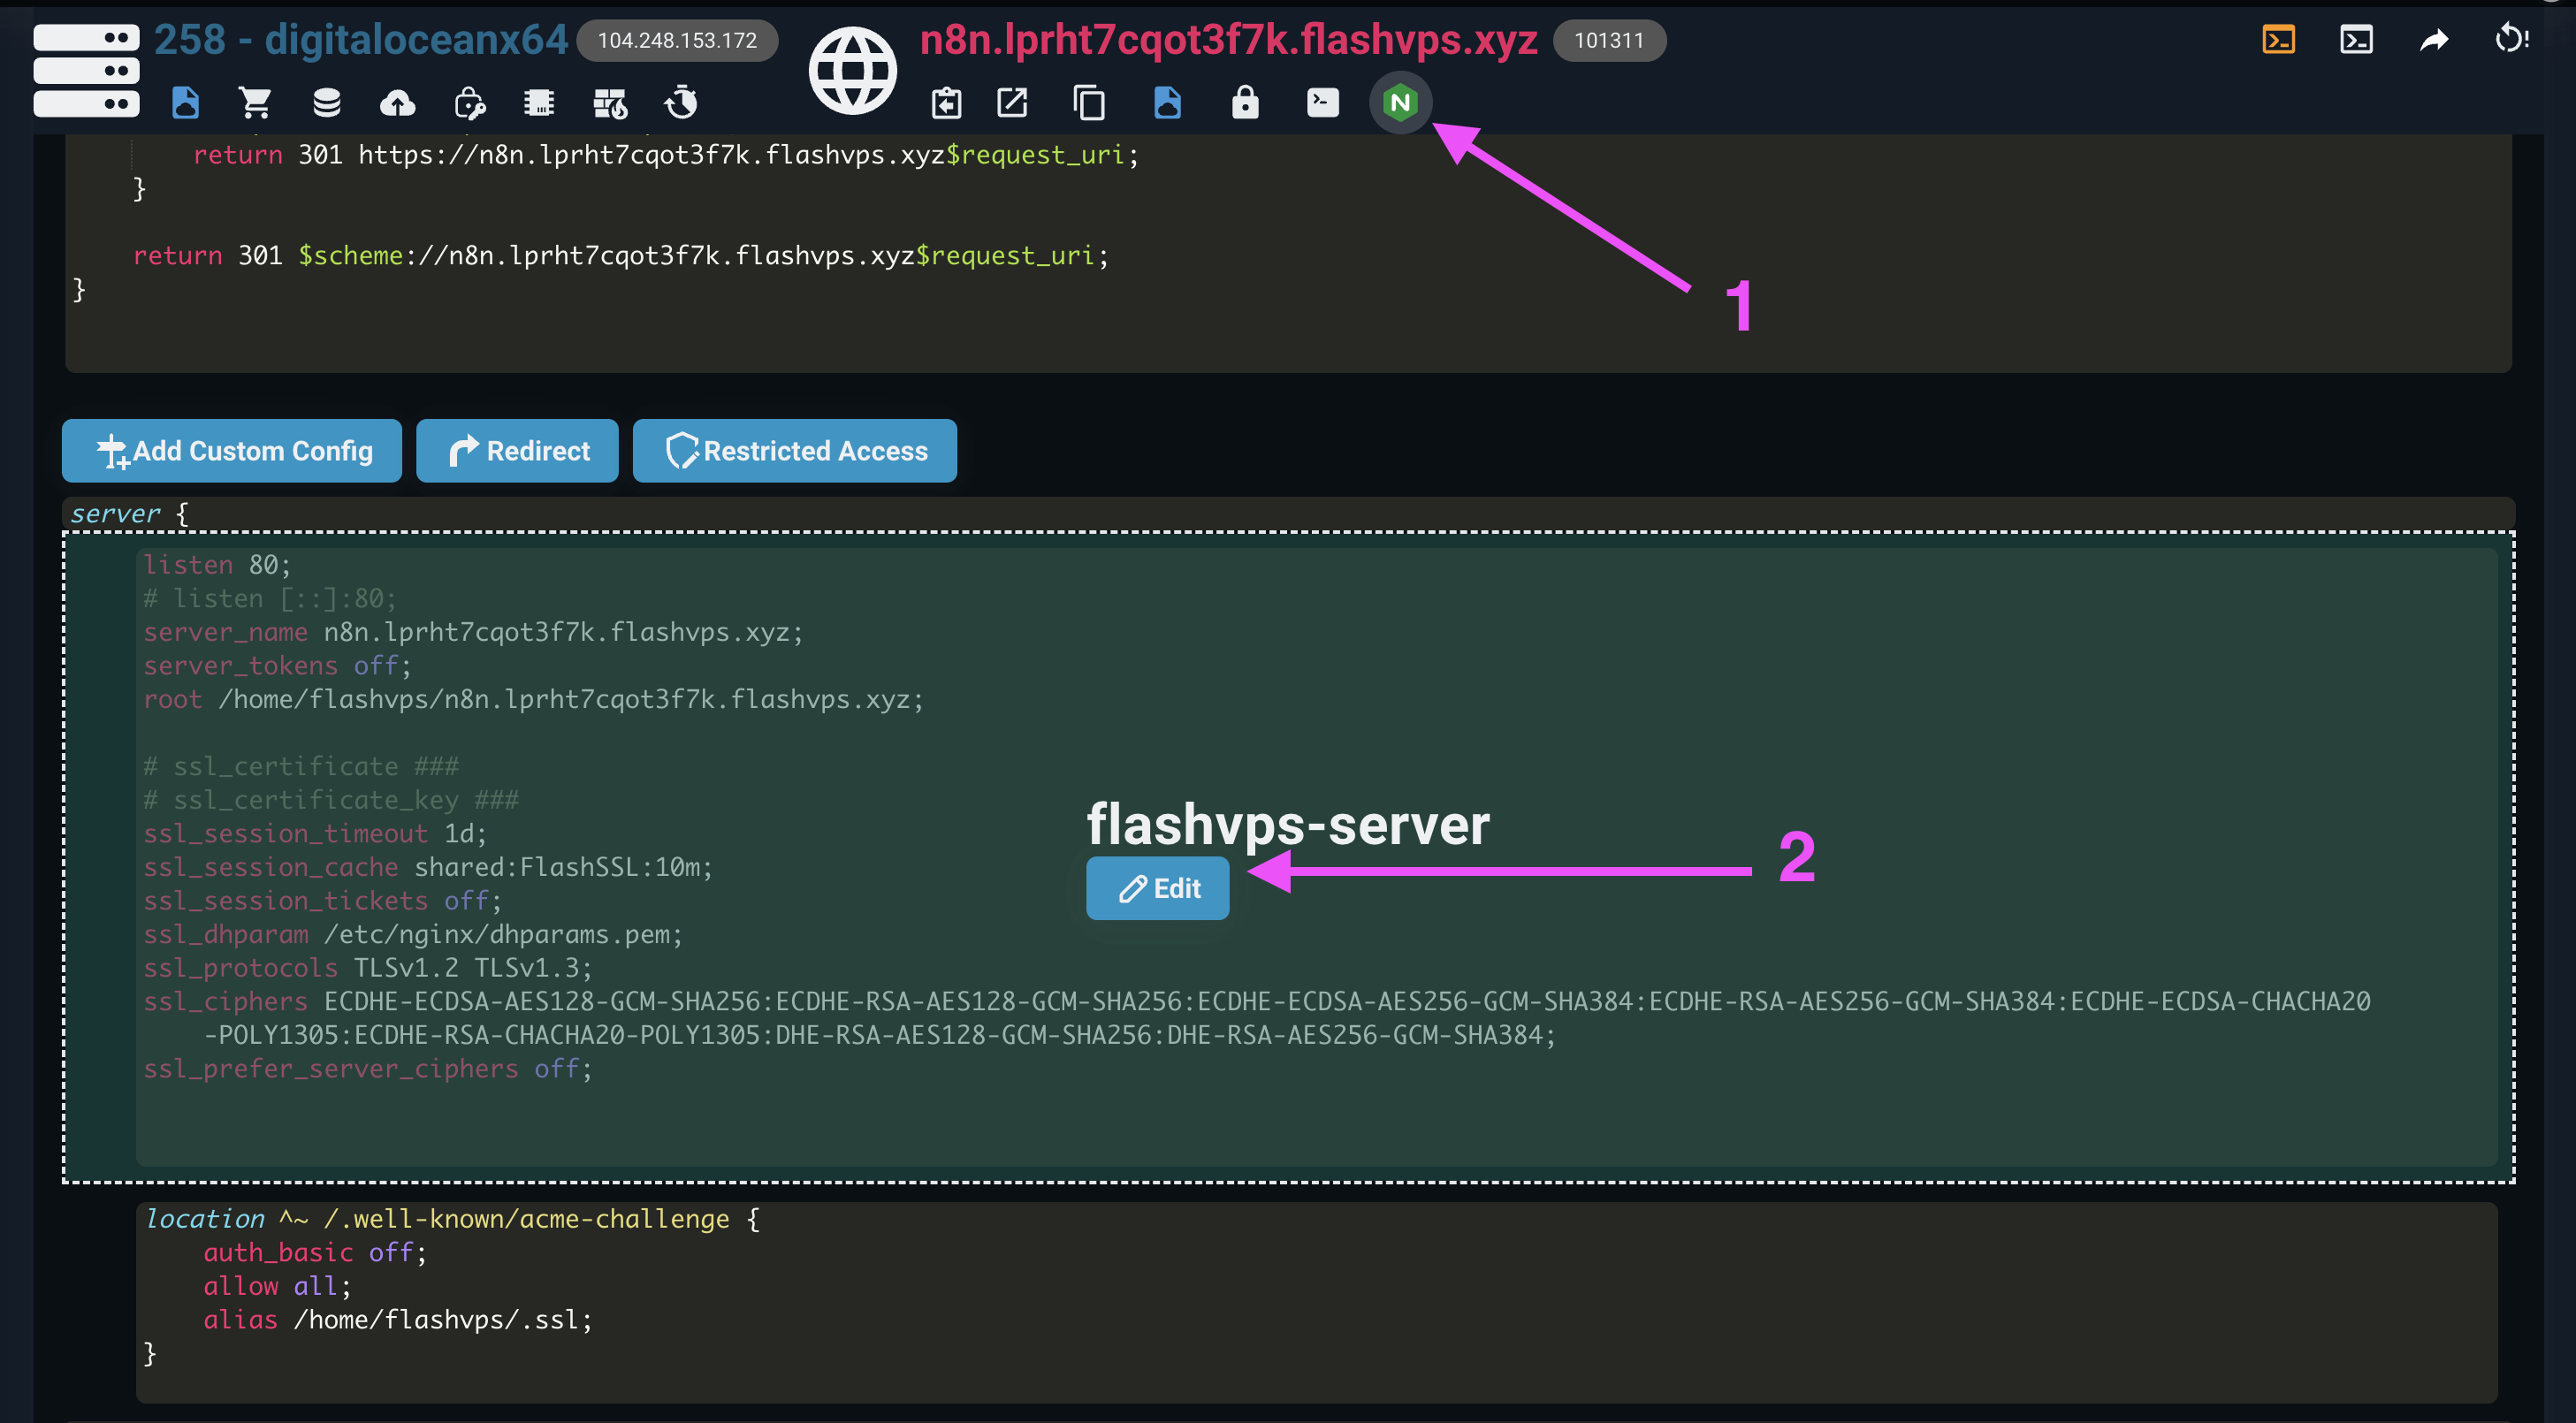
Scroll down, add lines with + (plus) signs and delete lines with - (minus) signs.
nginxlisten 80; listen [::]:80; server_name n8n.flashpanel.io; server_tokens off; root /home/flashpanel/n8n.flashpanel.io; # ssl_certificate ### # ssl_certificate_key ### ssl_session_timeout 1d; ssl_session_cache shared:FlashSSL:10m; ssl_session_tickets off; ssl_dhparam /etc/nginx/dhparams.pem; ssl_protocols TLSv1.2 TLSv1.3; ssl_ciphers ECDHE-ECDSA-AES128-GCM-SHA256:ECDHE-RSA-AES128-GCM-SHA256:ECDHE-ECDSA-AES256-GCM-SHA384:ECDHE-RSA-AES256-GCM-SHA384:ECDHE-ECDSA-CHACHA20-POLY1305:ECDHE -RSA-CHACHA20-POLY1305:DHE-RSA-AES128-GCM-SHA256:DHE-RSA-AES256-GCM-SHA384; ssl_prefer_server_ciphers off; add_header Strict-Transport-Security "max-age=63072000" always; add_header X-Frame-Options "SAMEORIGIN"; add_header X-XSS-Protection "1; mode=block"; add_header X-Content-Type-Options "nosniff"; index index.html index.php; charset utf-8; # USER CUSTOM CONFIG (CAN MOVE, DO NOT REMOVE!) location / { proxy_pass http://localhost:5678; proxy_http_version 1.1; proxy_set_header Upgrade $http_upgrade; proxy_set_header Connection 'upgrade'; proxy_set_header Host $host; proxy_cache_bypass $http_upgrade; #proxy_read_timeout 86400s; #proxy_send_timeout 86400s; chunked_transfer_encoding off; proxy_buffering off; proxy_cache off; } # Deny files starting with a . (dot) except .well-known location ~ /\.(?!well-known).* { deny all; } location ~* \.(3gp|gif|jpg|jpeg|png|ico|wmv|avi|asf|asx|mpg|mpeg|mp4|pls|mp3|mid|wav|swf|flv|exe|zip|tar| rar|gz|tgz|bz2|uha|7z|doc|docx|xls|xlsx|pdf|iso|eot|svg|ttf|woff|woff2)$ { gzip_static off; add_header Pragma public; add_header Cache-Control "public, must-revalidate, proxy-revalidate"; access_log off; expires 30d; break; break; }location ~* \.(txt|js|css)$ { add_header Pragma public; add_header Cache-Control "public, must-revalidate, proxy-revalidate"; access_log off; expires 30d; break; break; } Click the
Edit Nginx Configurationbutton to make changesClick the
Syncbutton to apply the changes.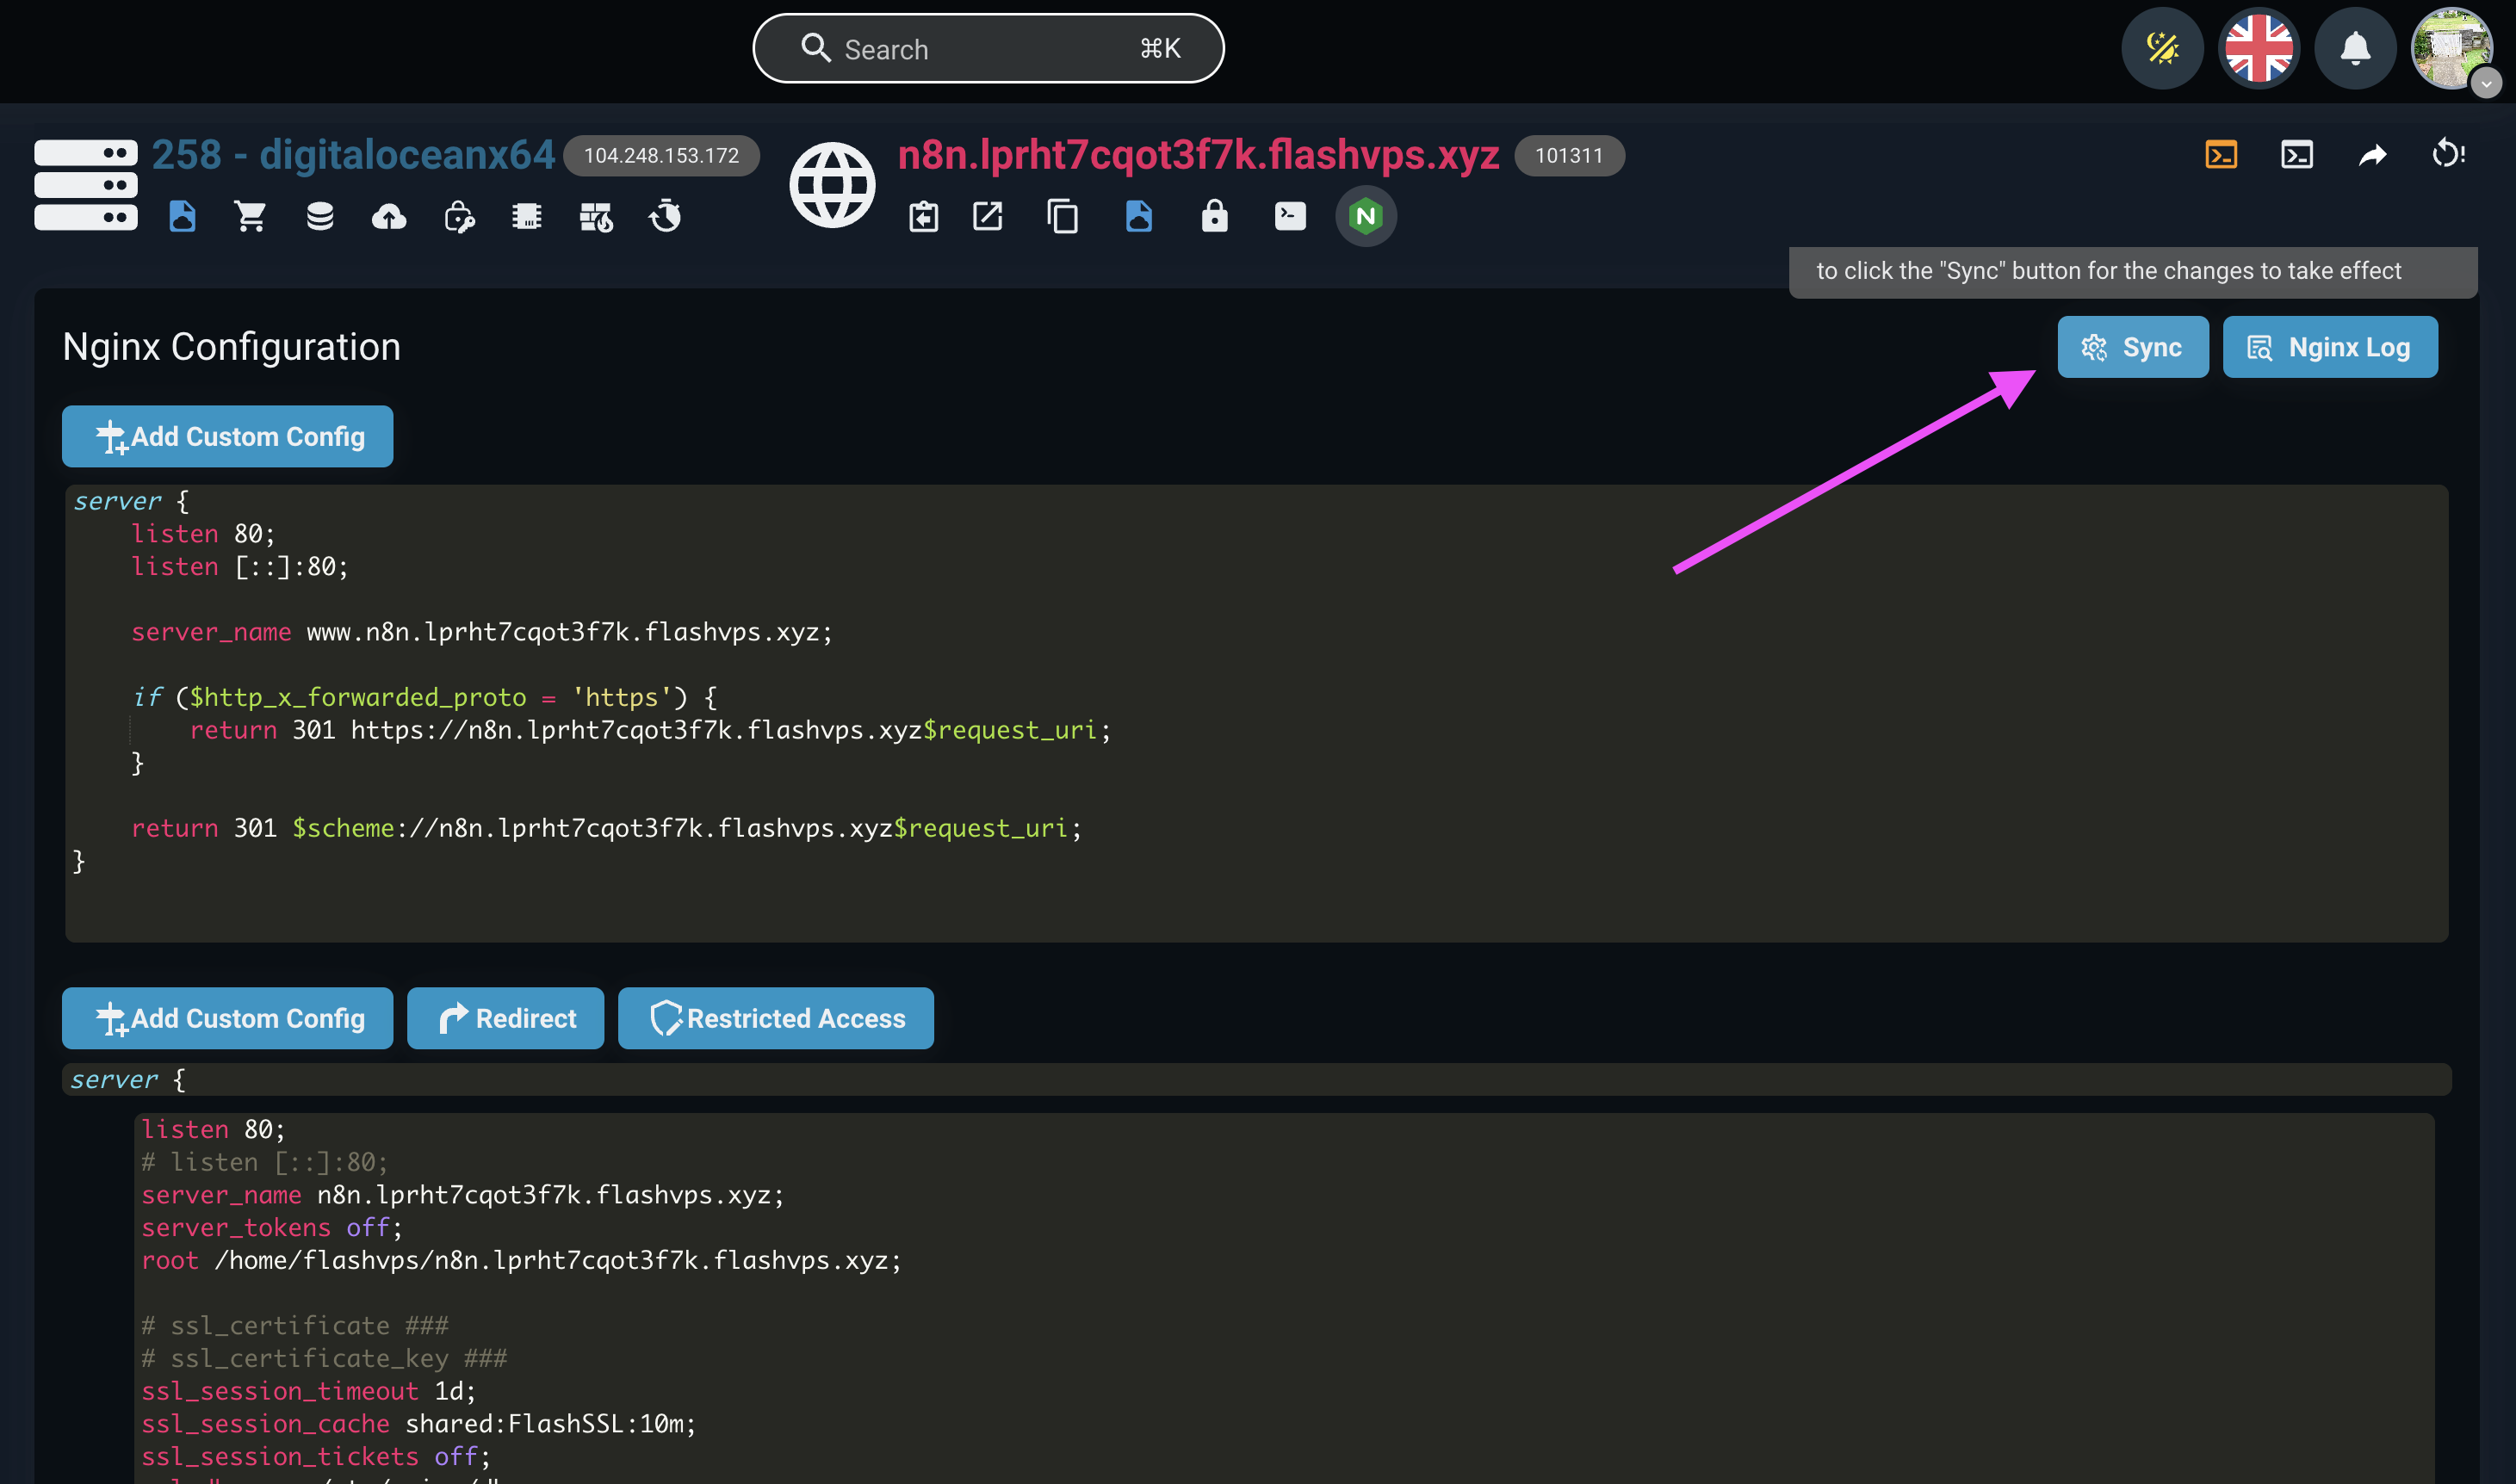
Open a browser and go to
n8n.domain.com(replace domain.com with your domain name)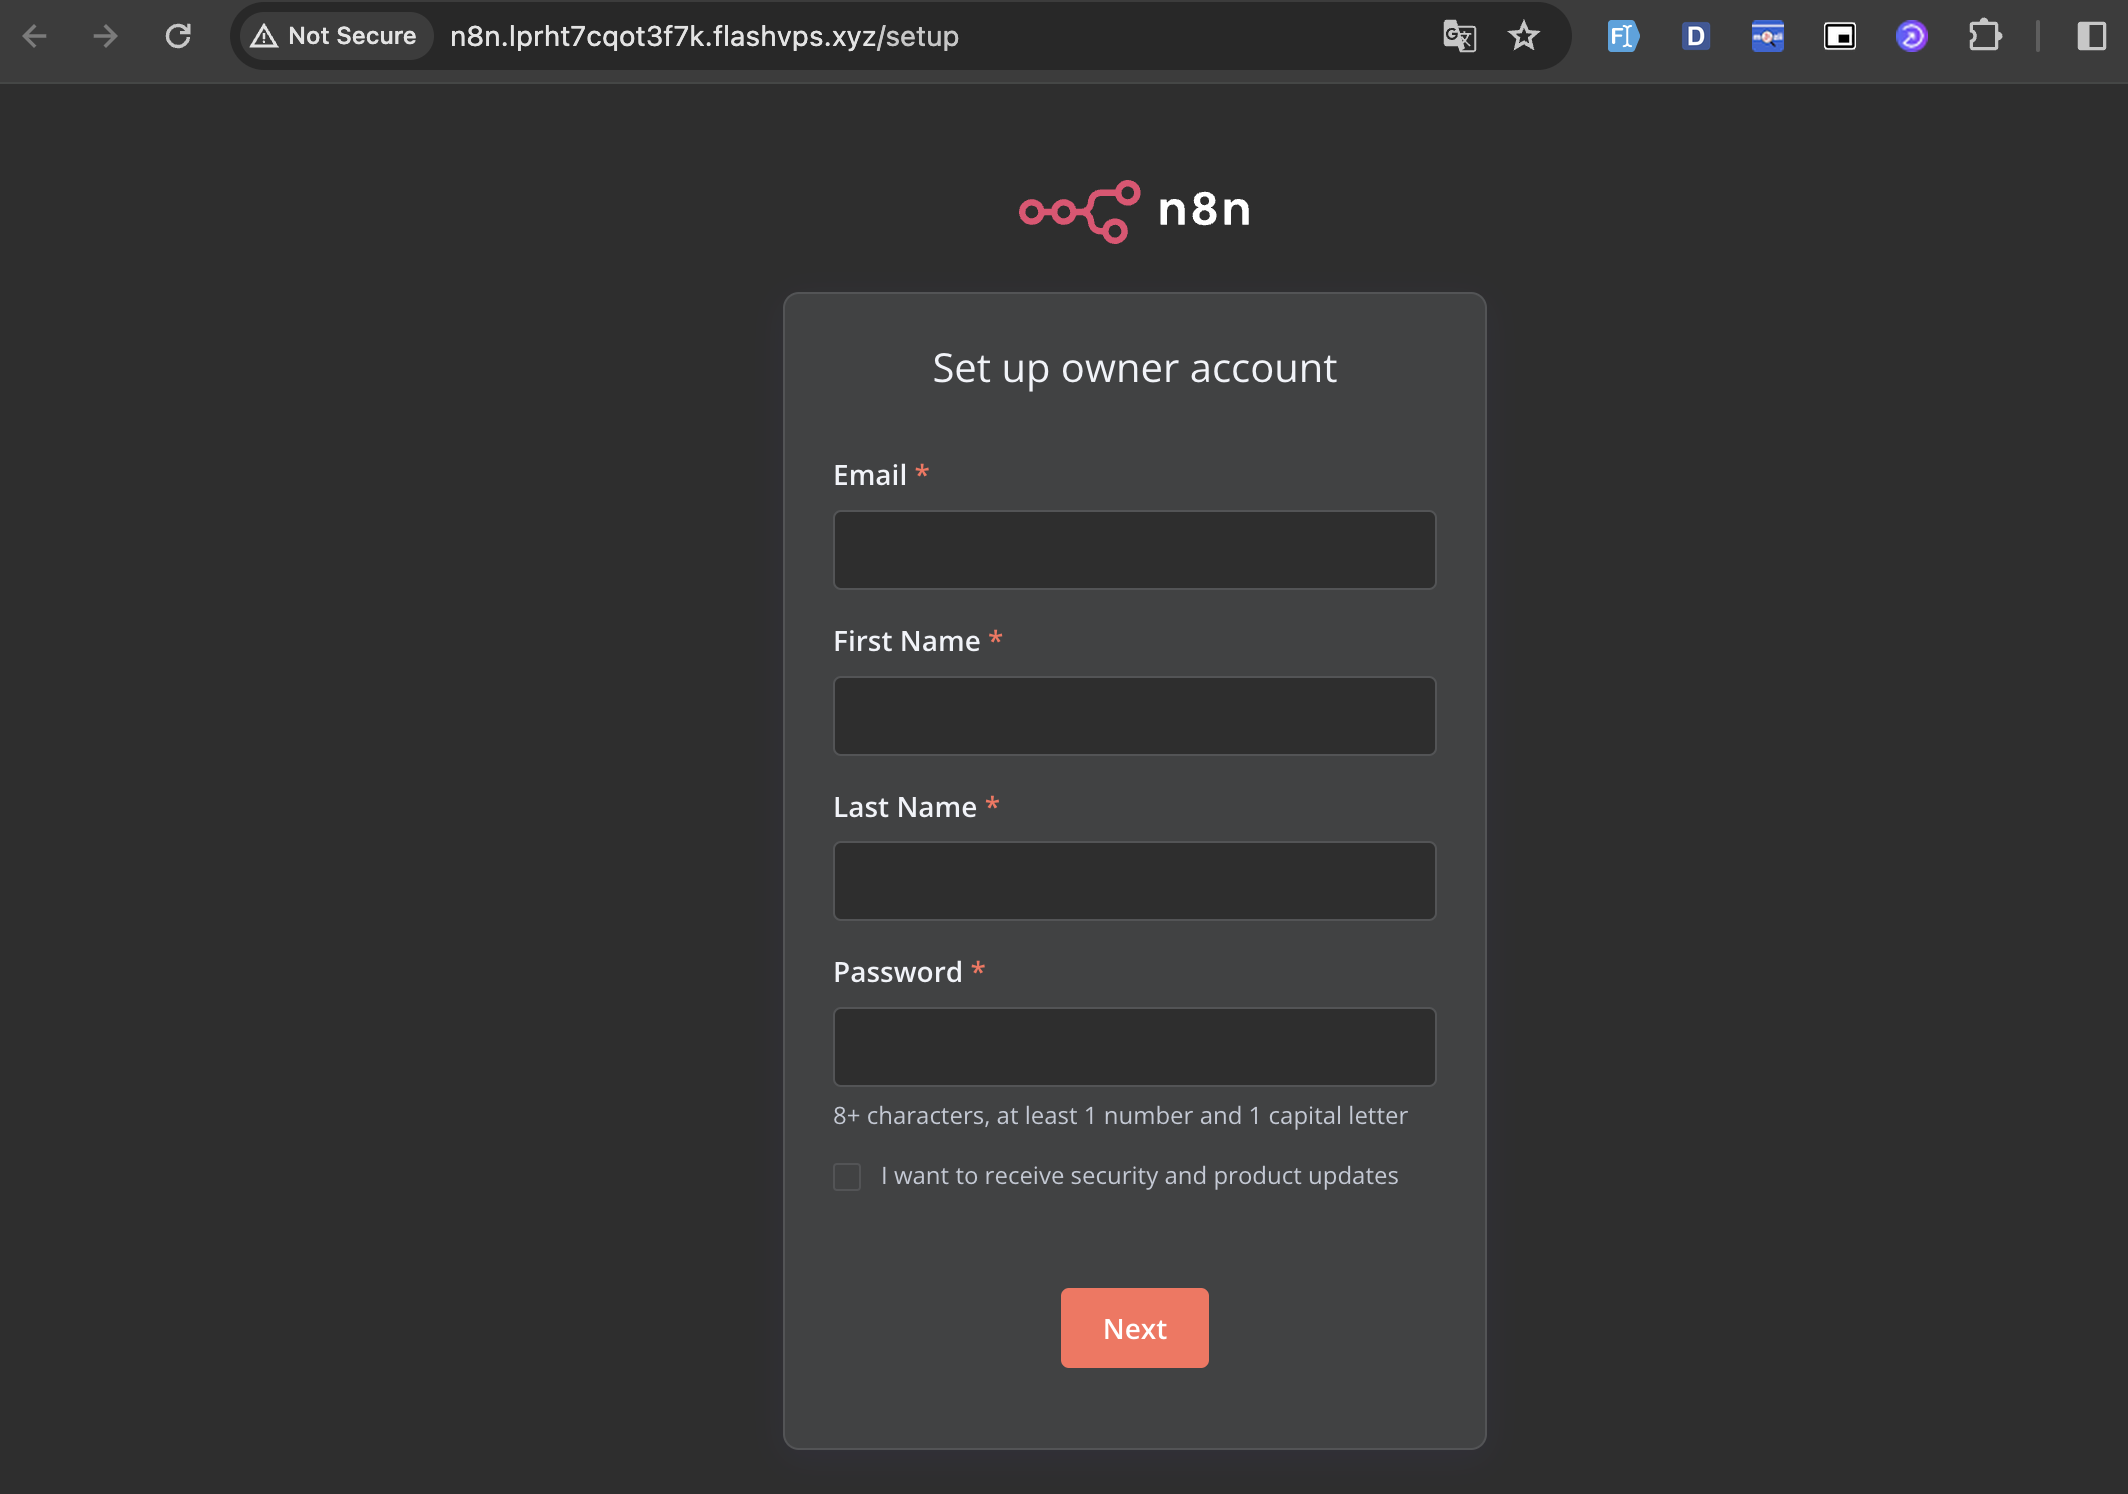
Showing up like this is successful