Chatwoot
What is Chatwoot?
Chatwoot is an open source software platform used to manage and support customers through different communication channels. Chatwoot focuses on helping businesses interact effectively with customers through channels such as: 1. Email 2. Live Chat (directly on the website) 3. Social Media (Facebook, Twitter, Instagram, WhatsApp, Telegram, etc. ) 4. SMS 5. API for integration with other systems.
Main features of Chatwoot
- Omnichannel support: Integrate multiple platforms to support customers in a single place.
- Group collaboration: Allows team members to work together, transfer conversations or assign tasks easily.
- Automation: Automate repetitive tasks such as replying to messages, tagging or forwarding conversations.
- Reporting and analytics: Track support team performance and key metrics like response time, number of tickets resolved.
- Customize interface: Provide API and webhooks to customize according to the needs of each business.
- Open source: You can download and deploy on your own server or use the cloud service version of
Chatwoot.
Advantage
- Free and open source (can be self-hosted to save costs).
- Easy integration with other tools and services.
- High flexibility, suitable for both small and large businesses.
Using Chatwoot in practice
• Used as an online customer support system. • Manage and reply to messages from social networks in a single interface. • Customer support on the website through live chat.
From now on, with FlashPanel, installing Chatwoot becomes simpler than ever. You only need a few simple steps, no need for complicated operations, you can still deploy right on your server!
Hardware requirements
- CPU: 2 cores
- RAM: 4 GB
1-Click Install Chatwoot
Step 1: Create a New Website
Step 2: After the website is successfully created, click Manage to open the management interface.
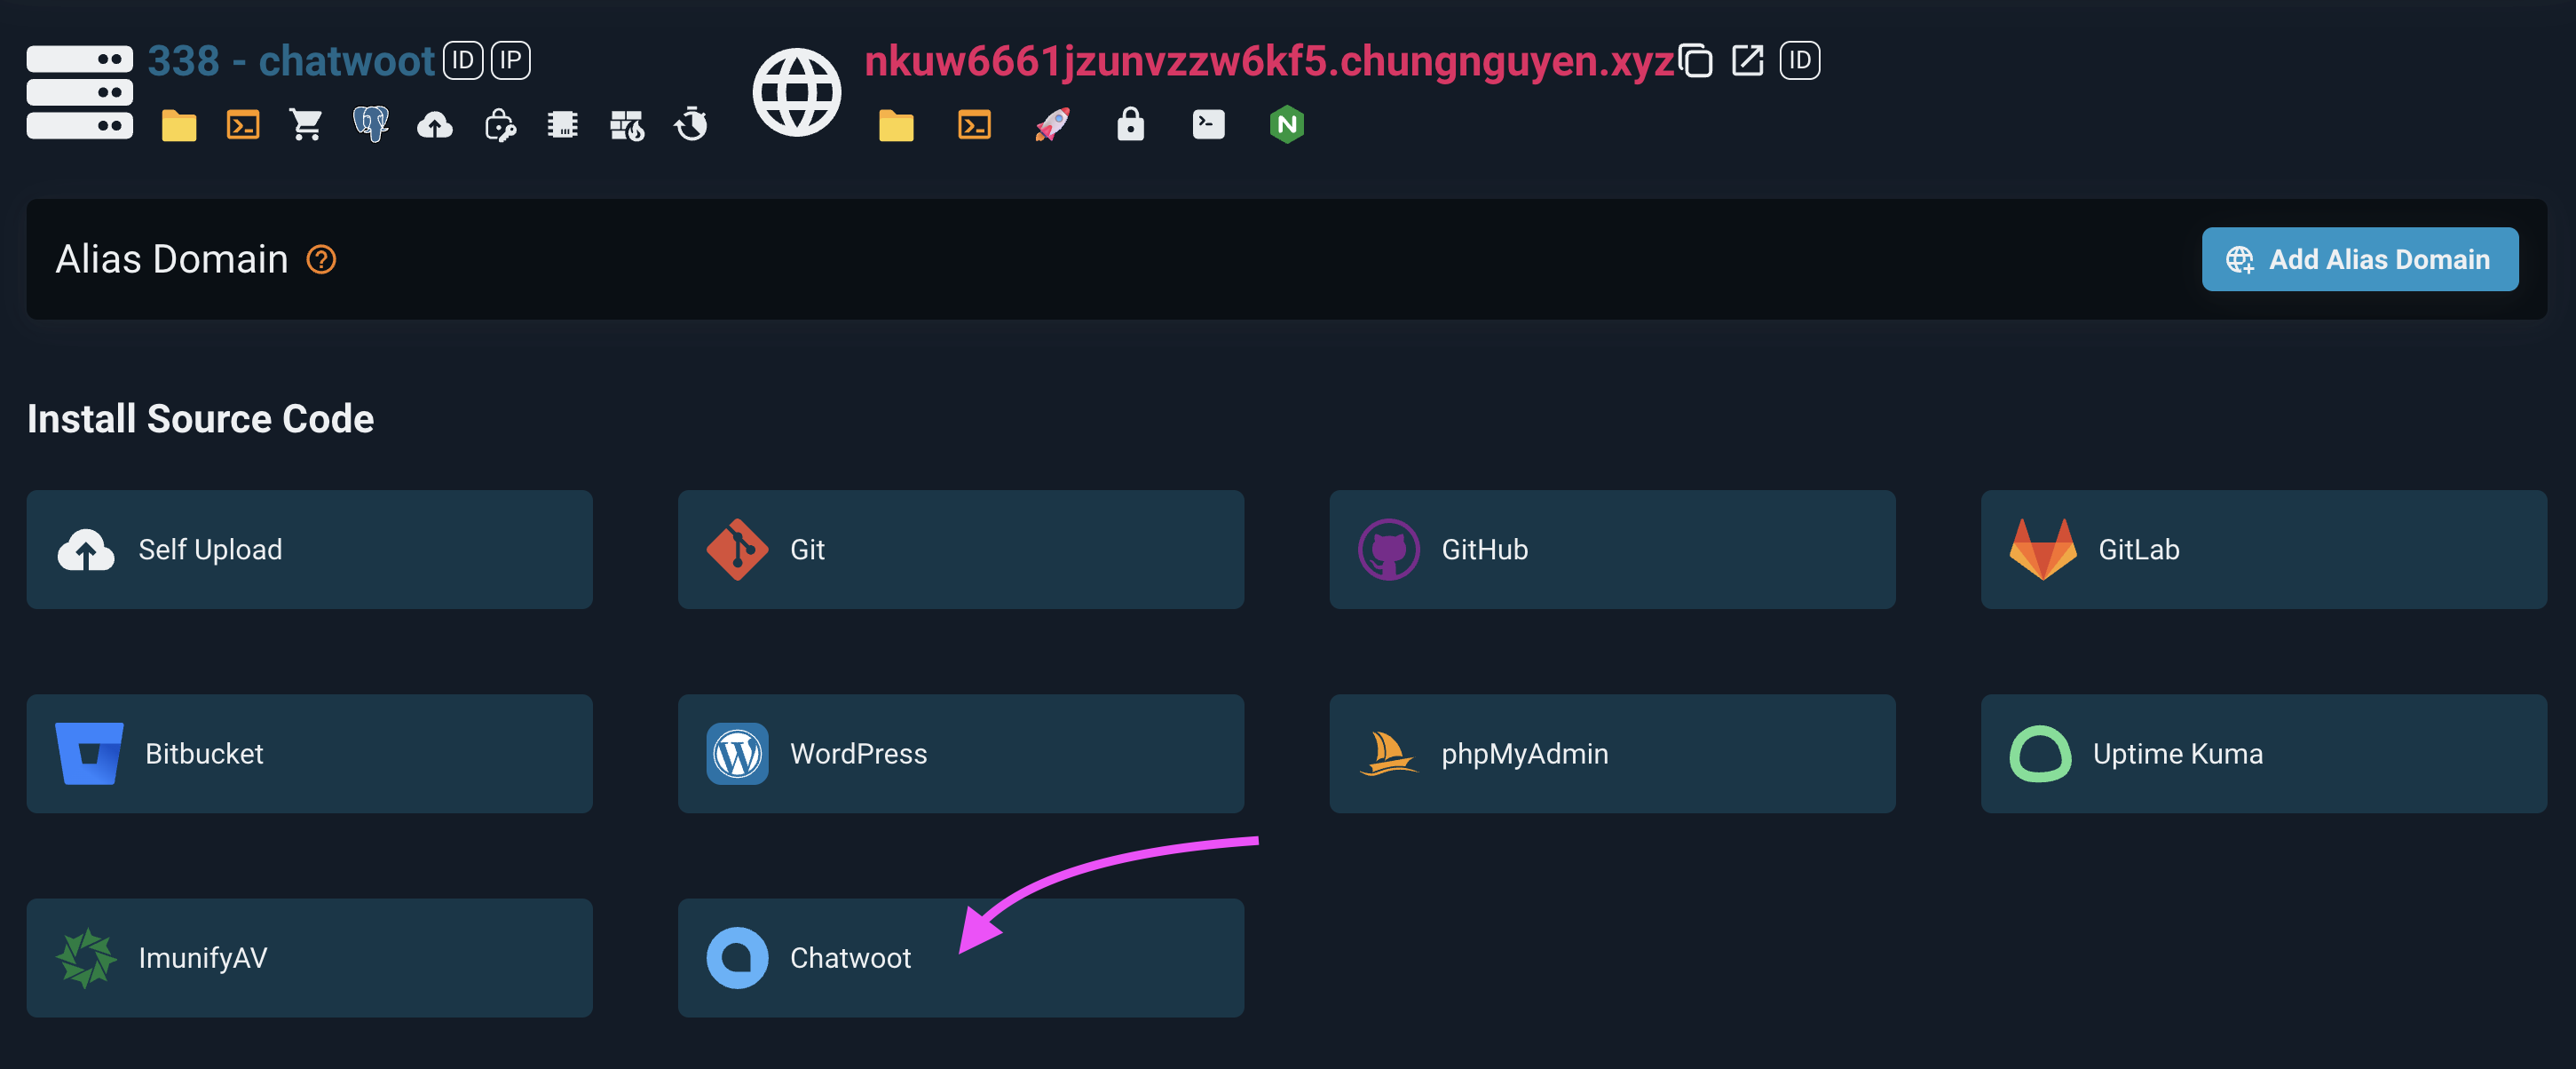
Step 3: Install Chatwoot
- In the website management interface, find Install Source Code.
- Here, you will see the
Chatwootoption in the list. - Click on the
Chatwooticon, then click the Install button.

Step 4: Complete
- FlashPanel will automatically download and install the
Chatwootsource code. - Once completed, you can access the website you just installed to start using
Chatwootimmediately. Below is a sample document that explains how to use thecwctltool you are developing:
Use Chatwoot
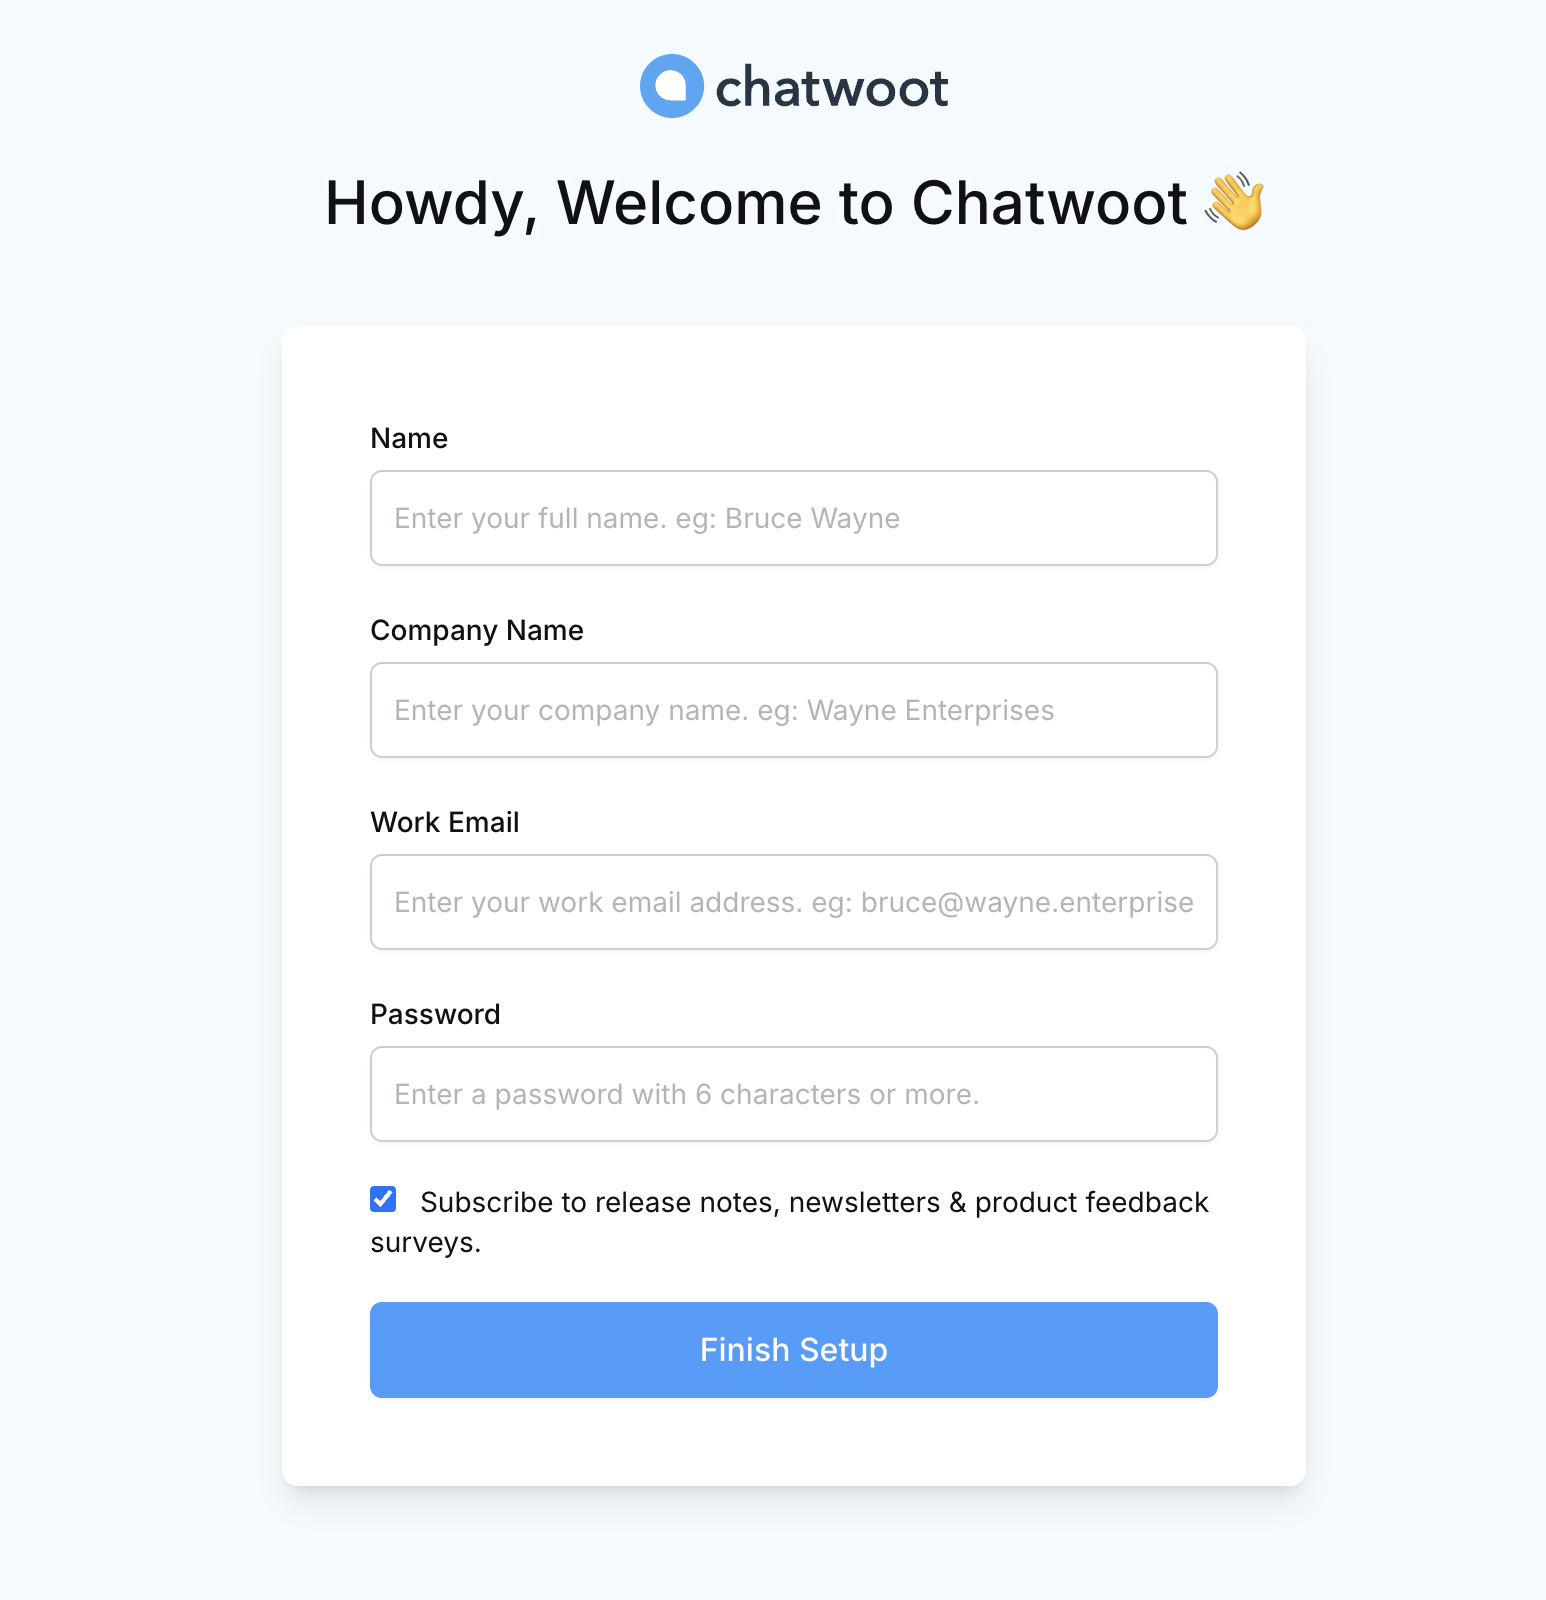
After completing the installation, access the website you created and you will see the Administrator information settings screen, enter the items to complete the installation.

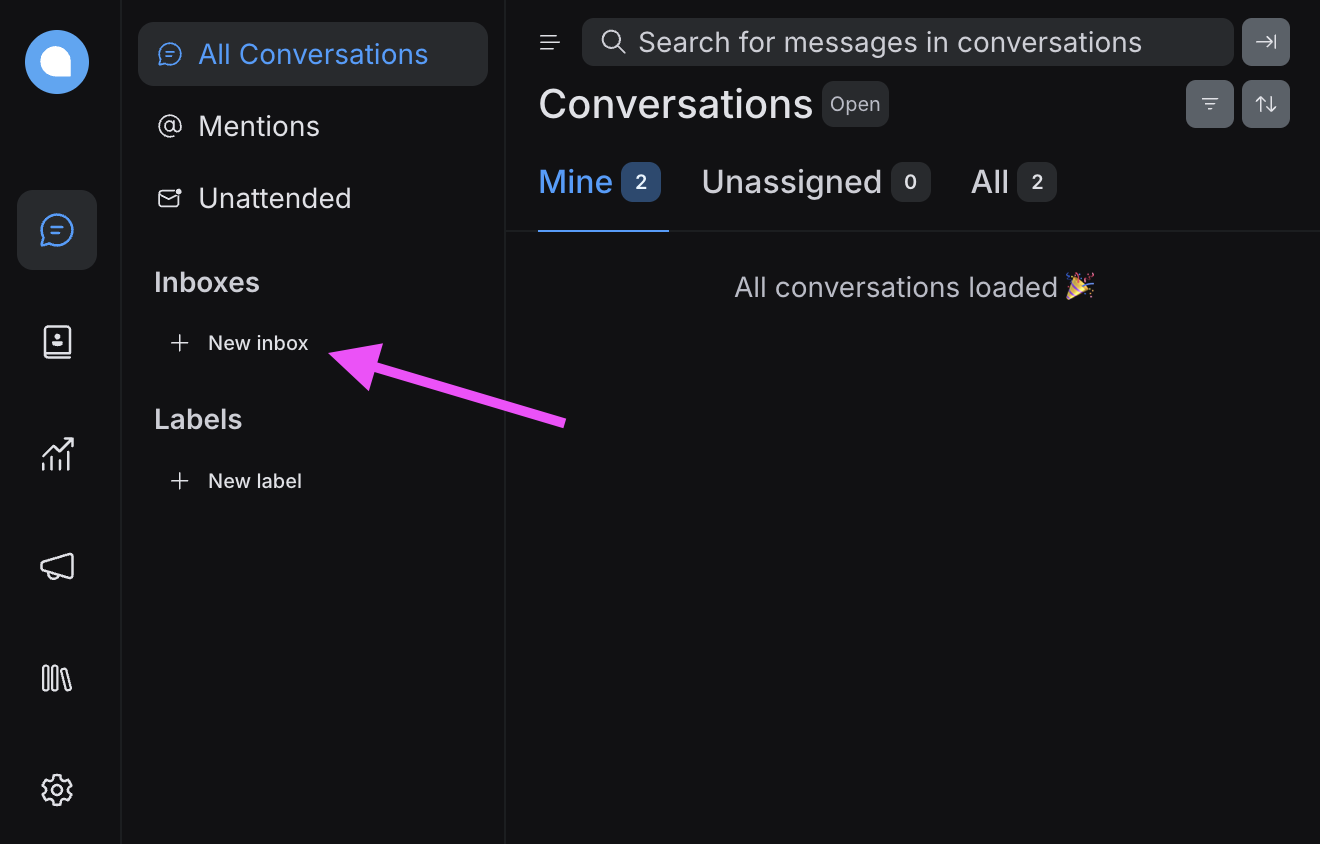
Create inbox
Click the
New Inboxbutton
Select channel as website
Enter channel information
Click the
Create InboxbuttonAdd people allowed to access the inbox, and click the
Add AgentsbuttonAnd
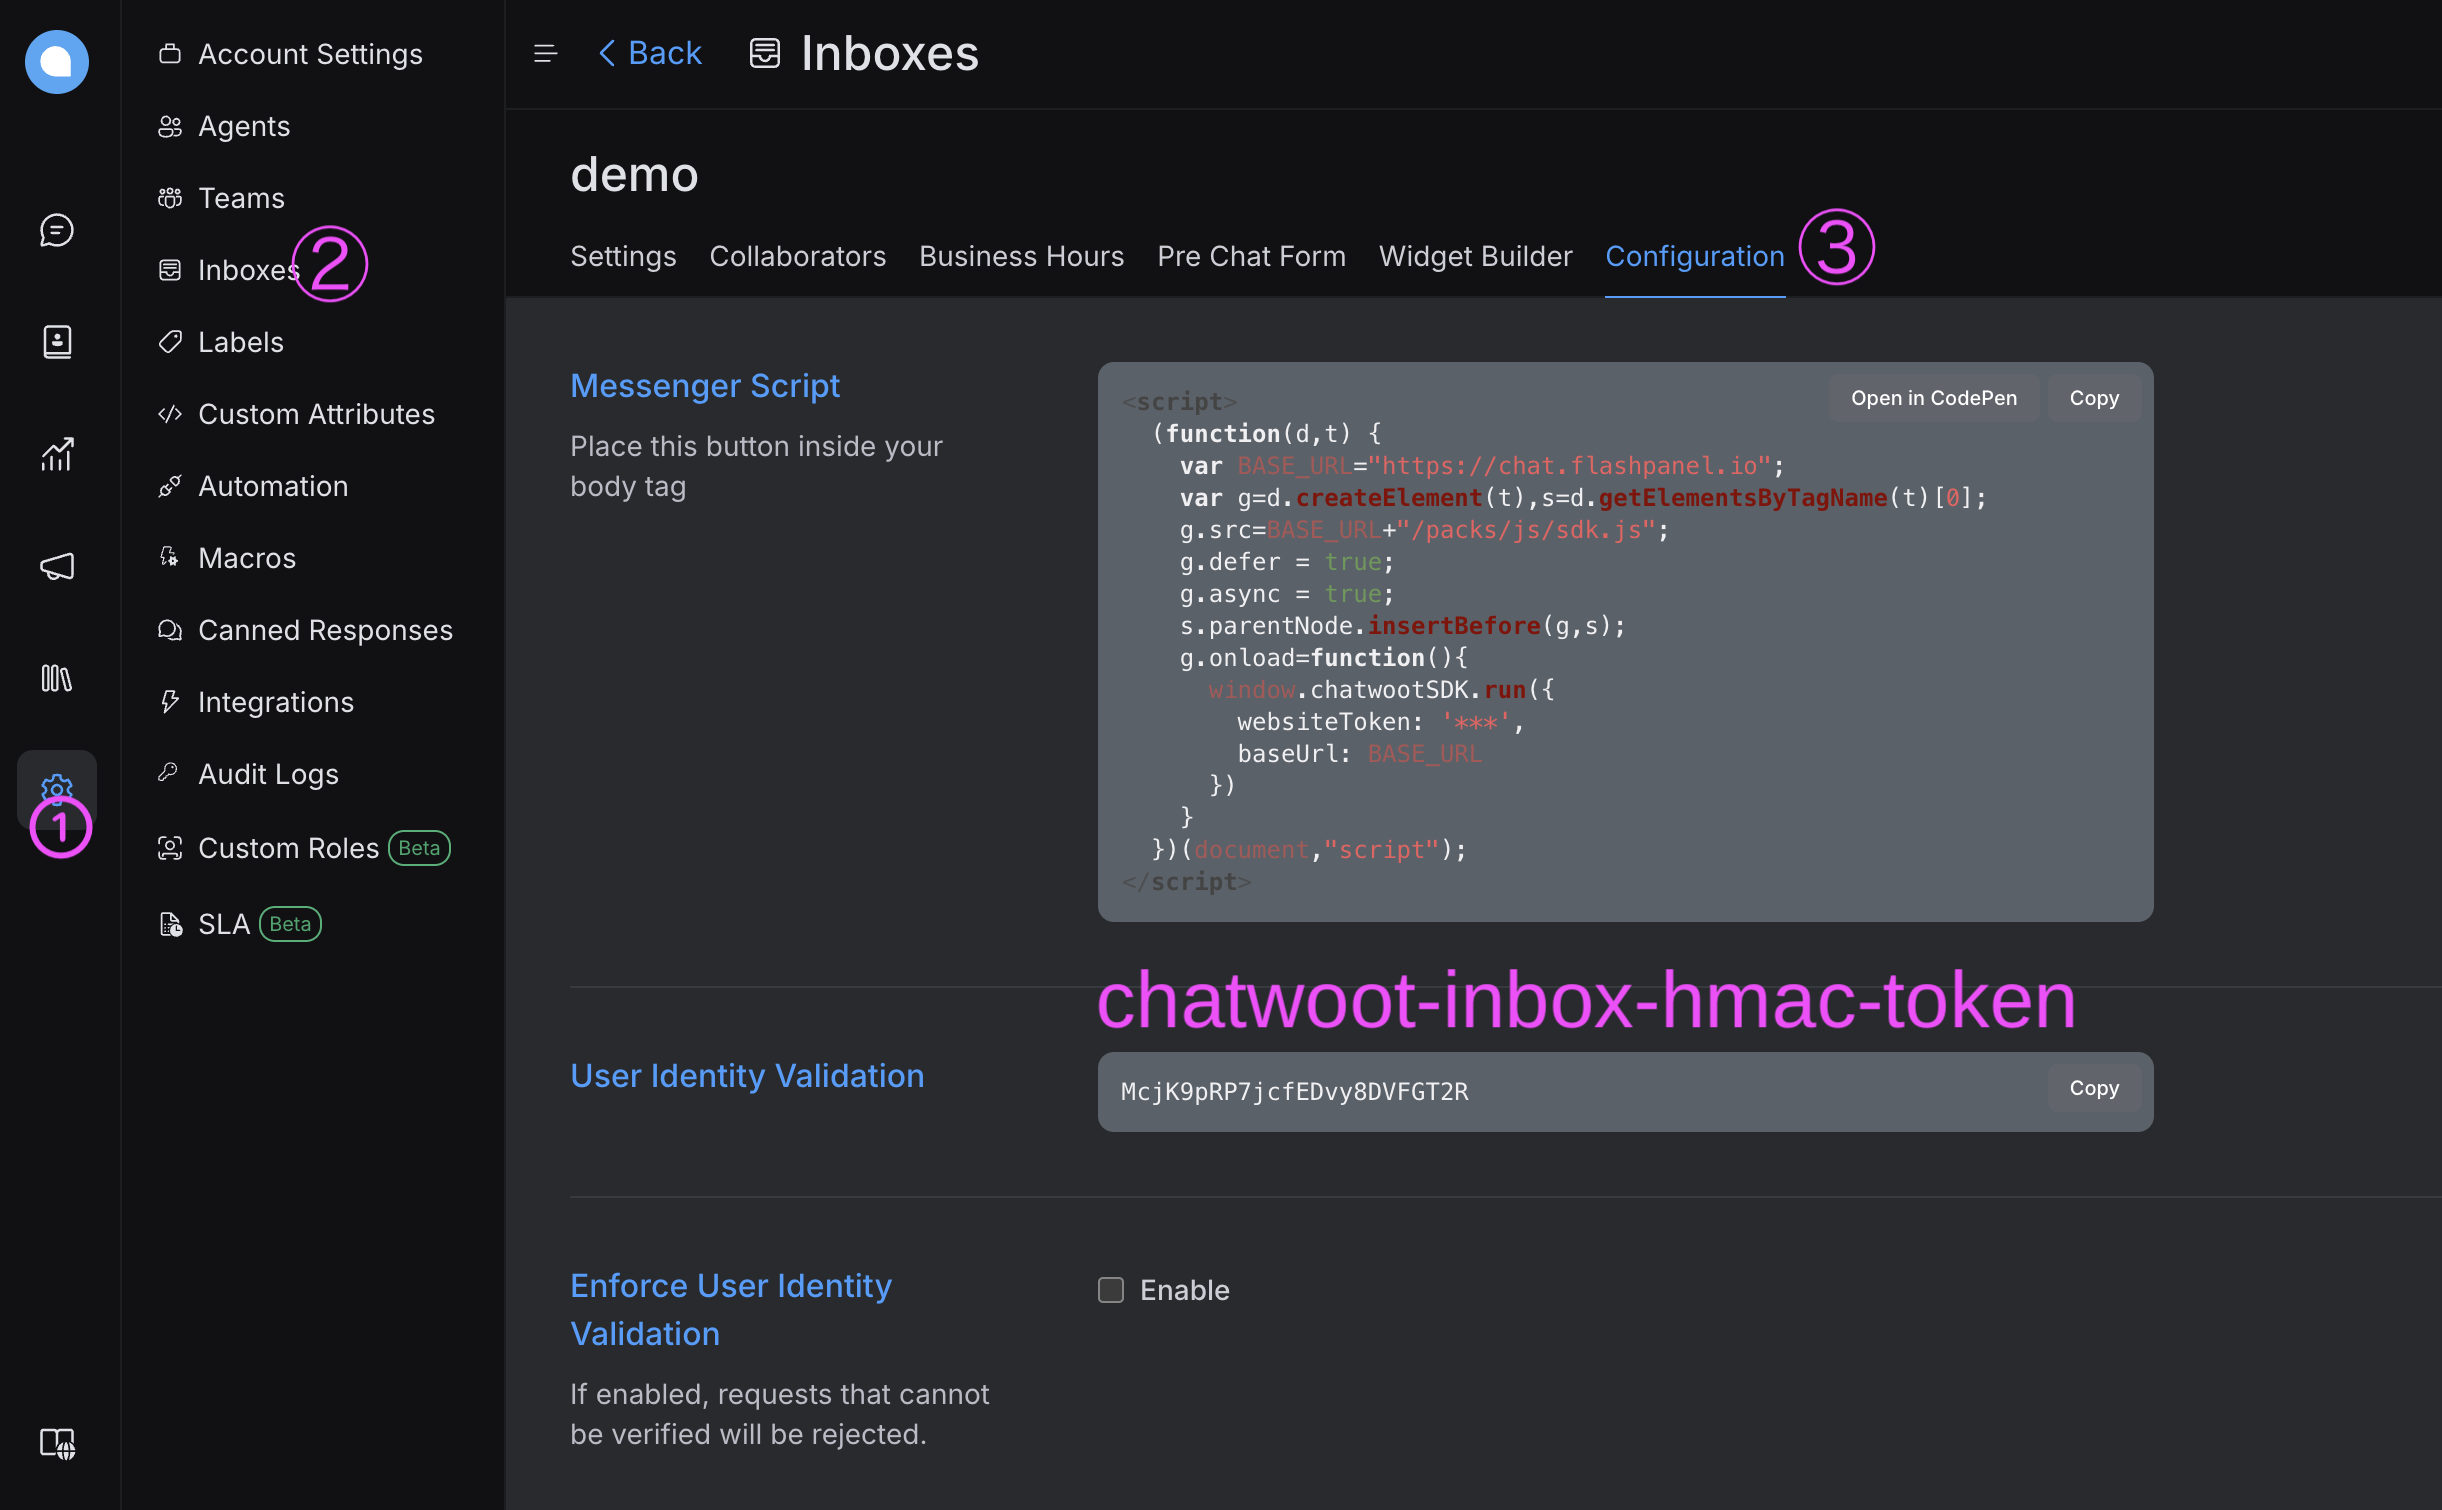
inboxis ready, now it gives a piece of code to put on the website to use
<script>
    (funct(function (d, t) {
    var BASE_URL = "https://chat.flashpanel.io";
    var g = d.createElement(t),
        s = d.getElementsByTagName(t)[0];
    g.src = BASE_URL + "/packs/js/sdk.js";
    g.defer = true;
    g.async = true;
    s.parentNode.insertBefore(g, s);
    g.onload = function () {
        window.chatwootSDK.run({
        websiteToken: "*****",
        baseUrl: BASE_URL,
        });
    };
})(document, "script");

window.addEventListener("chatwoot:ready", function () {
    window.$chatwoot.setUser(`user-id`, {
        name: "FlashPanel", // Name of the user
        avatar_url: "", // Avatar URL
        email: "[email protected]", // Email of the user
        identifier_hash: "", // Identifier Hash generated based on the webwidget hmac_token
        phone_number: "", // Phone Number of the user
        description: "", // description about the user
        country_code: "", // Two letter country code
        city: "", // City of the user
        company_name: "", // company name
        social_profiles: {
            twitter: "", // Twitter user name
            linkedin: "", // LinkedIn user name
            facebook: "", // Facebook user name
            github: "", // Github user name
        },
    });
});
</script>
Please copy this code and put it on the website you want to use.
Send user information to Chatwoot using the SDK
When you use the code above, the user who visits the website and sends you a message will display a random name.
For websites with logged in users, we want the person sending the message to contain login information such as name, email,... we add the following script:
<script>
  (funct(function (d, t) {
  var BASE_URL = "https://chat.flashpanel.io";
  var g = d.createElement(t),
    s = d.getElementsByTagName(t)[0];
  g.src = BASE_URL + "/packs/js/sdk.js";
  g.defer = true;
  g.async = true;
  s.parentNode.insertBefore(g, s);
  g.onload = function () {
    window.chatwootSDK.run({
      websiteToken: "*****",
      baseUrl: BASE_URL,
    });
  };
})(document, "script");

window.addEventListener("chatwoot:ready", function () {
  window.$chatwoot.setUser(`user-id`, {
    name: "FlashPanel", // Name of the user
    avatar_url: "", // Avatar URL
    email: "[email protected]", // Email of the user
    identifier_hash: "", // Identifier Hash generated based on the webwidget hmac_token
    phone_number: "", // Phone Number of the user
    description: "", // description about the user
    country_code: "", // Two letter country code
    city: "", // City of the user
    company_name: "", // company name
    social_profiles: {
      twitter: "", // Twitter user name
      linkedin: "", // LinkedIn user name
      facebook: "", // Facebook user name
      github: "", // Github user name
    },
  });
});
</script>
In the above script we see an entry called identifier_hash, which determines that the authentication user-id is generated by the server. See how to create identifier_hash with php below
hash_hmac('sha256', 'user-id', 'chatwoot-inbox-hmac-token');
When Enforce User Identity Validation is enabled, invalid requests will be rejected.
cwctl - Chatwoot Management Tool
cwctl is a command-line tool that simplifies the installation, upgrade, and management of Chatwoot. This tool supports common operations such as upgrading, checking logs, and restarting services.
After successfully installing Chatwoot, this list of commands will appear in the site management section.

Chatwoot upgrade
cwctl123456 --upgrade- The tool will automatically download the latest stable version of Chatwoot and apply the update.
Open Ruby Console
cwctl123456 --console- This command helps you directly access the Ruby console environment of
Chatwootto perform advanced operations or debugging.
View system log
cwctl123456 --logs web
cwctl123456 --logs worker- web: Displays logs from the web server.
- worker: Displays logs from workers handling background tasks.
Restart Chatwoot
cwctl123456 --restart- This command stops and restarts the entire
Chatwootservice.
With the One-Click Install feature, FlashPanel helps you deploy Chatwoot quickly without spending much time and effort. Try it now to take full advantage of the potential of this powerful monitoring tool!